

Welcome to sproof Sign.
What is sproof Sign?
sproof Sign is a leading European solution for digital signatures – developed for companies and organizations that do not compromise on security, legal validity, and efficiency. The platform supports all eIDAS-compliant signature standards – from the simple to the qualified signature – and enables the collection of qualified signatures including identification across Europe via the integrated eID hub.
📑 Getting Started with sproof Sign
Registration & Login
Before you can start electronically signing, approving and managing documents in sproof Sign, you must first register and log in.
Registration
You have several options to register. The process depends on whether you are invited by the plan administration or create an account yourself.
-
Invitation by the plan administration via email
If you are added to an official company plan by the plan administration, you will receive an invitation email. You can accept or decline the invitation. -
Registration already handled by the plan administration
If your plan admin has enabled automatic addition, you do not need to register and can log in directly via Single Sign-On (SSO) (for example via Microsoft). -
Registering for individual or private use
If you have purchased a license online yourself or want to use sproof Sign with the private free license, you can register yourself directly.
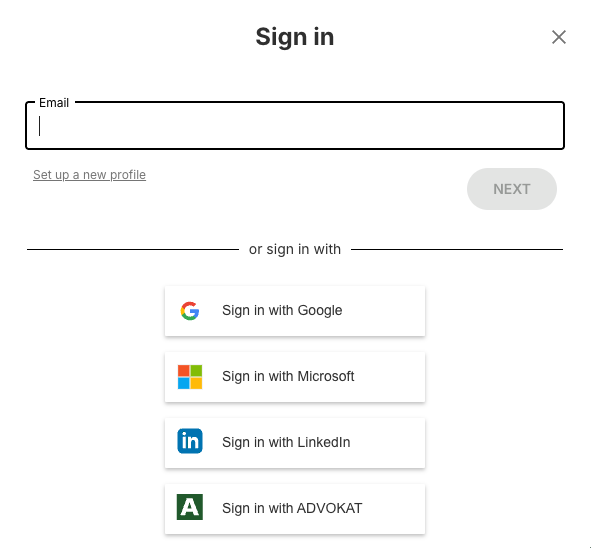
Go to https://sign.sproof.com/#/start/login, enter your email address and set a password. You will then receive a confirmation email which you must open.
Alternatively, you can register with a third party (e.g. Google). In that case you will receive an email with a PIN code for confirmation.
Login
After registration you can log in at any time on the sproof Sign start page with your email address and password. If your company uses Single Sign-On (SSO), you can also log in directly that way.
Set up your profile
Important: Your rights and access to certain features depend on your plan status. Some of the functions described below may not be displayed or available because they are centrally controlled by the plan administration.
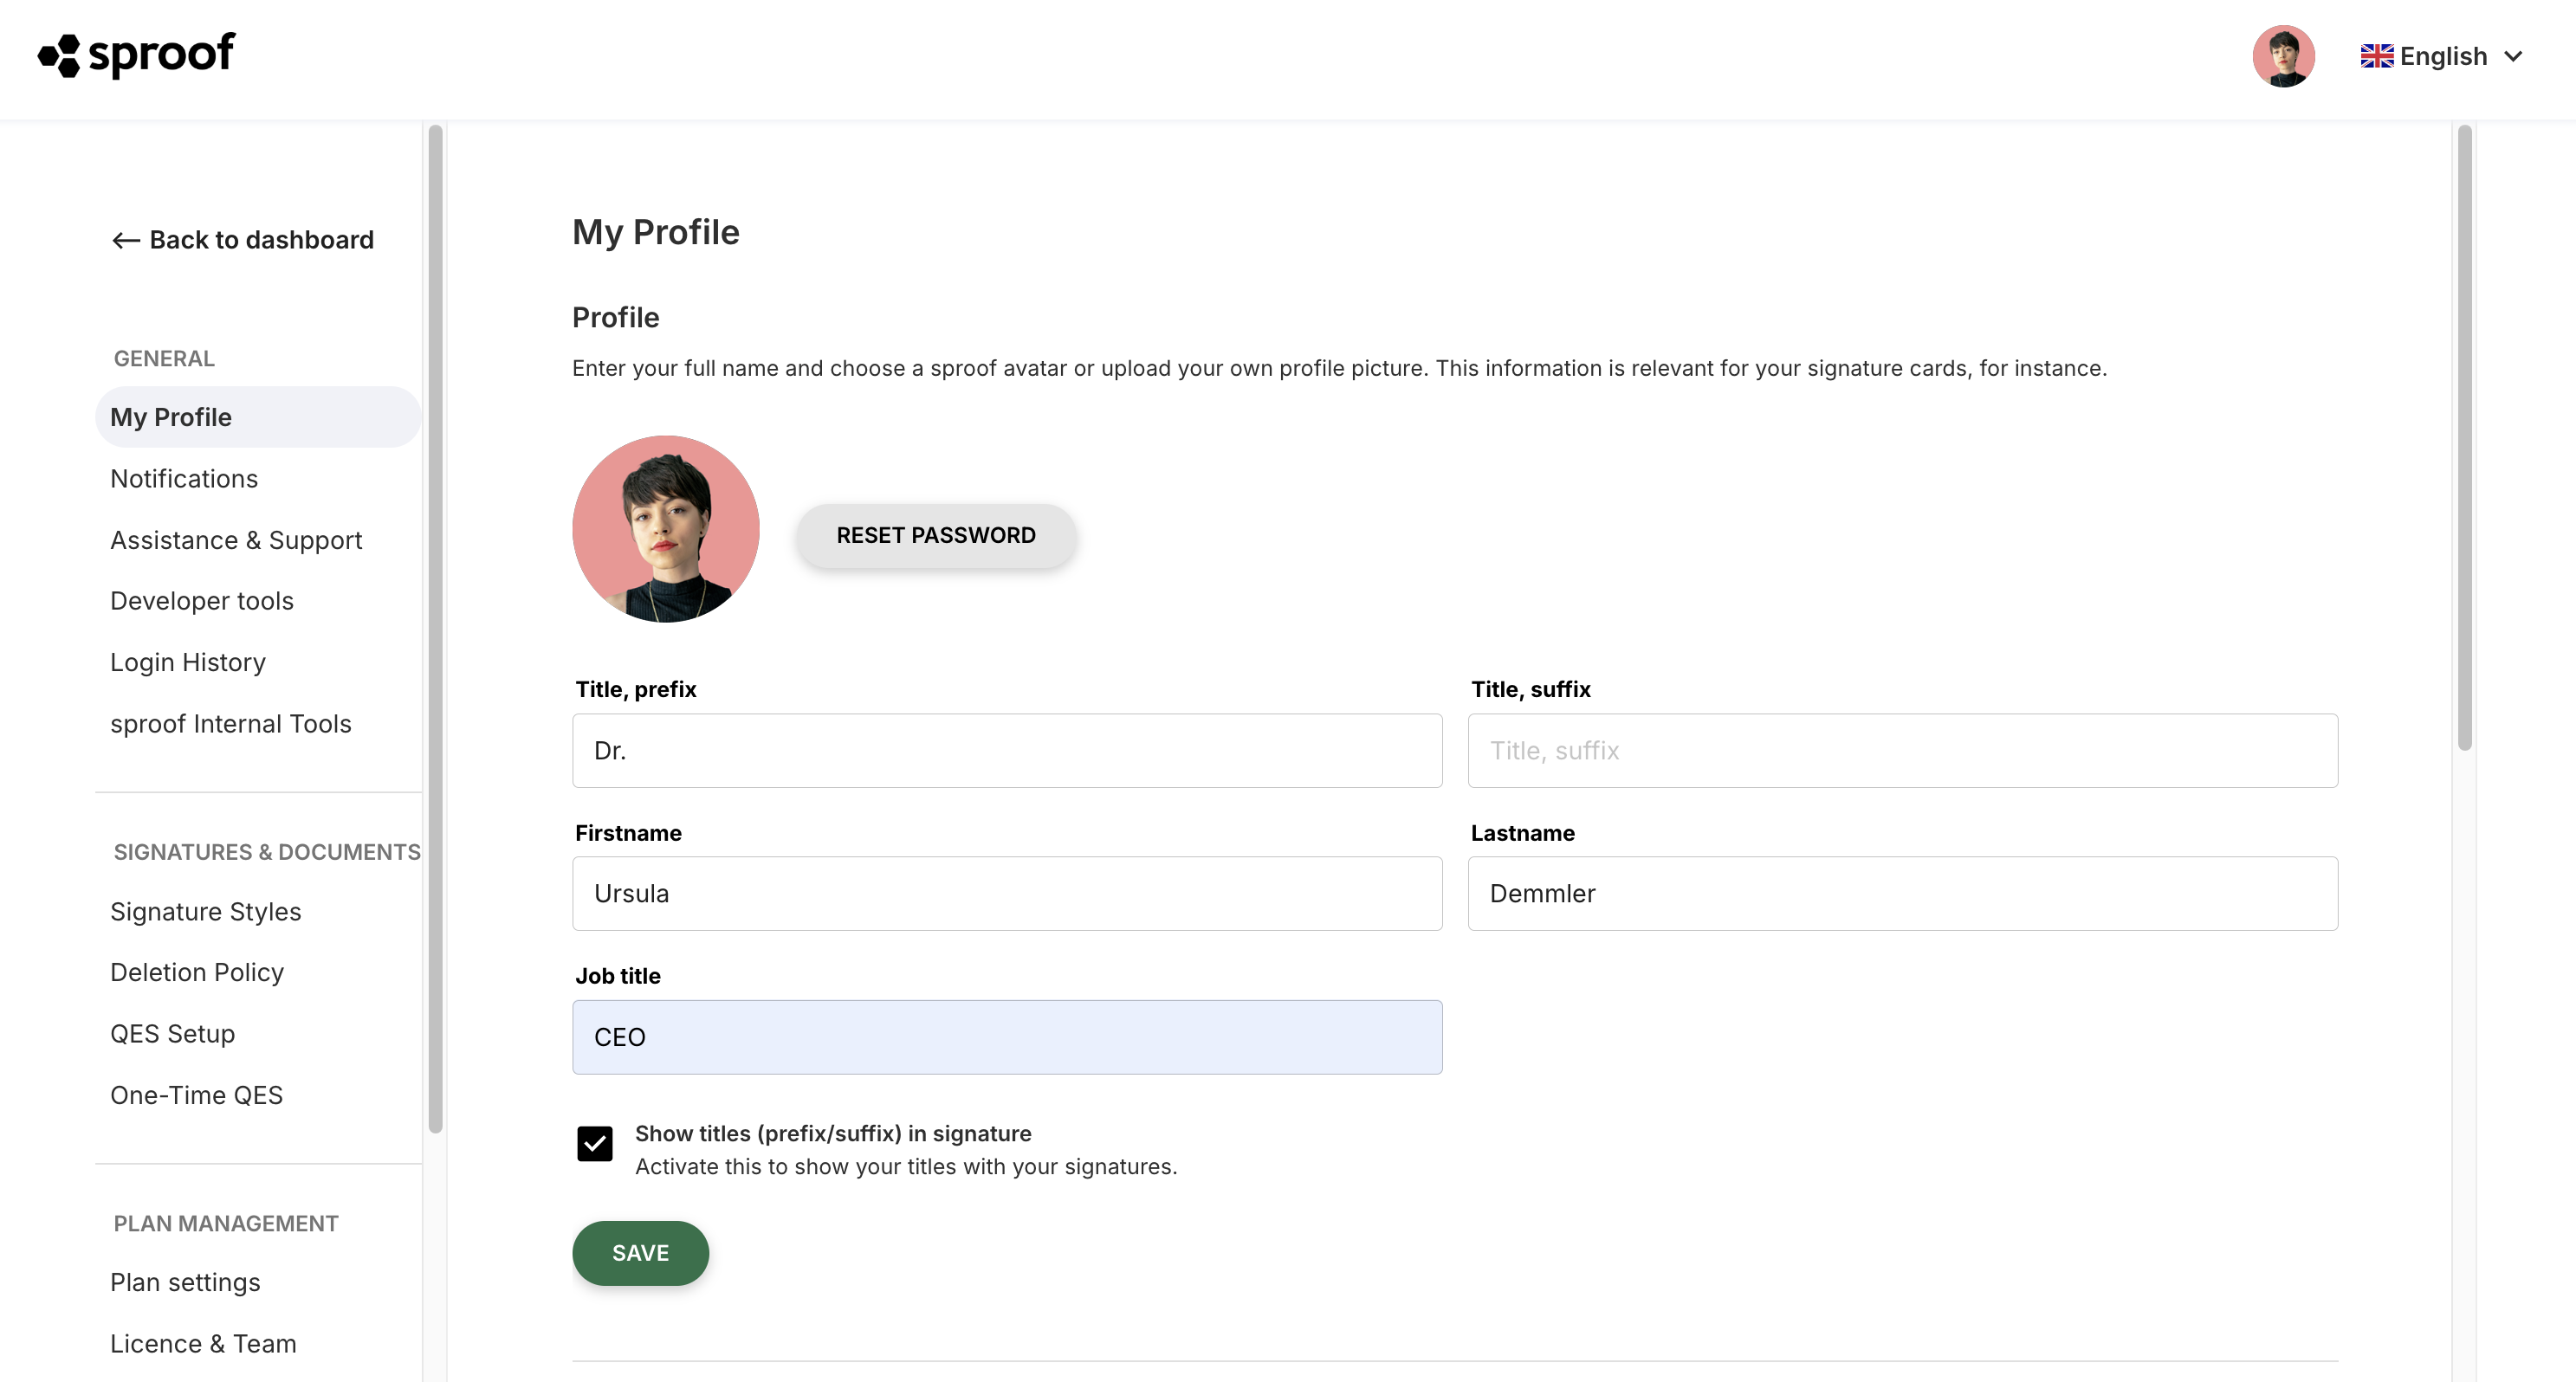
Complete profile information
Under Settings > Profile you can provide your personal details and set a profile picture.
Signature styles
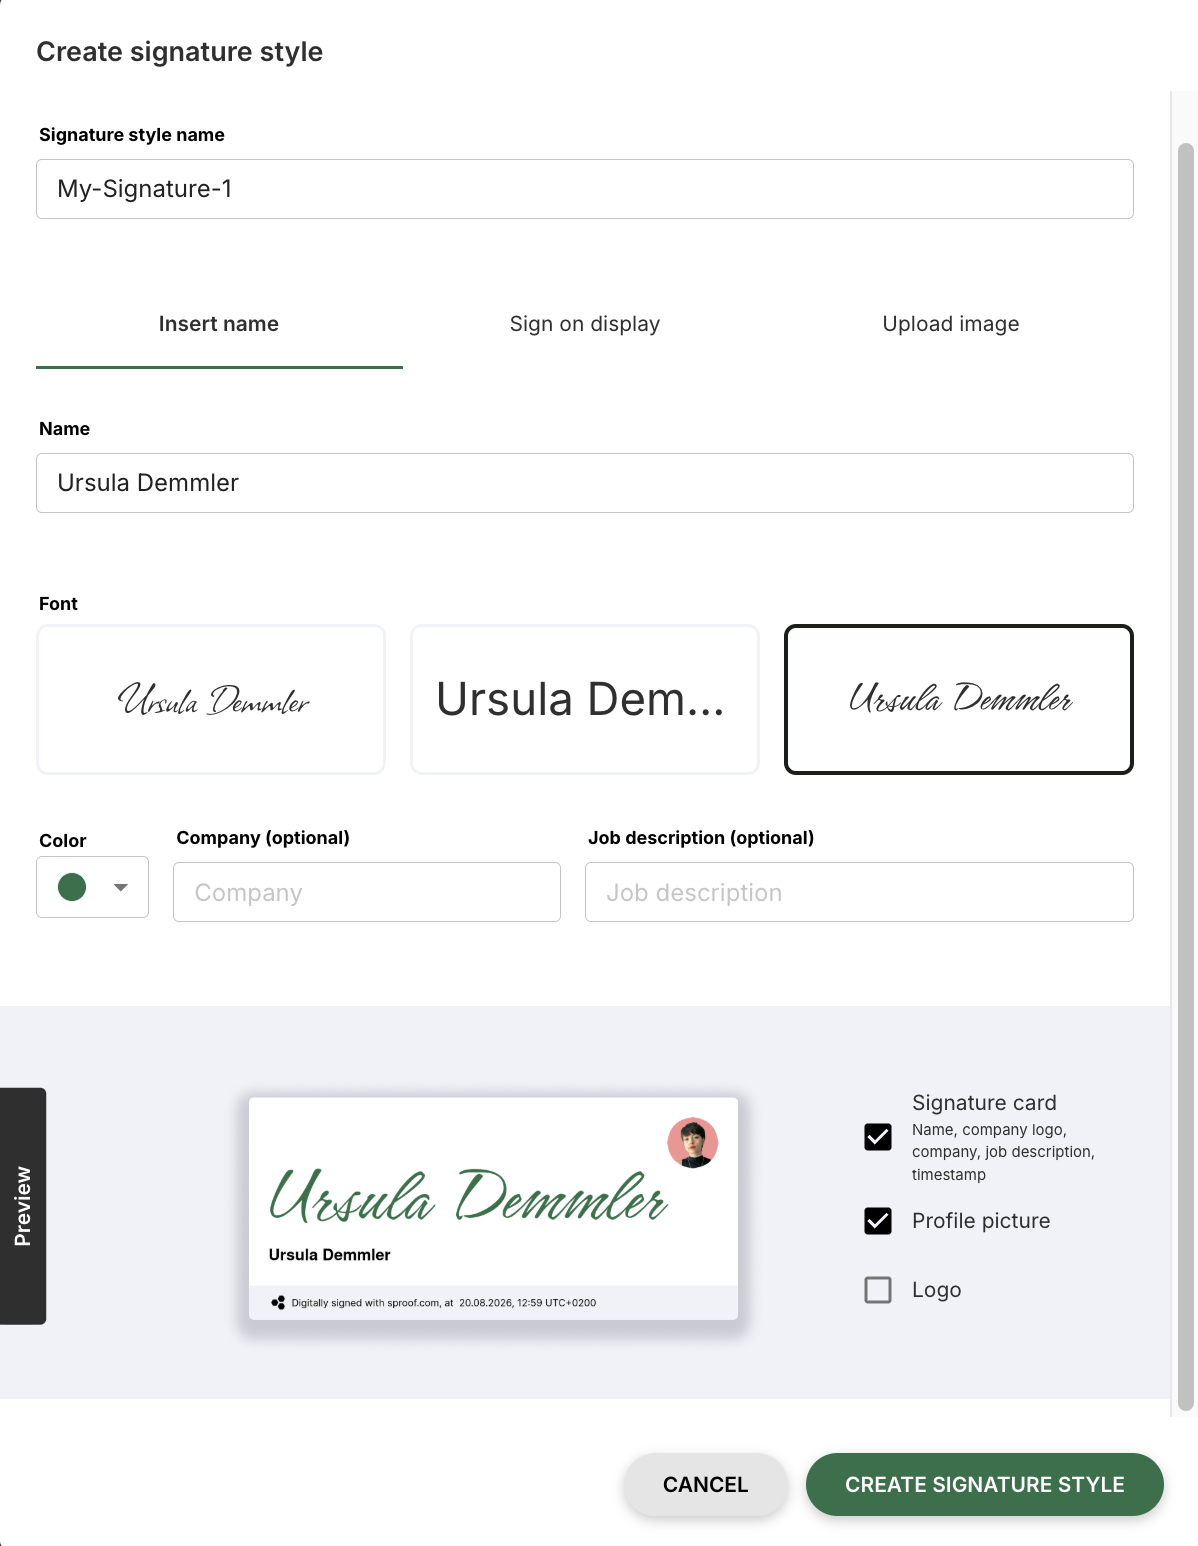
You can view and add these at any time under Settings > Signature styles.
A signature style is the visual representation of your signature. It is not related to the legal signature type (EES, FES, FES Plus or QES). A distinction is made between signature styles and initials styles:
-
Signature style: Uses your full name and can display additional information such as profile picture or job title.
-
Initials style: Consists only of the initials of your first and last name.
By default, signature styles are created from your profile information.
→ For more information see the module “Signature Styles Setup”.
Set up notifications
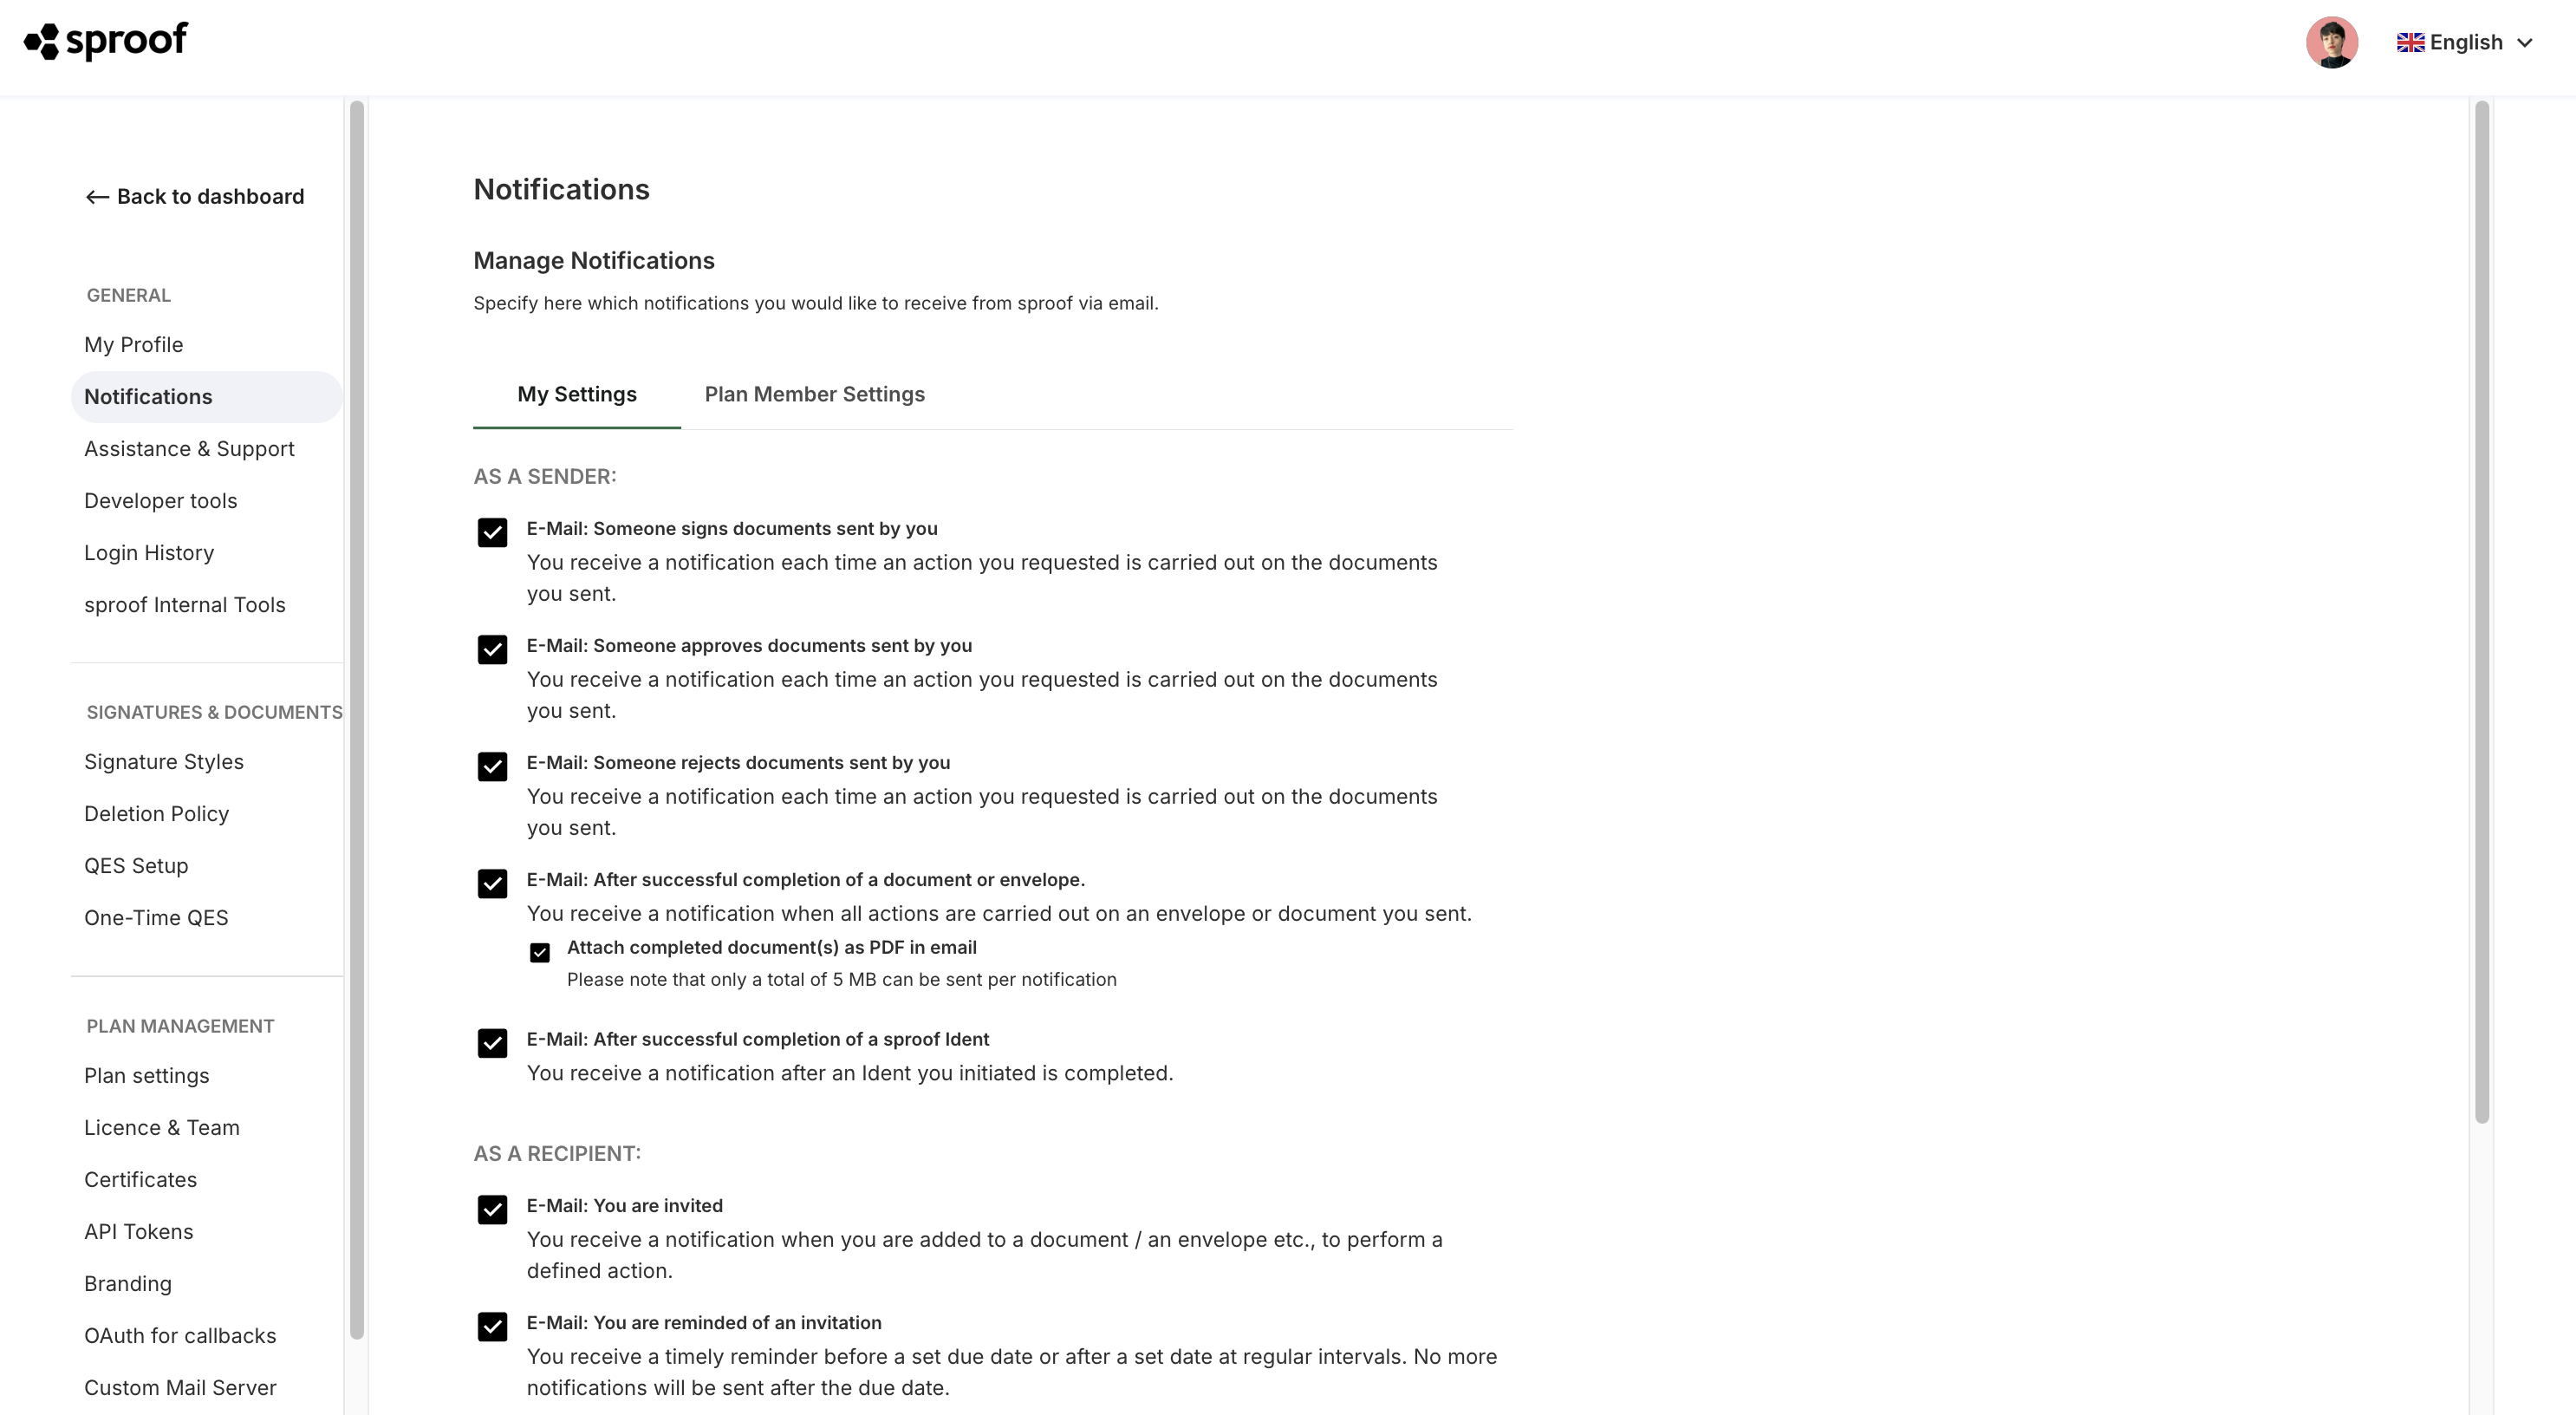
In Settings you can configure email notifications.
→ A detailed guide for setting up notifications can be found in the module “Notifications”.
QES identification
To use a qualified electronic signature (QES), a one-time identification is required. This process ensures that your digital signature is uniquely assigned to you and legally recognized.
→ For detailed information on QES identification, go to the module “QES identification”.
Self-signing
Signature standards
sproof Sign offers four eIDAS-compliant signature types:
the Simple Electronic Signature (EES), the Advanced Electronic Signature (FES), the Advanced Electronic Signature Plus (FES PLUS) and the Qualified Electronic Signature (QES).
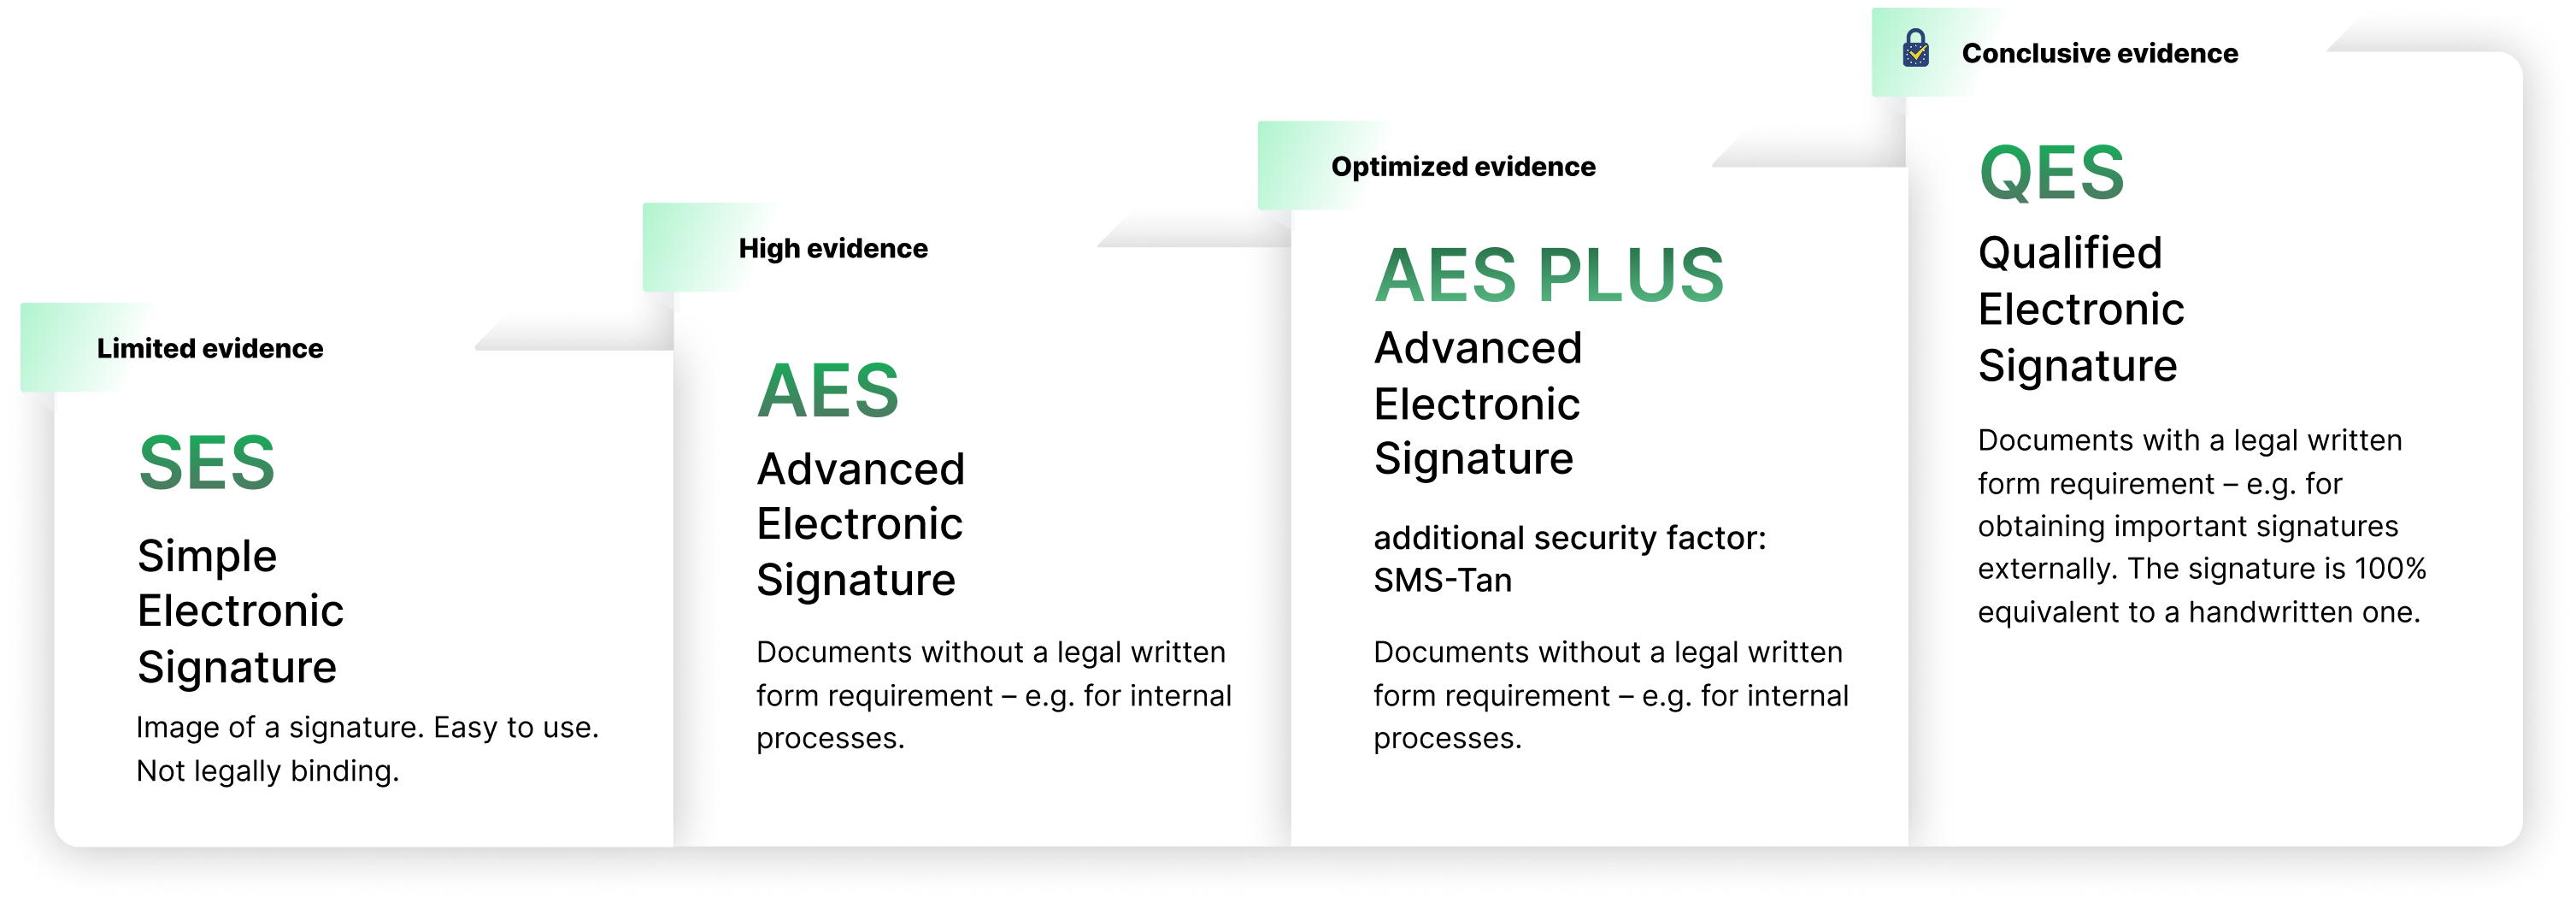
→ A detailed explanation can be found in the module “E-Signature standards”.
Upload documents
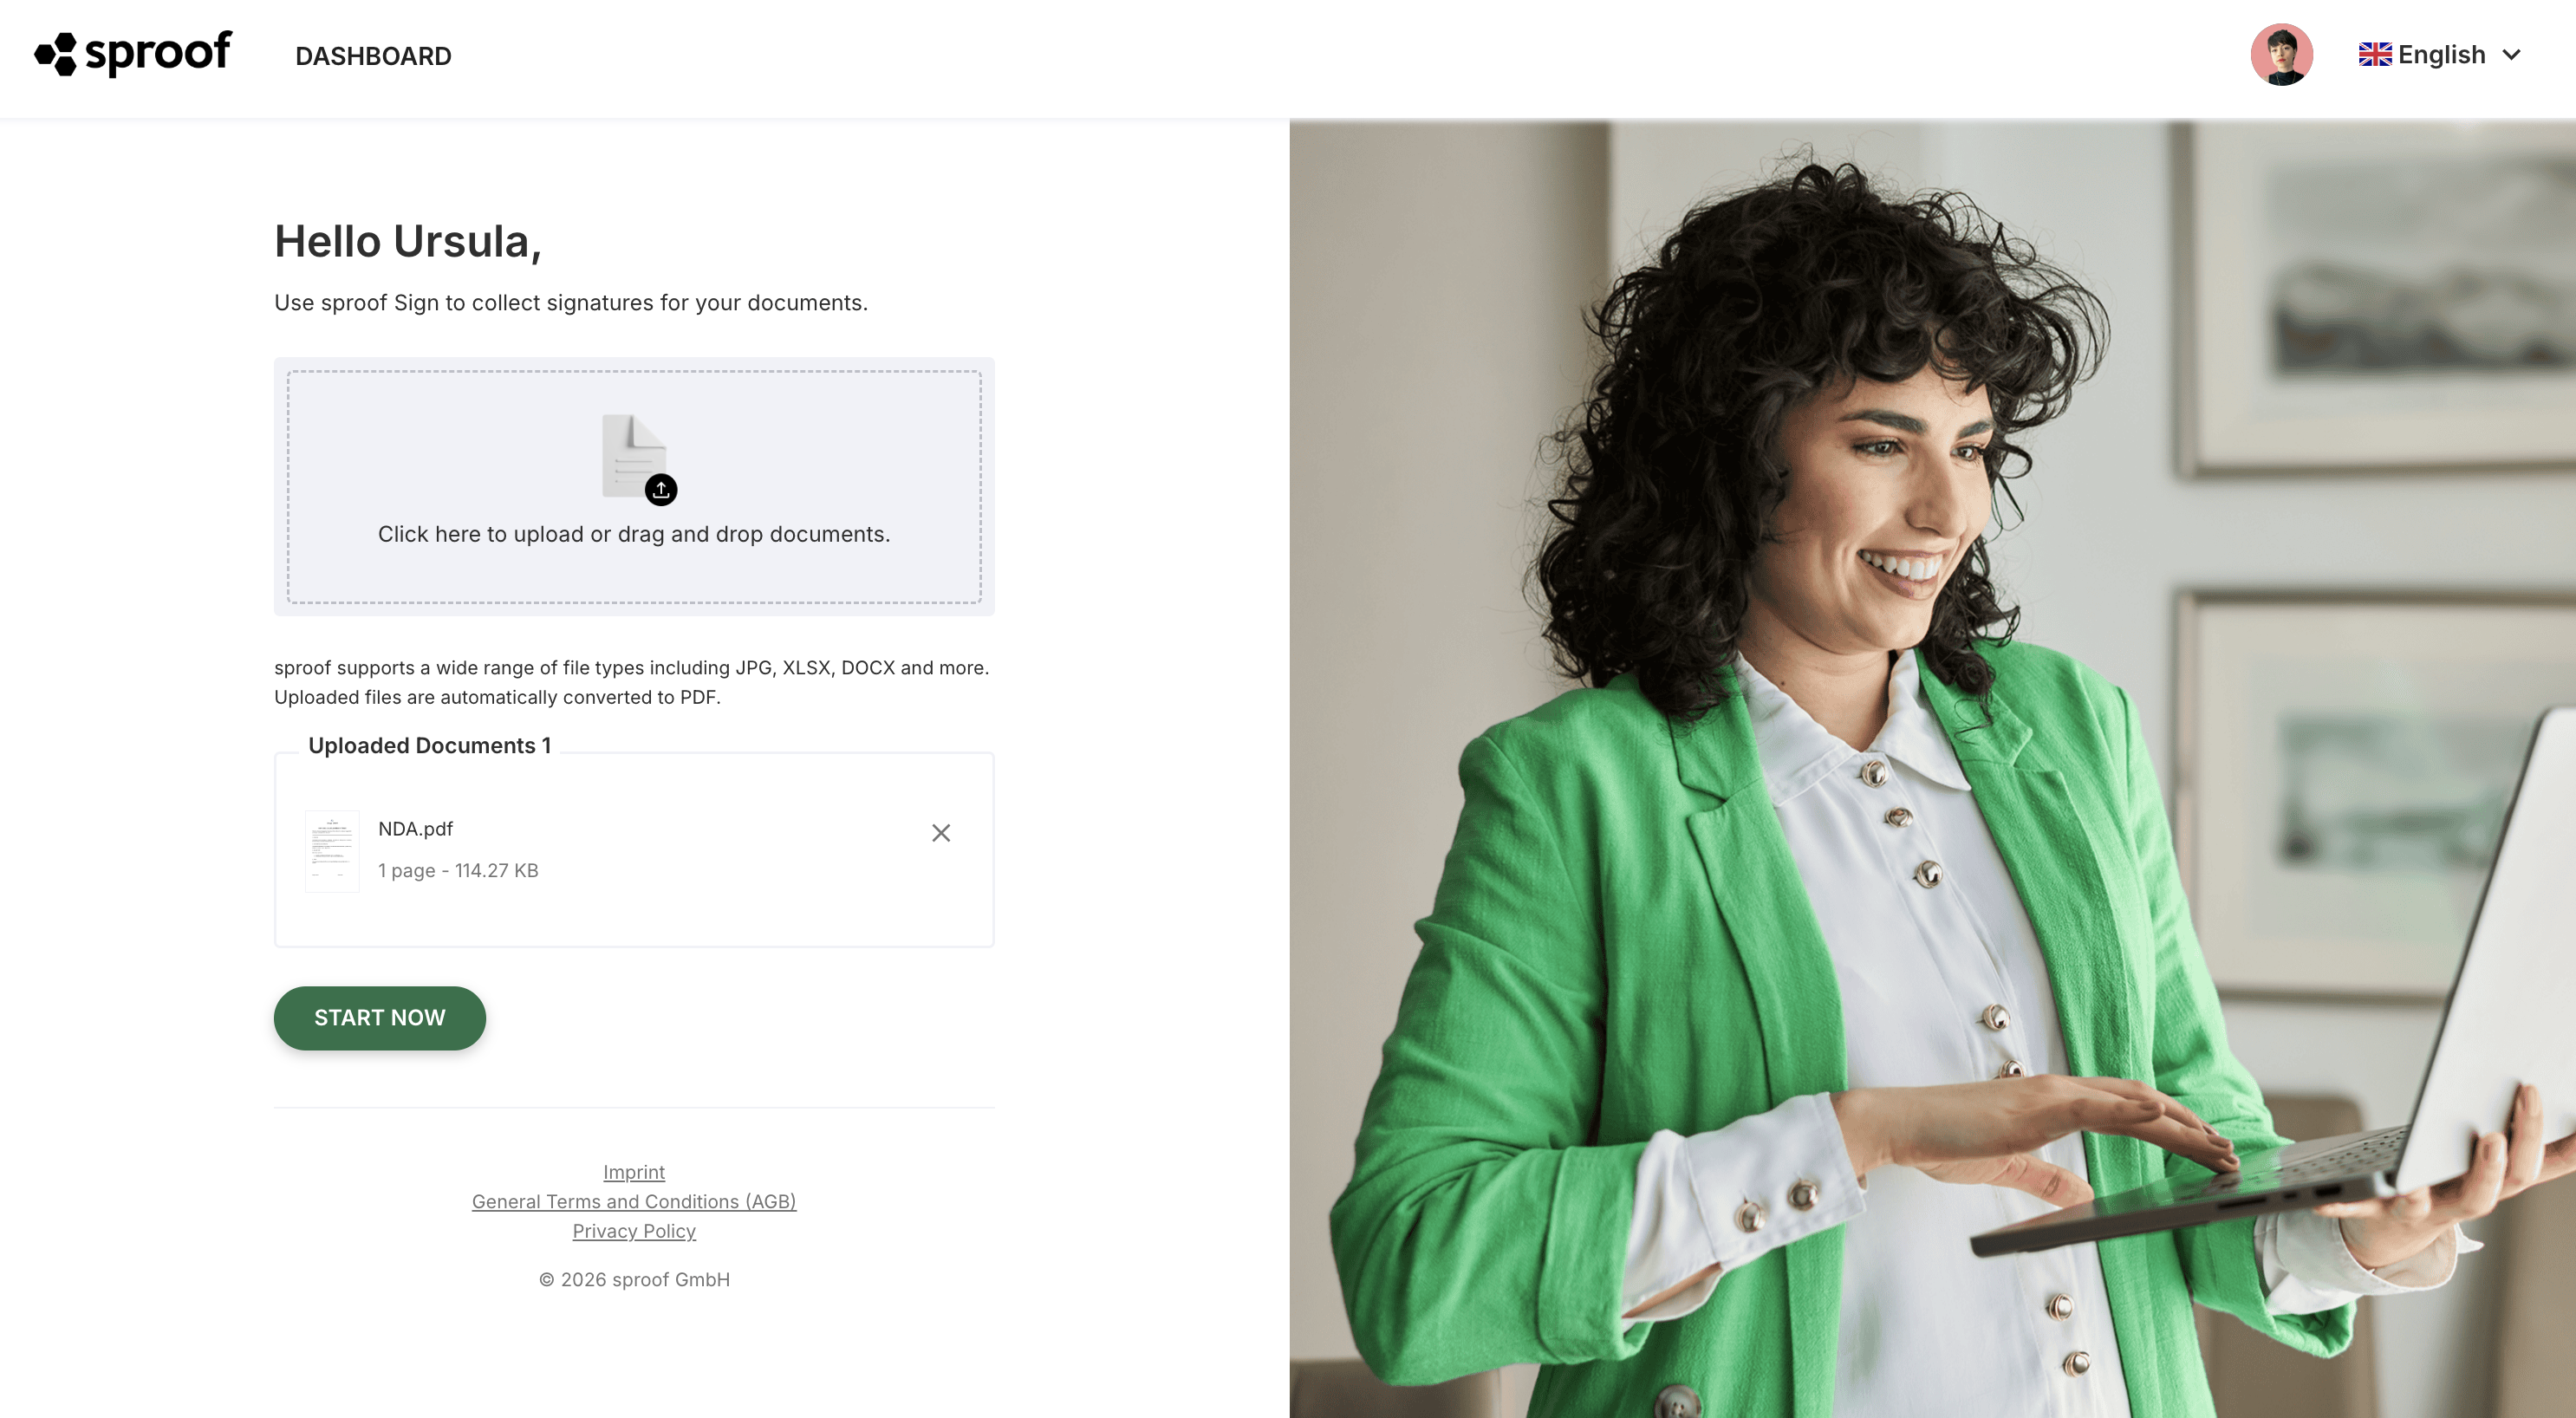
To start your first signing process, first upload one or more document(s) by clicking “Upload document” on the dashboard. You can drag & drop your file(s) into the gray area or click the area to select them. sproof Sign supports a variety of file formats and automatically converts them to PDF.
Prepare document (form fields)
Once your document is opened in the editor, you can add form fields.
-
Click “Edit document” in the right sidebar.
-
Place the desired form fields by drag & drop or by double-clicking on the document.
-
If you are signing the document yourself, you will find the form fields under the “Self-sign” tab.
→ A detailed guide can be found in the module “Prepare Forms”.
Select signature standard
To select your signature standard (EES, FES, FES Plus, QES), navigate in the right sidebar to “Self-sign → Type of signature”.
Note: sproof Sign is a specialist in legally valid electronic signing and 100% eIDAS-compliant. The eIDAS regulation creates a uniform legal framework for secure electronic transactions and ensures EU-wide recognition of electronic signatures.
→ Details can be found in the module “Security & Compliance”.
Sign
-
Place at least one signature or initials field on the document.
-
Choose your desired signature style.
-
Finally click “Sign now”.
-
If you use a qualified signature (QES), you must complete the signature with a second factor.
Respond to signature requests
If you have been invited to sign, you can handle the request as follows:
-
Open the document via the link in the invitation email or directly from your dashboard.
-
You will be automatically directed to the “Sign” tab.
-
Choose a signature standard and signature style, unless specified otherwise by the sender.
-
Fill in all required fields and click “Sign now” or “Decline” if you do not wish to sign the document.
→ The detailed guide for responding to signature requests can be found in the module “Sign Yourself, Approve, View”.
Invite to sign
Upload document
After you have logged in, you can upload a document or a document folder or start with a template that you want to send for signature.
Set workflow & roles
You can control the signature process flexibly:
Control the signature process by defining the order and assigning roles such as “Signer”, “Approver” or “Viewer”. You can also set individual signature standards per person.
Important: The signature process can only be completed when signing and approving persons have performed their actions.
→ For details see the module “Collecting Signatures With Workflows”.
Place signature positions & form fields
Place at least one placeholder for the signature or initials for each signer. You can also add additional fields whose size and position can be adjusted.
→ The detailed guide can be found in the module “Prepare Forms”.
Add recipients
-
The document is opened in the editor.
-
Navigate to the “Recipients” tab in the right sidebar.
-
Enter the email addresses of the desired recipients or select contacts, groups or saved workflows.
Send invitation
-
You can optionally set a subject for the invitation email, as well as compose a general message or an individual message for each recipient.
-
It is also possible to set a reminder date from which automatic reminders are sent, as well as a due date by which actions must be completed.
-
Finally click “Send invitation”.
→ The exact guide to adding recipients and sending invitations can be found in the module “Signature Progress & Reminder Function”.
Check progress
-
You can view the status of your document and the progress of individual recipients at any time in the dashboard.
-
In the “Document status” column you can see the current progress of the document.
-
A complete list of all recipients and their status can be found in the document details. An even more comprehensive table with all recipient configurations can be accessed via “Show summary”. Alternatively, this view also opens by clicking the “Document status”.
→ The exact guide can be found in the module “Signature Progress & Reminder Function”.
Verify signatures
-
sproof Sign allows you to verify the validity of a digital signature directly in the tool.
-
Hover over a signature to see the name, date and email address of the signing person.
-
For more detailed information click on the signature to obtain details about the signature and certificate verification.
-
You can also download an audit trail that contains detailed information about the signature history.
→ Detailed information can be found in the module “Signature Verification & Audit Feature”.
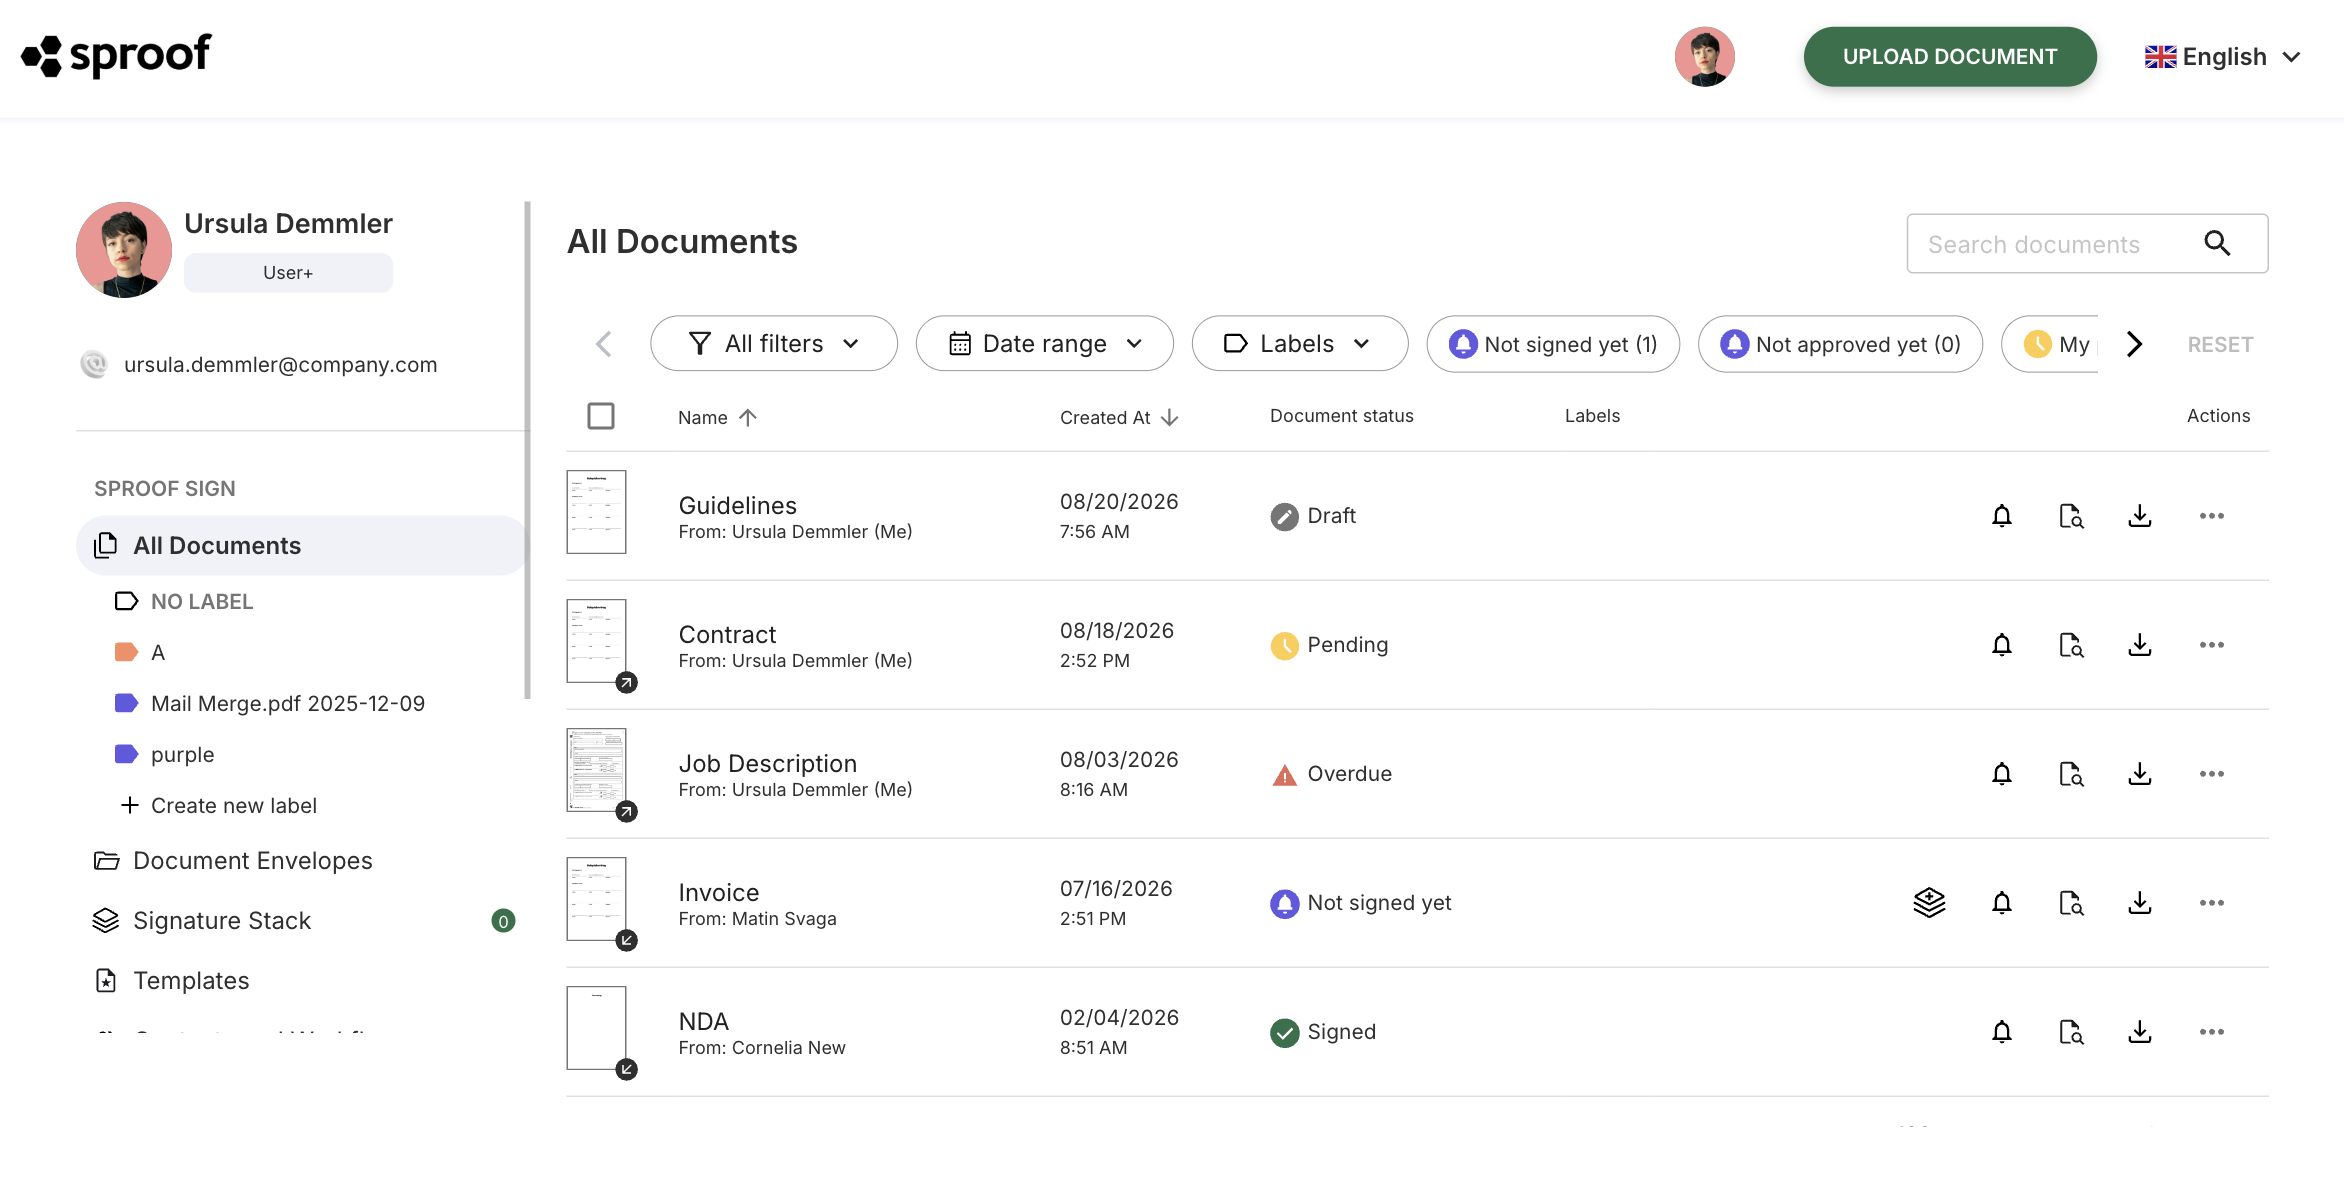
Manage documents
-
The dashboard serves as the central place for managing your signature processes.
-
You can search, filter documents and track or manually adjust their status.
-
Via the three-dot icon in the document list you can access a menu with further actions.
-
You can download the current version of a document as a PDF.
→ The exact guide to managing documents can be found in the module “Manage documents / Dashboard”.
📖 Additional information
System requirements
sproof Sign is primarily optimized for use on desktop devices. Pure signing is also optimized for mobile. The application is compatible with common web browsers including Google Chrome, Mozilla Firefox, Microsoft Edge and Apple Safari. To ensure optimal performance, it is recommended to always use the latest version of the respective browser. In addition, a maximum document size of 30MB is recommended for optimal performance.
Internet connection and email access
A stable and fast internet connection is required to use sproof Sign. This ensures that documents can be uploaded, signed and downloaded smoothly. In addition, secure access to your email program is essential. The sproof Sign account and the signing processes are directly linked to your email address. Each signature is confirmed via a link in an email, ensuring the authenticity and security of the process. Make sure you have access to this email address and that it is protected from unauthorized access.
Use with assistive technologies
sproof Sign is designed to be easy and accessible for all users, including those who rely on assistive technologies.
You can use sproof Sign with common aids such as screen readers and voice controls. Attention has also been paid to a clear and intuitive user interface that can be operated via keyboard navigation.
→ Detailed information can be found in the spoof sign_Accessibility_Statement.pdf