

💡 At a glance
In sproof Sign you always have the status of your document and the progress of the individual recipients in view. When setting up the invitation you can already define automatic reminders. To speed up the signature process after sending, you can use the reminder function and point out outstanding actions to individual recipients. You can also use the chat to send reminders to your recipients or to communicate important information about the document.
📑 Step-by-step guide
1. Set up automatic reminders & due date
Before you send a document/a document bundle to recipients, you can set a due date and a reminder date:
-
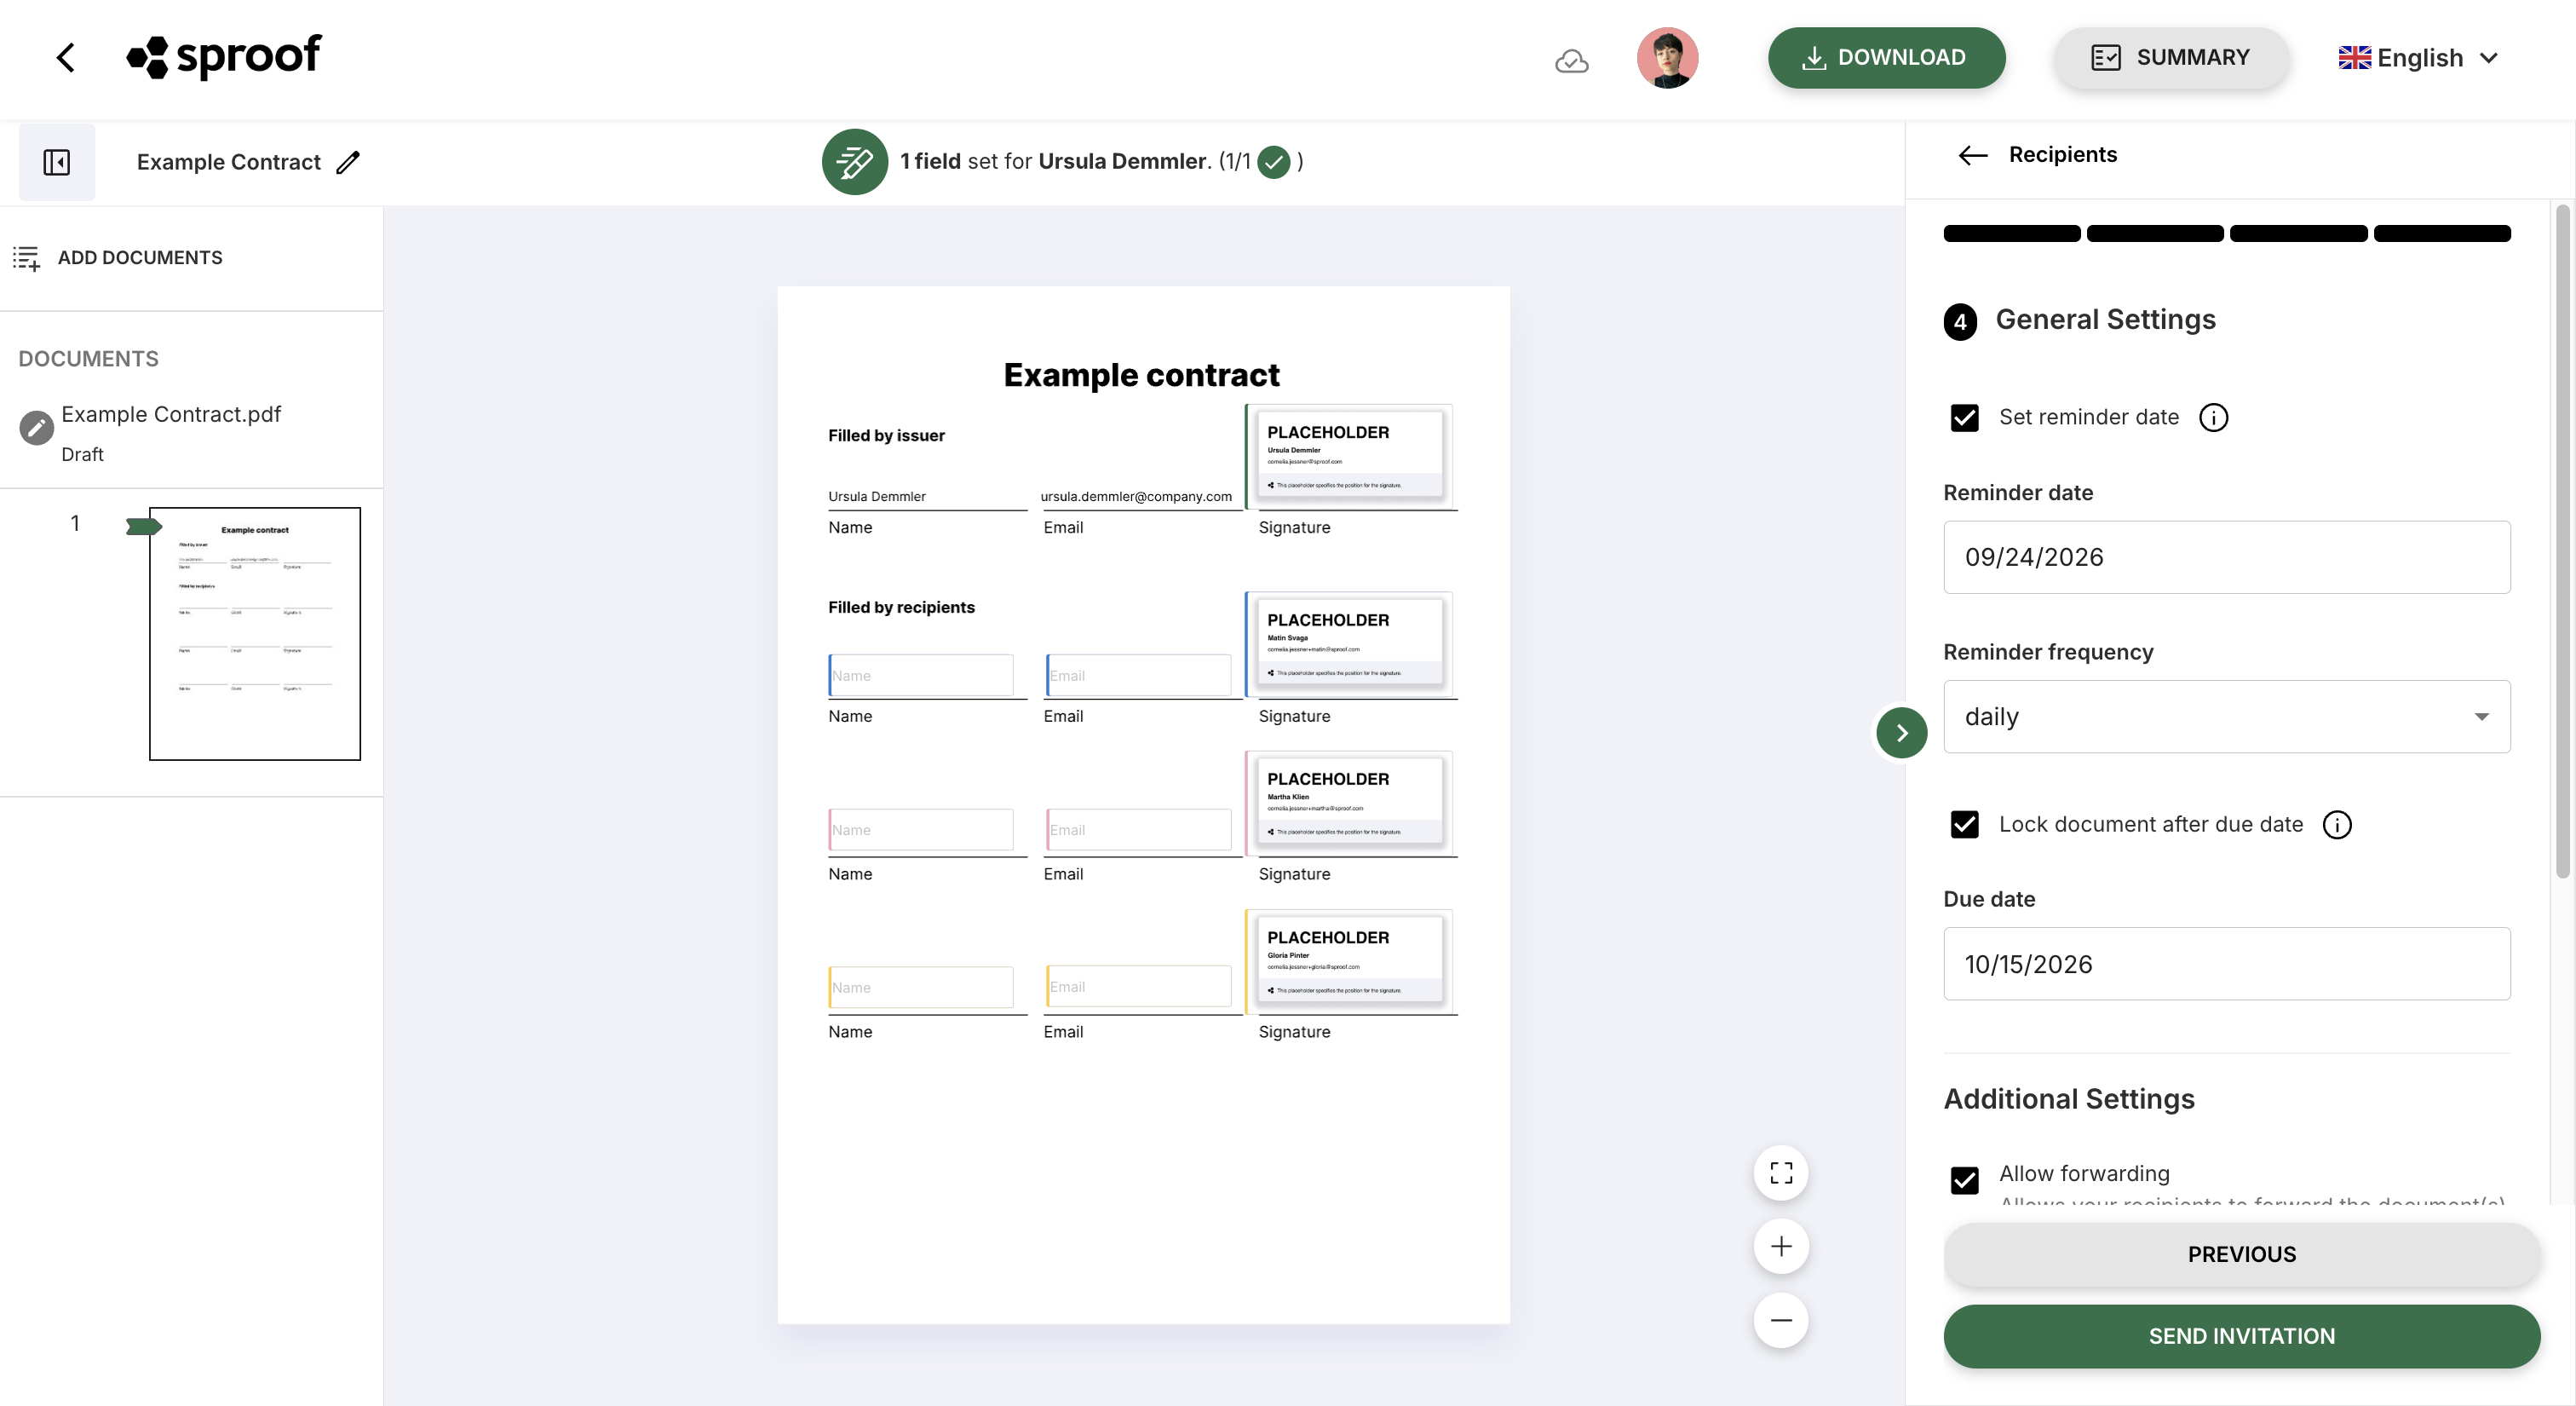
Upload a document as usual, add recipients and form fields and set up the email invitation. You should now be in the fourth step “More settings” of the invitation process.
-
Optionally enable the checkbox “Set reminder date” and choose a date and a frequency. From that date, automatic reminder emails will be sent to the recipients at the specified frequency.
-
Optionally enable the checkbox “Set due date” and choose a date. Recipients must complete their action(s) by this deadline. After that date, no more signatures can be added.
-
Just before sending you will be shown a summary of your configurations and the general settings. You can also call up this overview at any time using the “Summary” button.
You can adjust the reminder and due date settings at any time after sending the document:
-
Open the document and go to the “Recipients” tab.
-
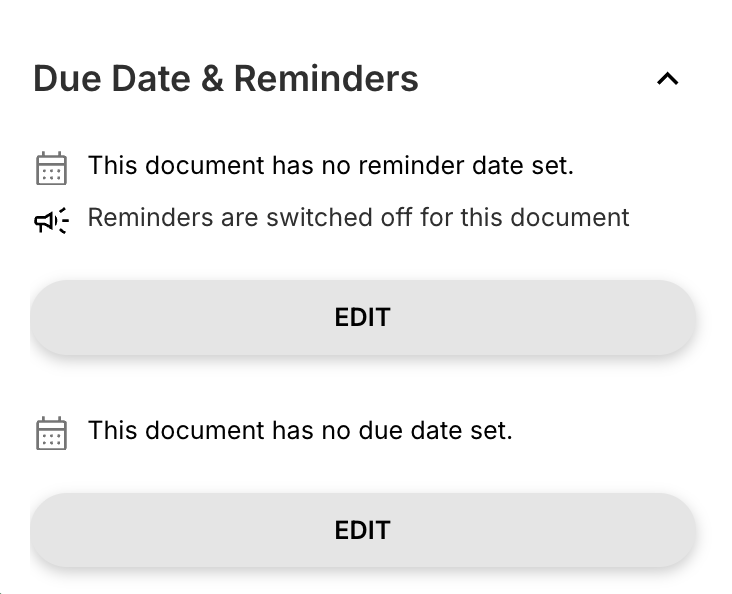
Expand the “Reminder settings” section.
-
Click the “Edit” button for reminders or the due date and change the settings.
-
Click “Save changes” to apply the adjustments.
2. View signature progress
After you have sent a document/a document bundle to people, you can view the progress in the dashboard or in the editor:
-
In the dashboard, in the document list, the “Document status” column shows the overall status of the document. Note that the status of a document always depends on the status of the recipients interacting with the document. Example: The status only changes to “Completed” when all 5 of 5 people have signed the document.
-
Optionally use the filters to filter documents by a specific status.
-
A complete list of all recipients and their statuses can be found in the document details. A more detailed table with all recipient configurations can be accessed via “Show summary”. Alternatively, this view also opens by clicking the “Document status”.

-
If you open a document in the editor and navigate to the “Recipients” tab, you will also see a list of all the document's recipients including status.
3. Send reminders afterwards & use the chat
If you want to draw all recipients' attention to something, you can use the chat:
-
Open the relevant document in the editor.
-
Click the “Chat” tab if you want to send a message to all recipients of the document in the chat. The recipients will receive an email notifying them that a new chat message has arrived.
-
Enter a message in the text line and send it by clicking the round button with the paper plane icon.
Note: The chat is only available after you have sent the document to others.
If you want to remind individual recipients of their action (e.g., outstanding signature), you can use the reminder function:
-
Go to the “Recipients” tab, scroll down to the recipients and find the relevant person in the list.
-
For that person, click the arrow icon on the right to open the recipient settings.
-
Click the “Resend invitation” button there. The recipient will receive the invitation email again. You can perform this action only once every ten hours.