

💡 At a Glance
In the Profile Settings you can enter your personal data, change your password, and store email addresses that should be linked to your sproof Sign account. You can also create absence periods and notes and designate a substitute for that period. If you no longer wish to use your user account, you can delete it in the Profile Settings. The Profile Settings are available for User/User+ as well as Free User.
📑 Step-by-step Guide
1. Open Profile Settings
-
Click “Settings” in the bottom left of the dashboard to open the settings.
-
Alternatively, you can click your profile picture in the top navigation bar and then click “Settings”.
-
In the settings, select the first entry in the left menu, “My Profile”.
2. Profile
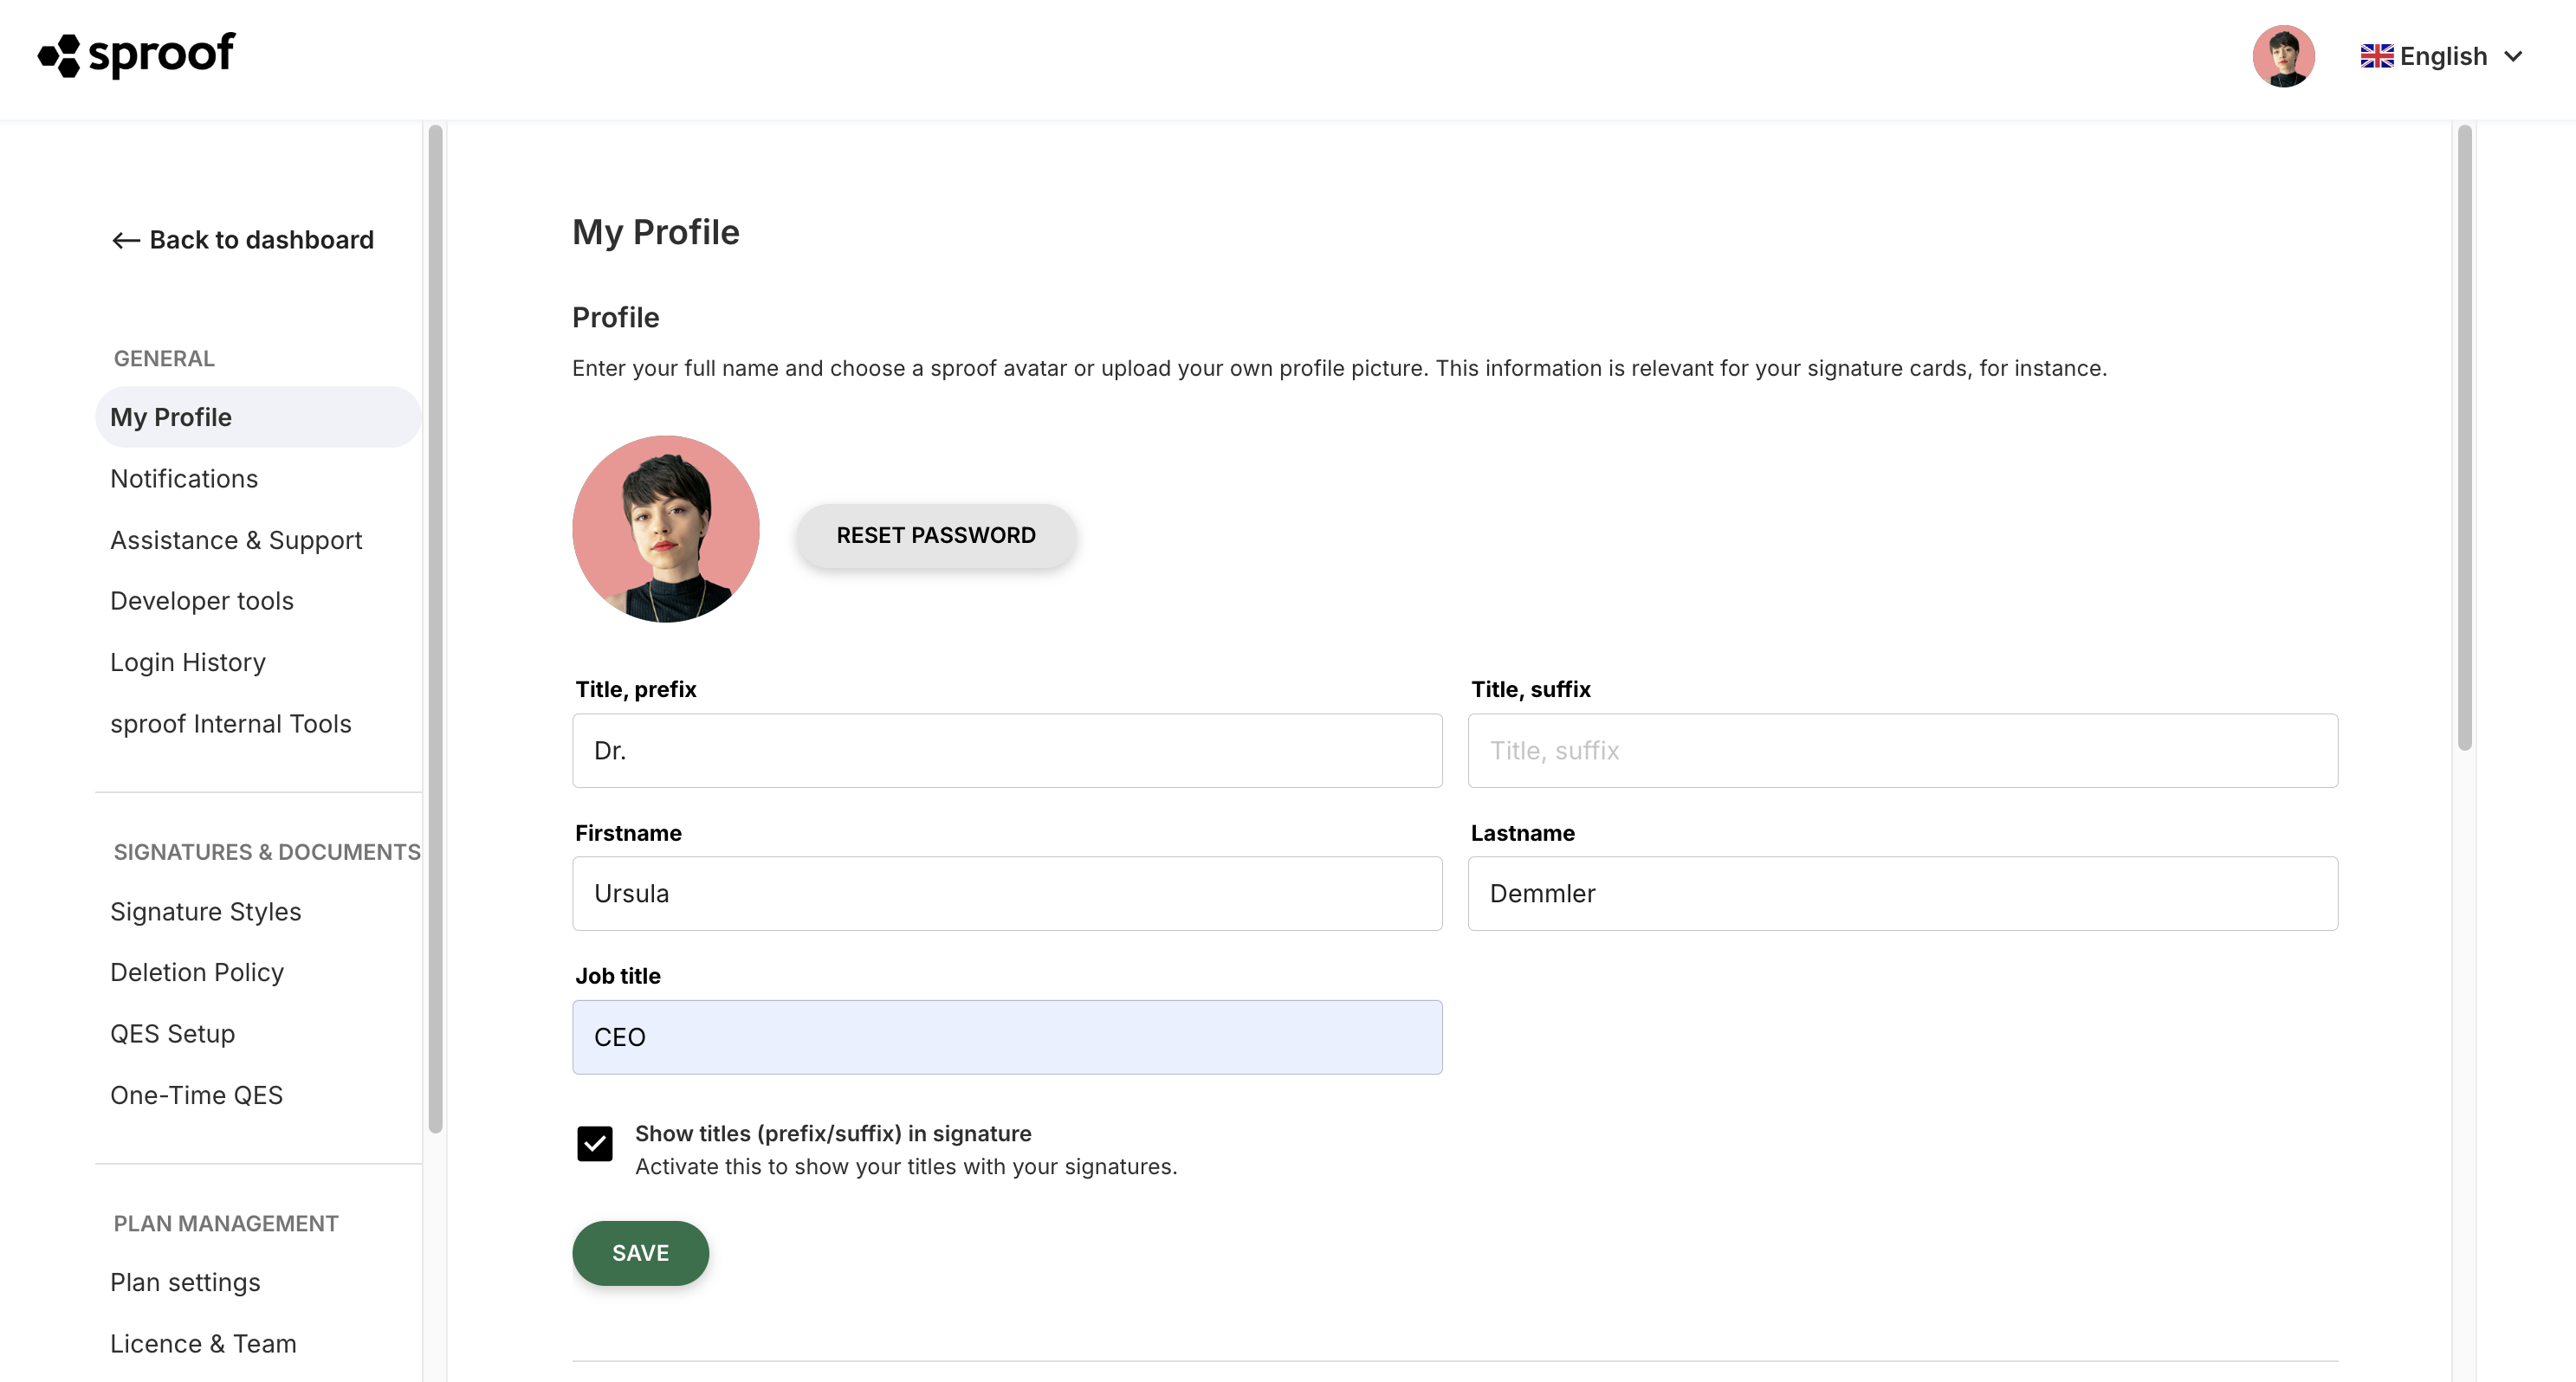
In the first section “Profile” you can provide your personal data and a profile picture:
-
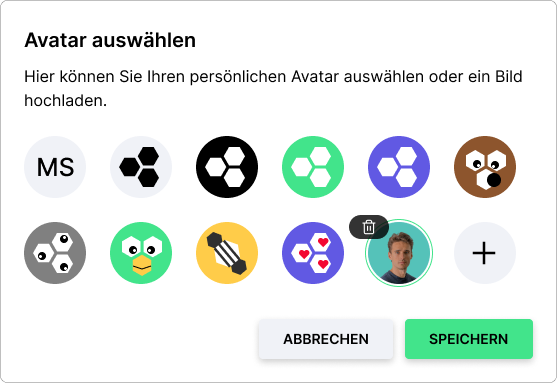
Click the circular profile picture to upload an image or choose a default avatar.
-
Click the “Reset password” button to change your account password.
-
Enter your full name, and optionally title and job designation, in the corresponding text fields. This information is used for signature styles. We created a dedicated module for creating signature styles.
-
Enable the checkbox “Show title in signature” if you want your titles to also appear in your signature styles.
-
Click the “Save” button to save the entries.
3. Absent
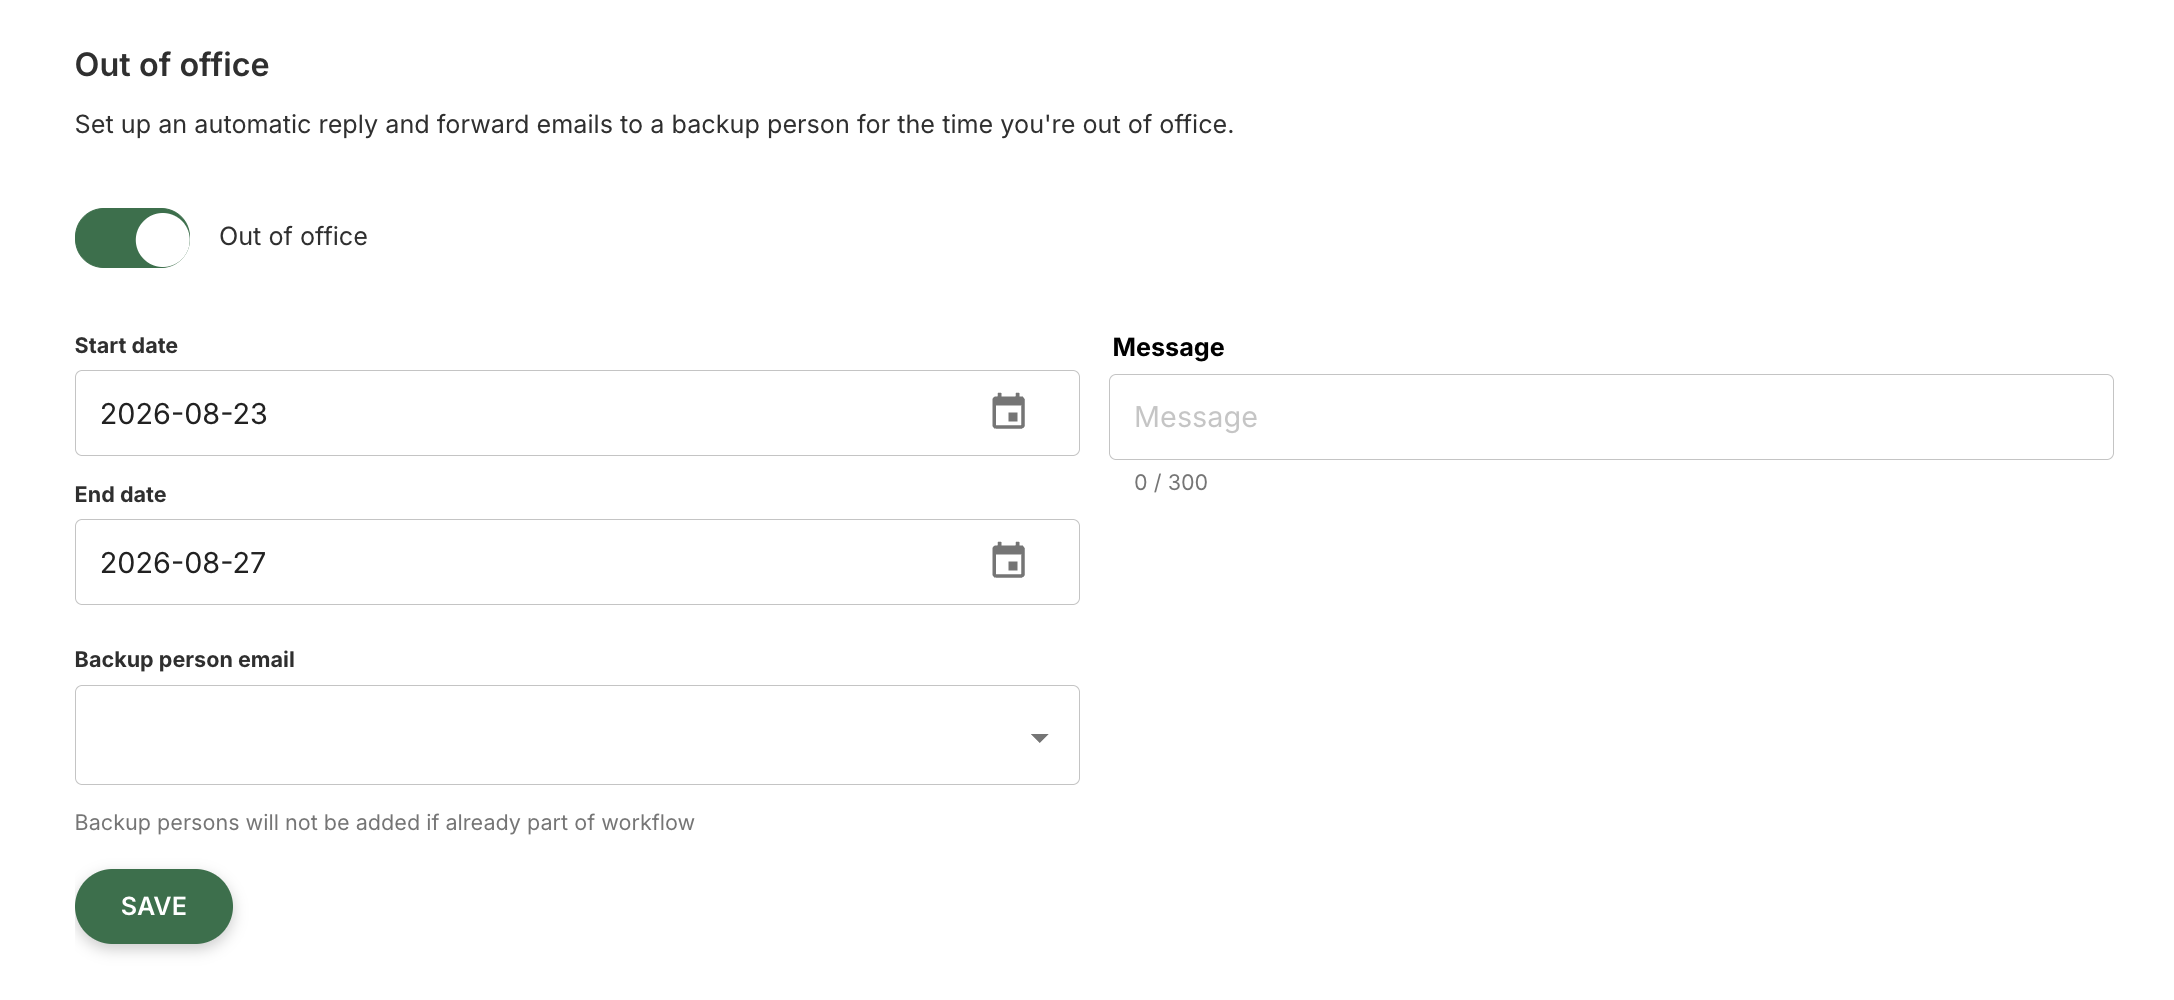
In the second section “Absent” you can set an absence period and define a substitute. You can find a detailed guide in the module “Absence & Substitute Function”.
4. Email Addresses Linked to This Account
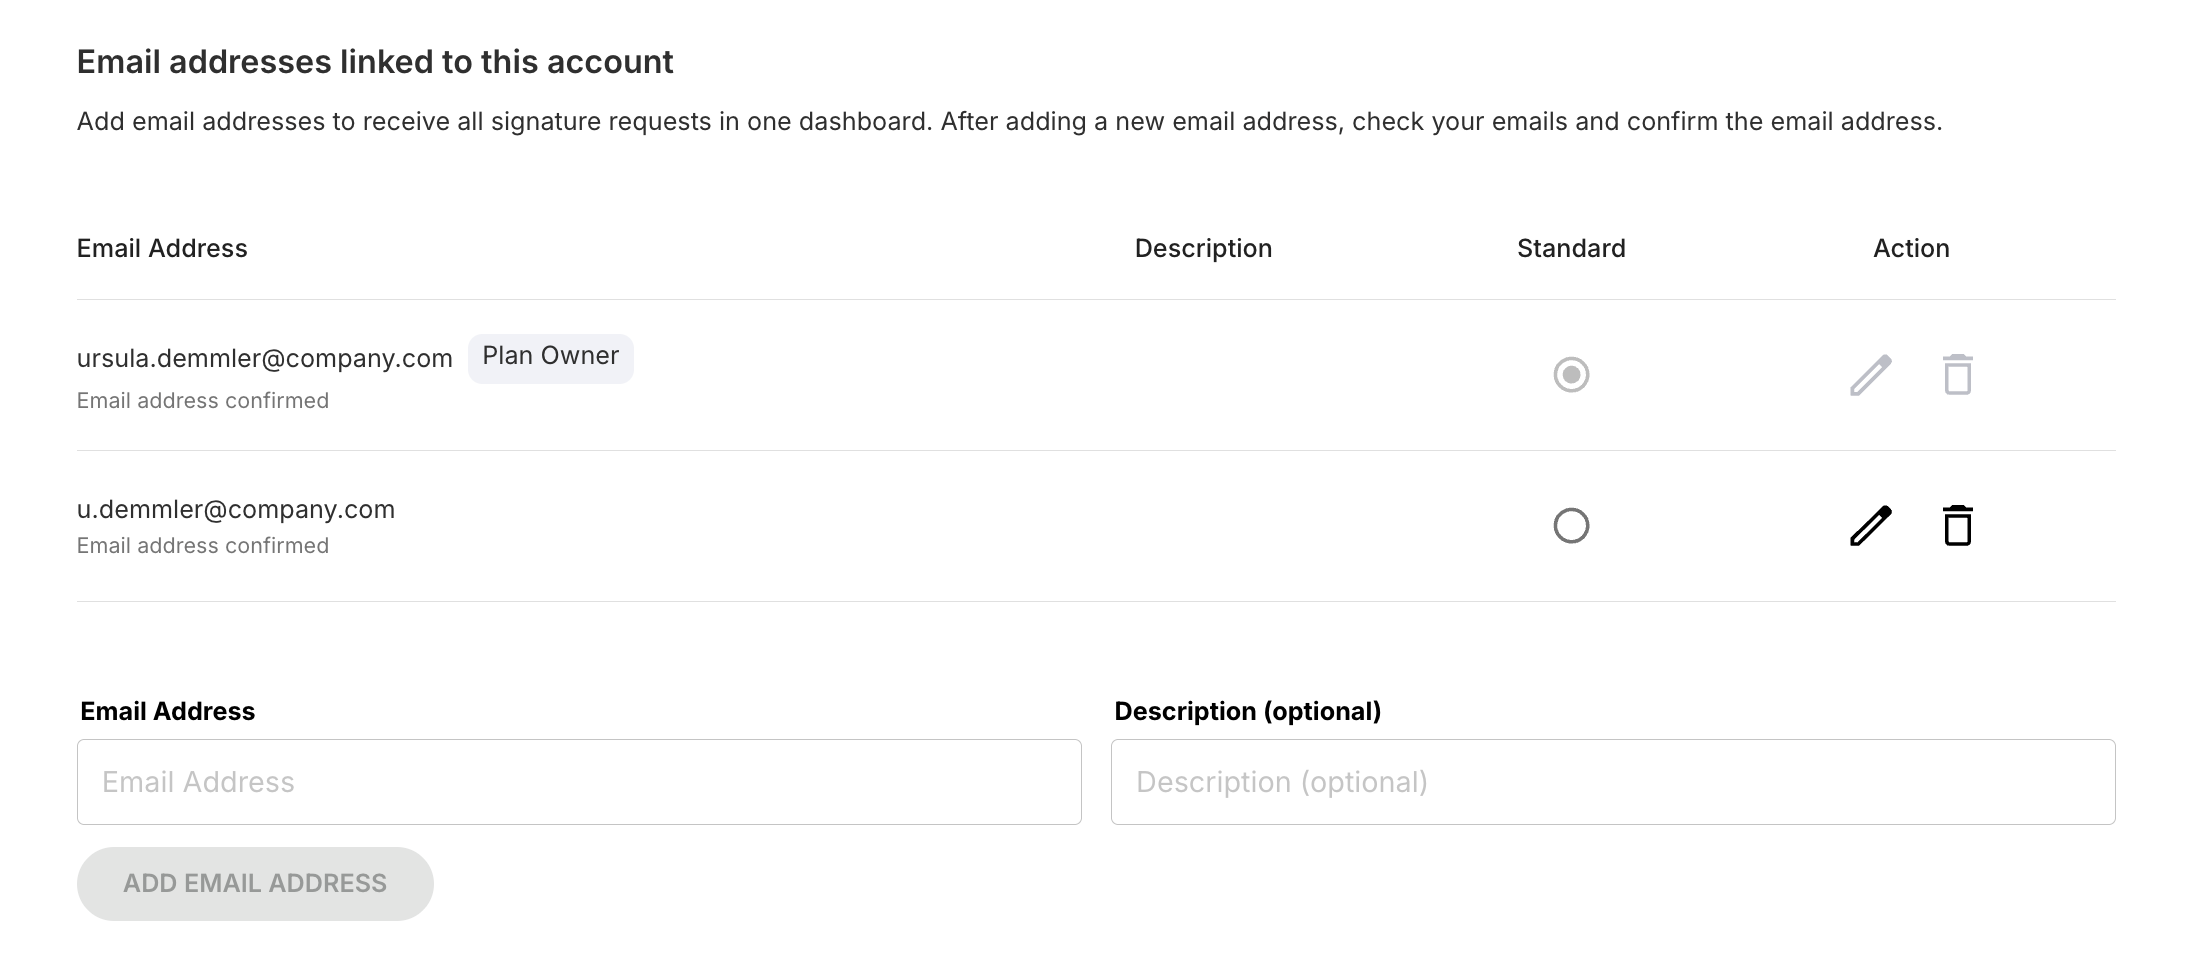
In the third section “Email Addresses Linked to This Account” you can store multiple email addresses so that all signature requests arrive in one dashboard:
-
To add a new email address to your account, enter it in the “Email address” input field.
-
Optionally, you can add a description, e.g., the purpose of the email address.
-
Then click the “Add email address” button.
-
The newly added email address should now appear in the list. Its status will be “Confirmation pending”.
-
To confirm the email address, open your email inbox. You should have received an email from sproof Sign that you need to confirm. Also check your spam folder.
-
The status of the email address should now have changed to “Email address confirmed”. From now on, signature requests for that email address will also appear in your dashboard.
-
Click the pencil icon to edit an email address.
-
Click the trash can icon to delete an email address. Note: The email address set as default cannot be deleted.
5. Delete Profile
In the last section you can permanently delete your sproof Sign account.
Warning: Once you have performed this action, you will no longer have access to your documents and your data will be permanently deleted.
