

💡 At a Glance
Collecting signatures and approvals is a core function in sproof Sign and is supported by a variety of features and settings. You can use not only individual documents but also entire document folders or workflows with document placeholders to make your processes even more flexible. This allows signature and approval processes to be designed very individually.
Important information up front: The sender generally pays for the signatures. Your counterpart does not need an account with sproof Sign and can simply open your invitation (e.g., by email) with any mobile device (smartphone, PC, tablet) and follow the instructions.
📑 Step-by-step Guide
1. Start workflow and prepare documents
Instead of starting the process manually each time, you can rely on predefined workflows.
-
Workflow with predefined documents or folders: In the dashboard under Contacts & Workflows, select an existing workflow. If it already contains a document or a document folder, these will be automatically loaded into the editor. You can proceed directly with configuring the recipients.
-
Workflow with document placeholder (NEW): Some workflows are set up so that the process is standardized, but the document itself remains variable (e.g., for individual contracts).
-
Choose a workflow that contains a document placeholder.
-
After selecting it, you will be prompted directly to upload the specific document for this procedure.
-
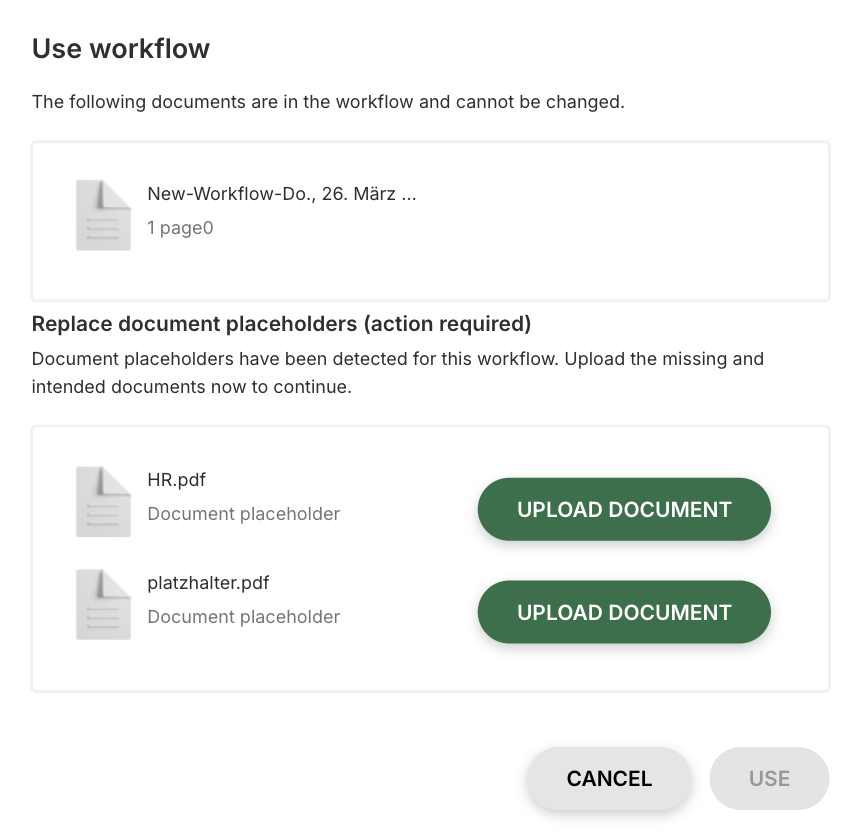
c. Once the document is uploaded, all settings stored in the workflow (recipients, fields, etc.) will be applied to it.
2. Add recipients and assign placeholders
After your document or workflow is loaded, you can finalize the recipient list.
-
Dealing with person placeholders: If the workflow you selected contains person placeholders (e.g., "new employee"), you must now assign these to a specific person. These placeholders represent roles in the signature process that can be filled by a different person each time the workflow is used.
-
The placeholder is displayed in the "Recipients" tab.
-
Click the placeholder to choose a person from your contacts or enter a new email address.
-
Confirm the assignment. All settings predefined for this placeholder (role, signature fields, etc.) will automatically be transferred to the assigned person.
-
3. Adjust recipients and general workflow settings
After your document or workflow is loaded, you can flexibly control the signature process:
Set order:
-
Determine in which order the invited persons must interact.
-
By clicking the 3-dot icon you can set options for the respective round. For example, you can specify that only one person from this round needs to sign/approve on behalf of the other people.
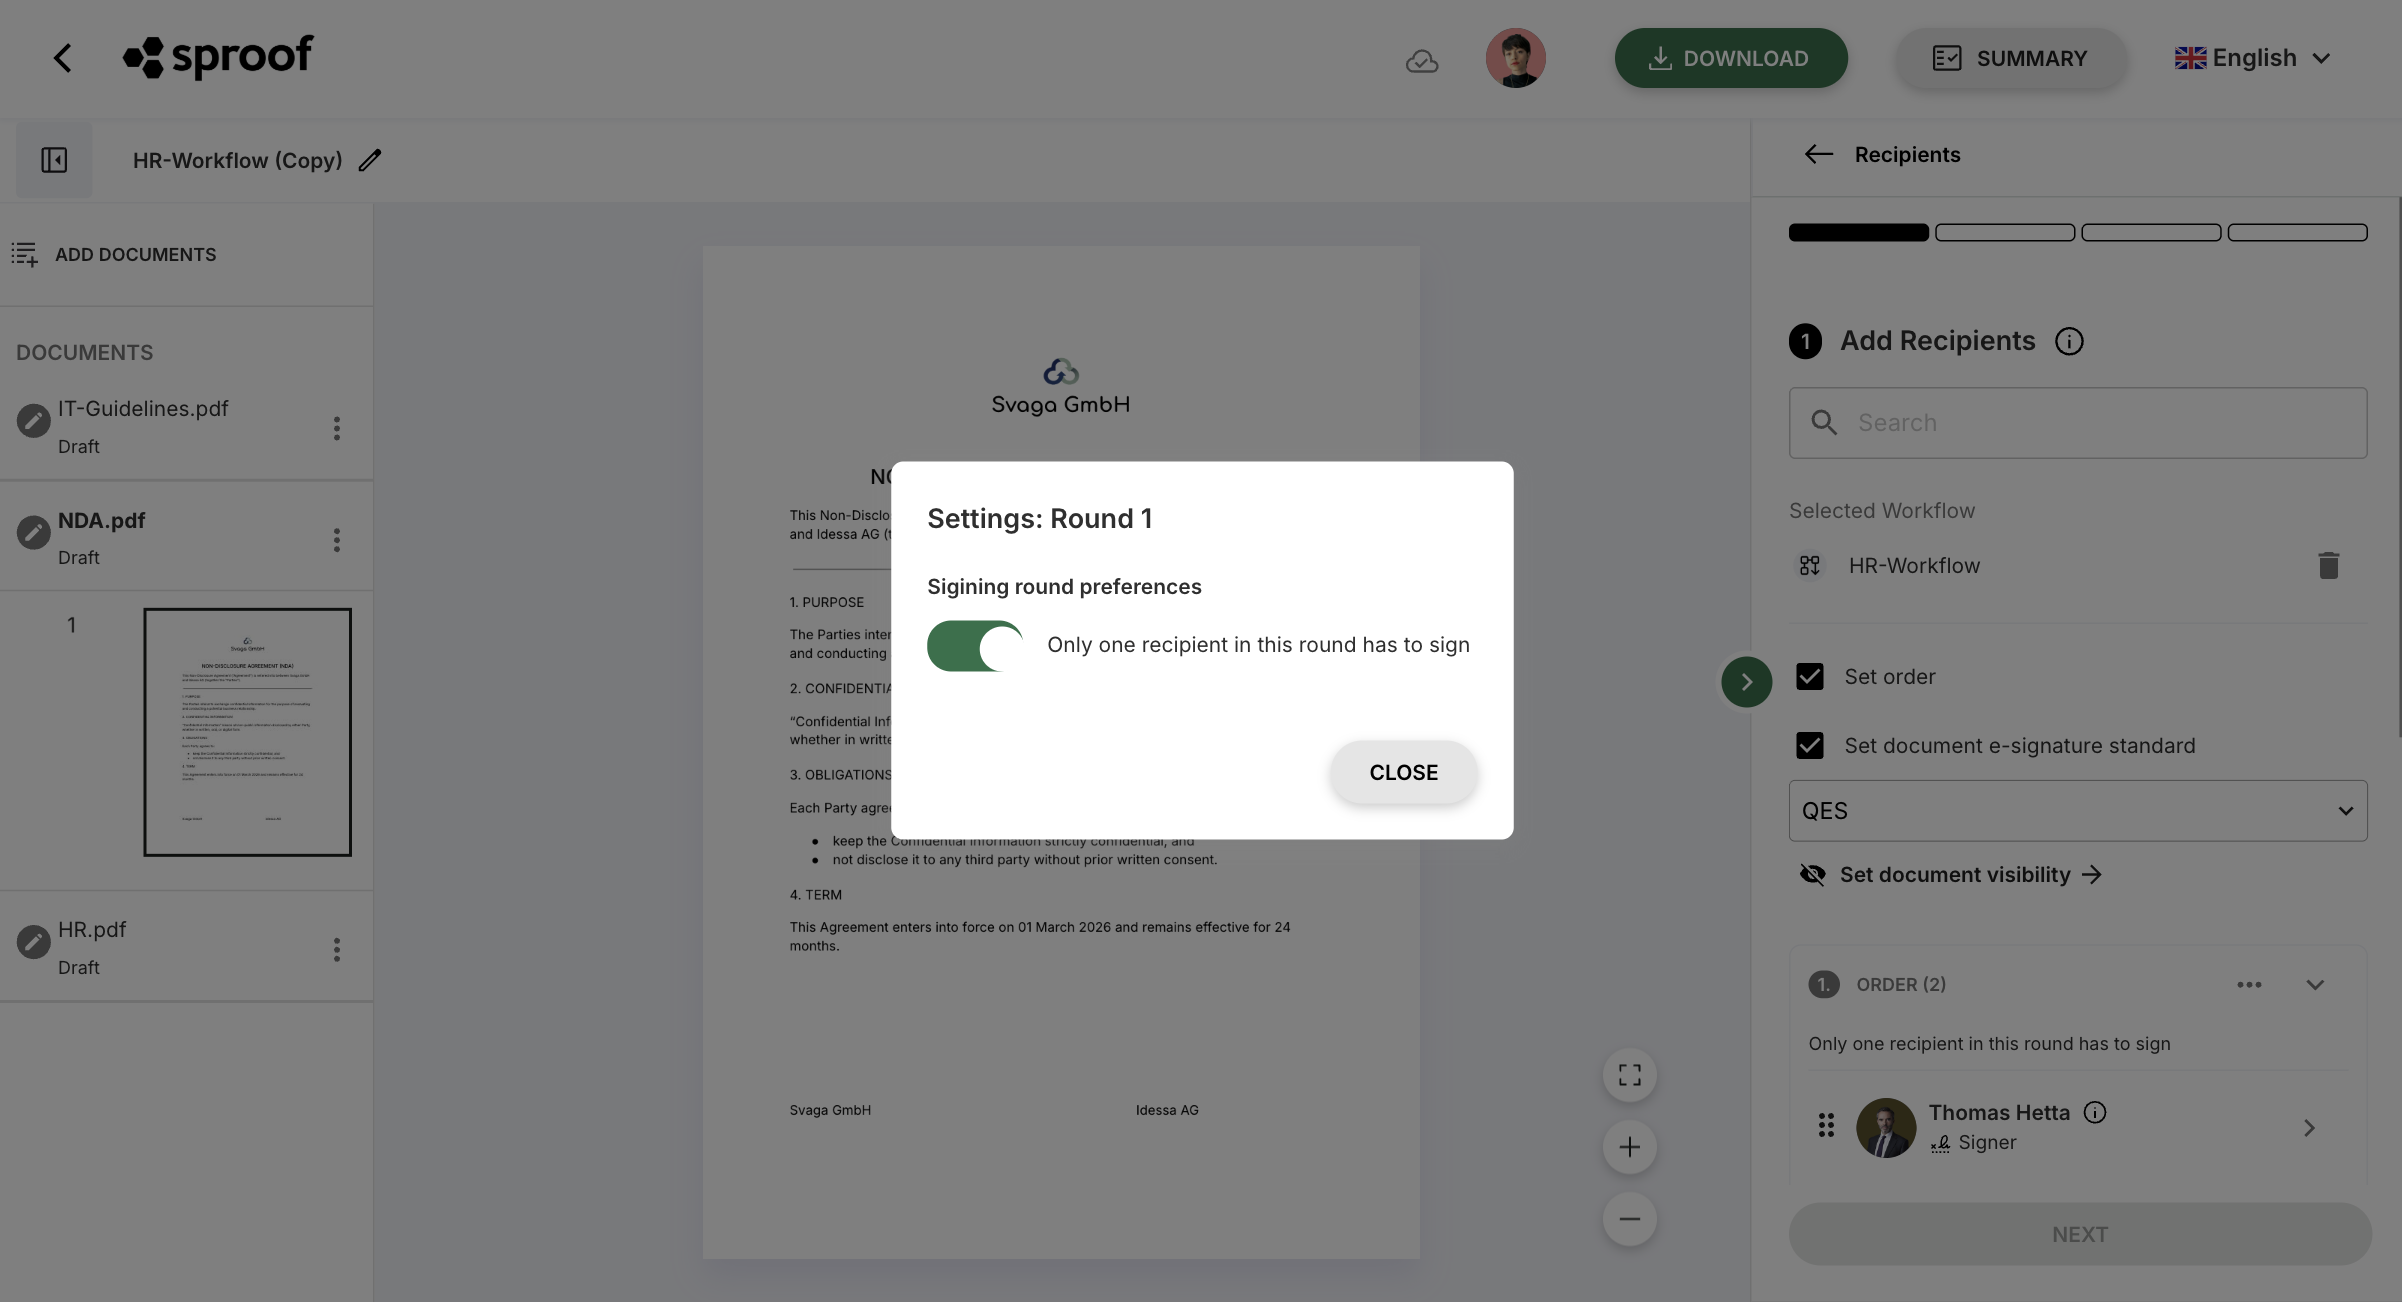
Set e-signature standard: Define the standard that applies to all signers (e.g., FES or QES).
4. Settings for individual recipients
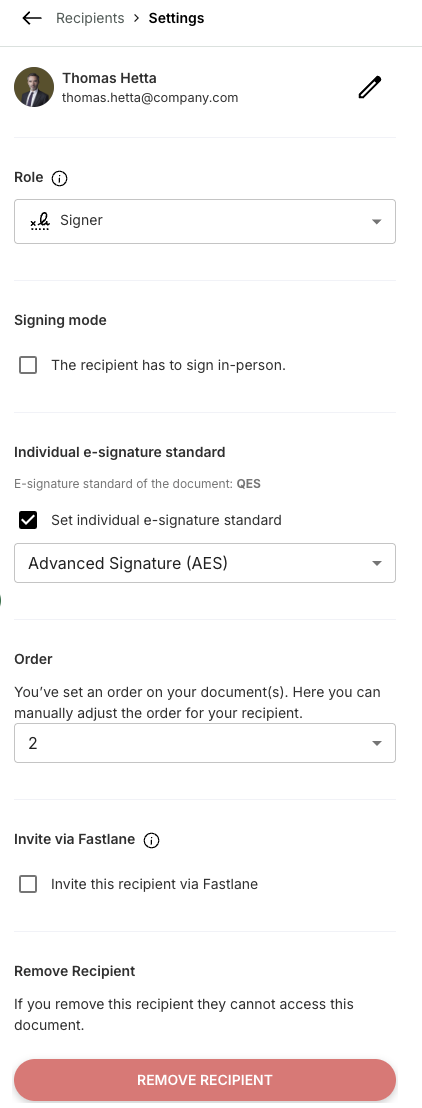
Click the arrow to the right of a person to make individual adjustments:
-
Adjust personal data: Using the pencil icon you can, for example, correct the name.
-
Assign role: Assign the roles "Signer", "Viewer", or "Approver". Important: Only signing and approving persons affect the completion of the workflow.
-
Signature mode: With this setting you can require that the recipient must sign on-site.
-
Individual signature type: This setting overrides the global signature standard for the document only for this person.
-
Invite via Fastlane: You can invite the recipient via Fastlane.
-
Remove recipient: Use the red button to delete the person from the workflow.
5. Placing signature positions and form fields
-
Select recipient: Use the dropdown menu to switch between the different people and place their fields.
-
Signature and initial fields: Place at least one signature or initial field for each signer. Both count as equivalent signatures.
-
Additional form fields: Add more person-specific fields via drag & drop (e.g., text fields, date).
Note: Size and position can be adjusted for all signature placeholders and form fields. Additionally, you can set specific options for each form field.
In the thumbnail view on the left you can see on which page you placed form fields and signature placeholders for which recipients. The small indicators have a distinct color for each person.
6. Settings for the email invitation
-
Subject: Choose a meaningful subject line.
-
General text: Set a uniform message for all recipients.
-
Individual message: Additionally, compose a personal message that is shown only to a specific person.
7. Reminders, due date and additional settings
-
Set deadlines: Define a reminder date (start point for automatic reminders) and/or a due date (end point for the possibility to sign).
-
More options: Allow, for example, forwarding of the document or set the invitation language.
-
Send invitation: Finally, click the green button to start the process.
8. NEW: Optimized document overview with the new “Summary”
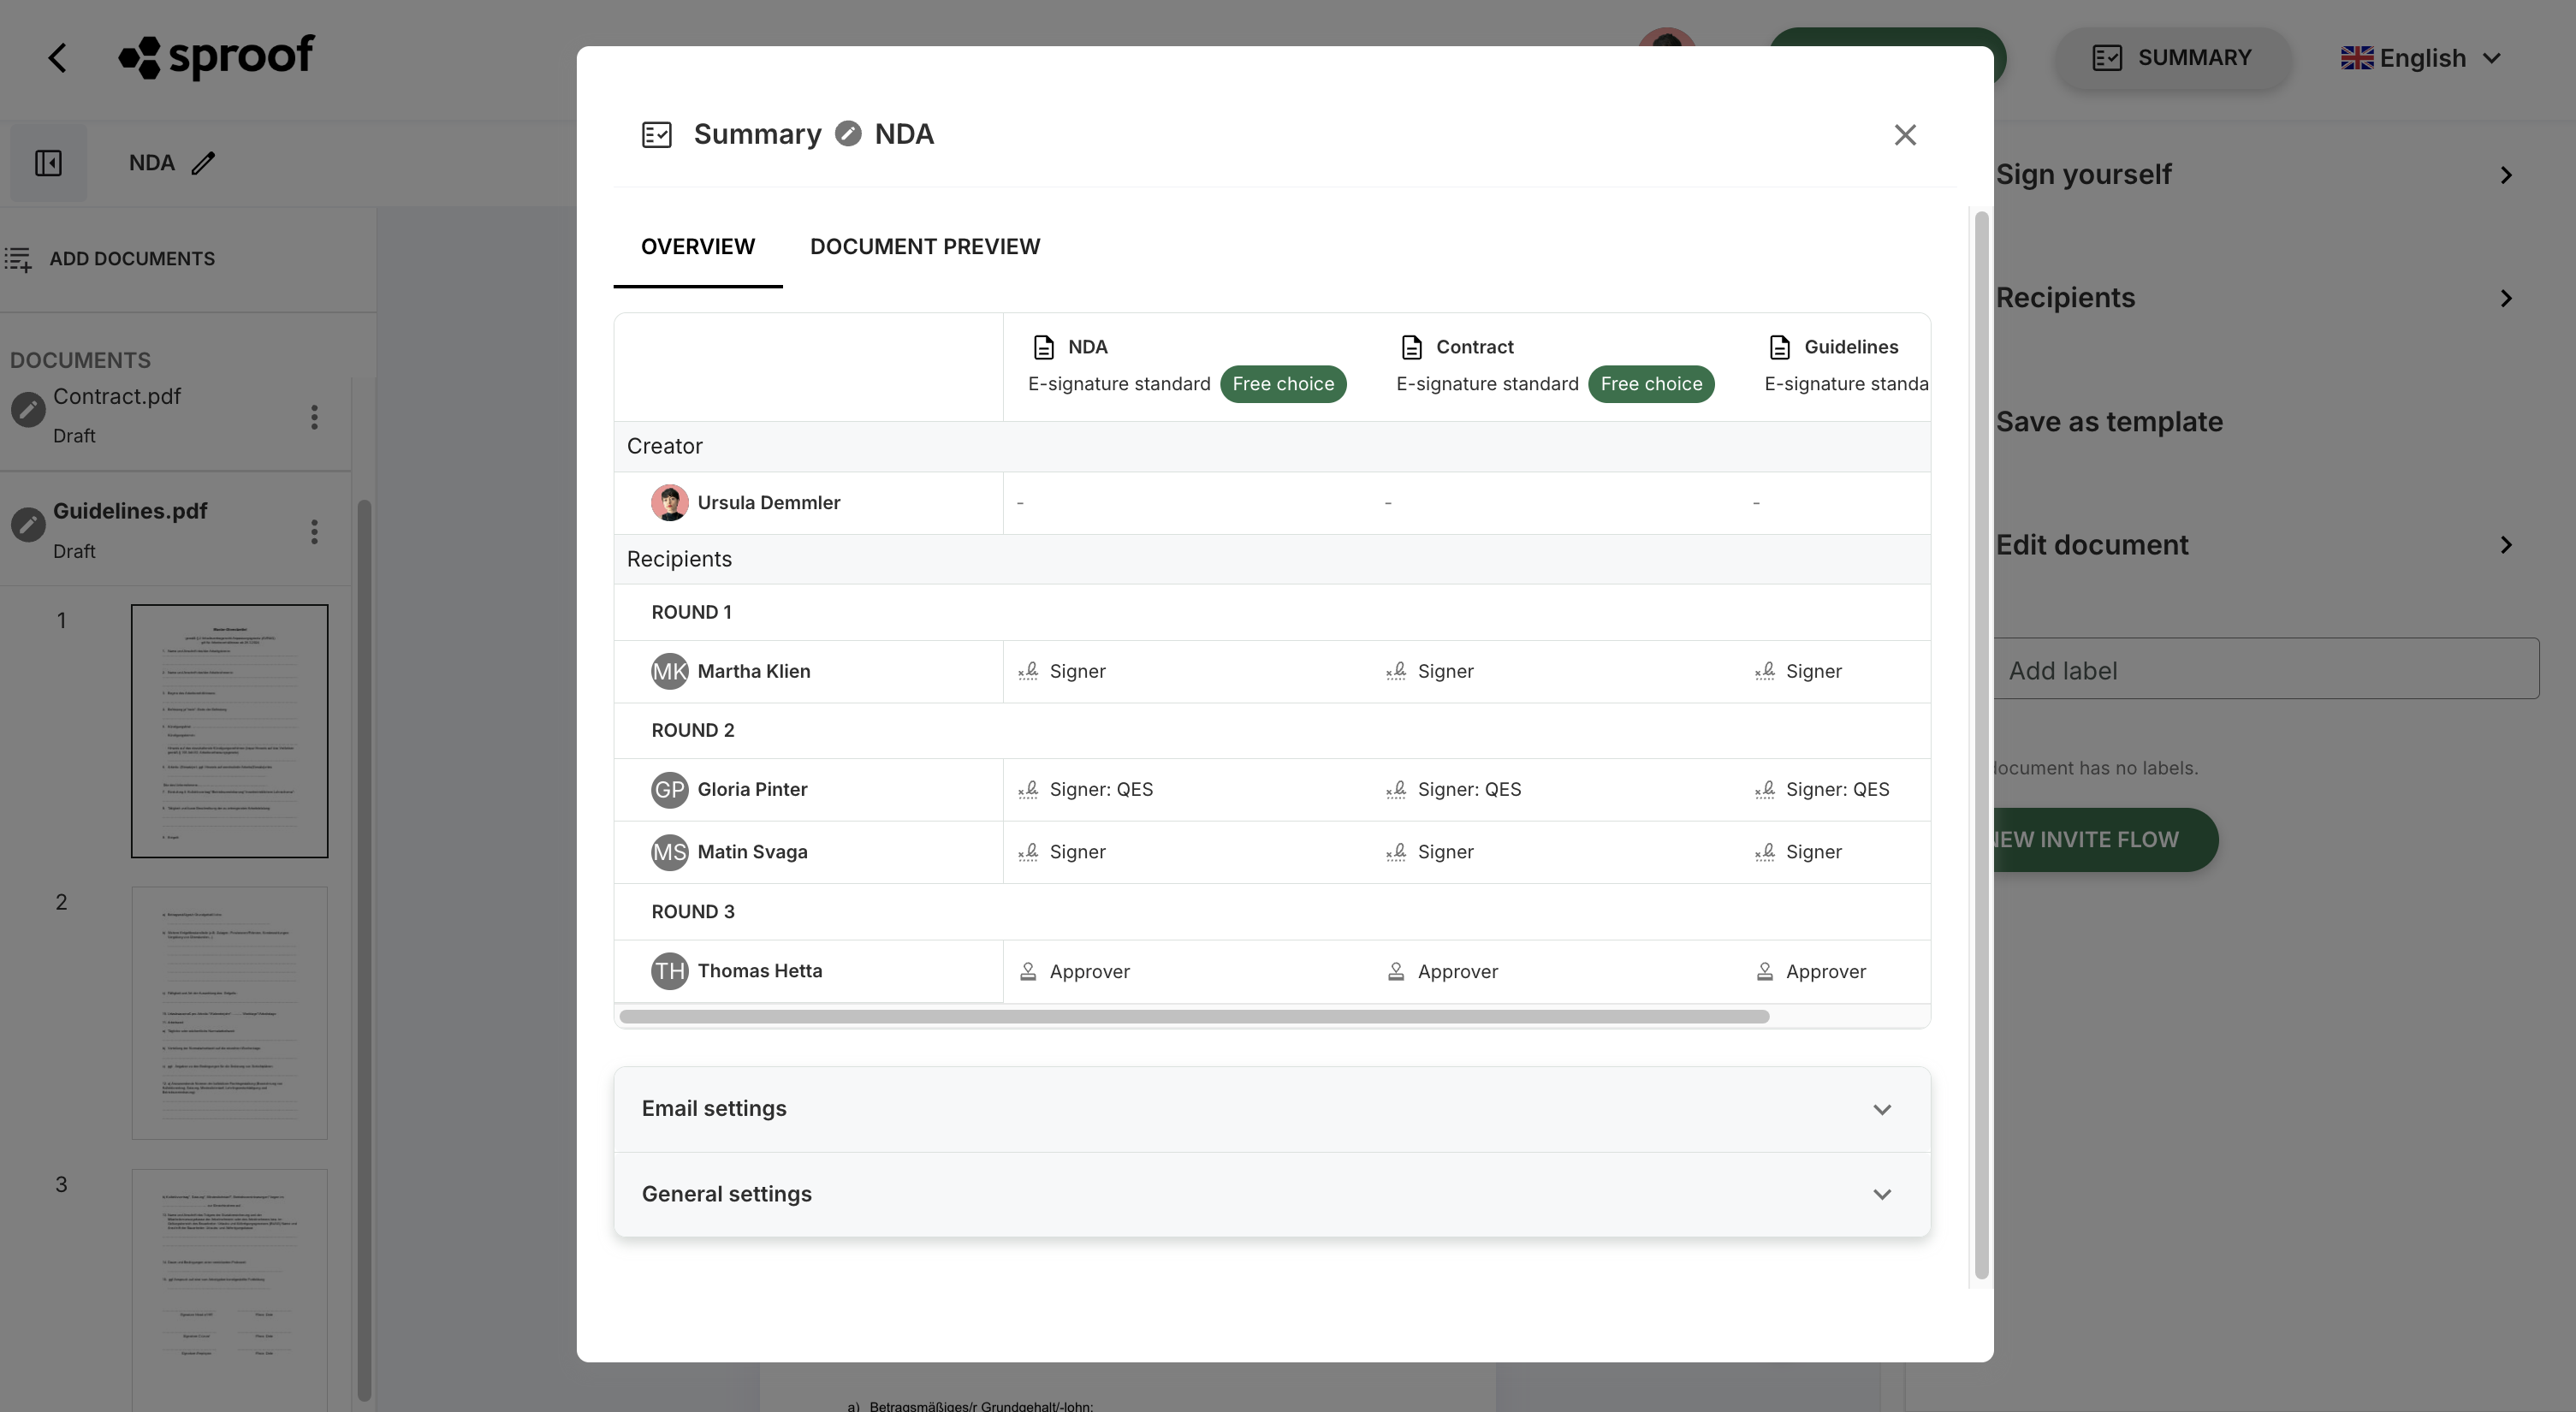
With just one click on the “Summary” button in the top right, an overview opens that shows you all the details of your configuration:
-
Recipient details: Who has which role (e.g., signer, approver, or viewer)? Are global or individual e-signature standards applied?
-
Visibilities: You can immediately see if certain documents have been hidden from specific recipients.
-
Settings: As the sender you retain full oversight of all email settings and general settings.
Note: The familiar document preview can be found in the second tab of the window.
9. Check progress
After sending, you can track the status of the signature process at any time in the dashboard or open the summary matrix by clicking the document status or via the document details. You can see the current status per recipient and document and know immediately where the process stands.

10. Subsequent changes
As long as the process is running, you can at any time in the document:
-
Adjust reminder settings
-
View settings
-
Add additional recipients to the document
-
By clicking the arrow (>) next to a person, revise the fields set for that person (provided they have not yet signed)
-
Resend invitation
-
Delete the recipient entirely