💡 At a Glance
The dashboard in sproof Sign is the central place for managing your signature processes. Here you can search, filter, organize documents and track or manually adjust their status. It provides a comprehensive overview of all incoming and outgoing documents and enables efficient control of your workflows.
📑 Step-by-Step Guide
1. Dashboard Layout
-
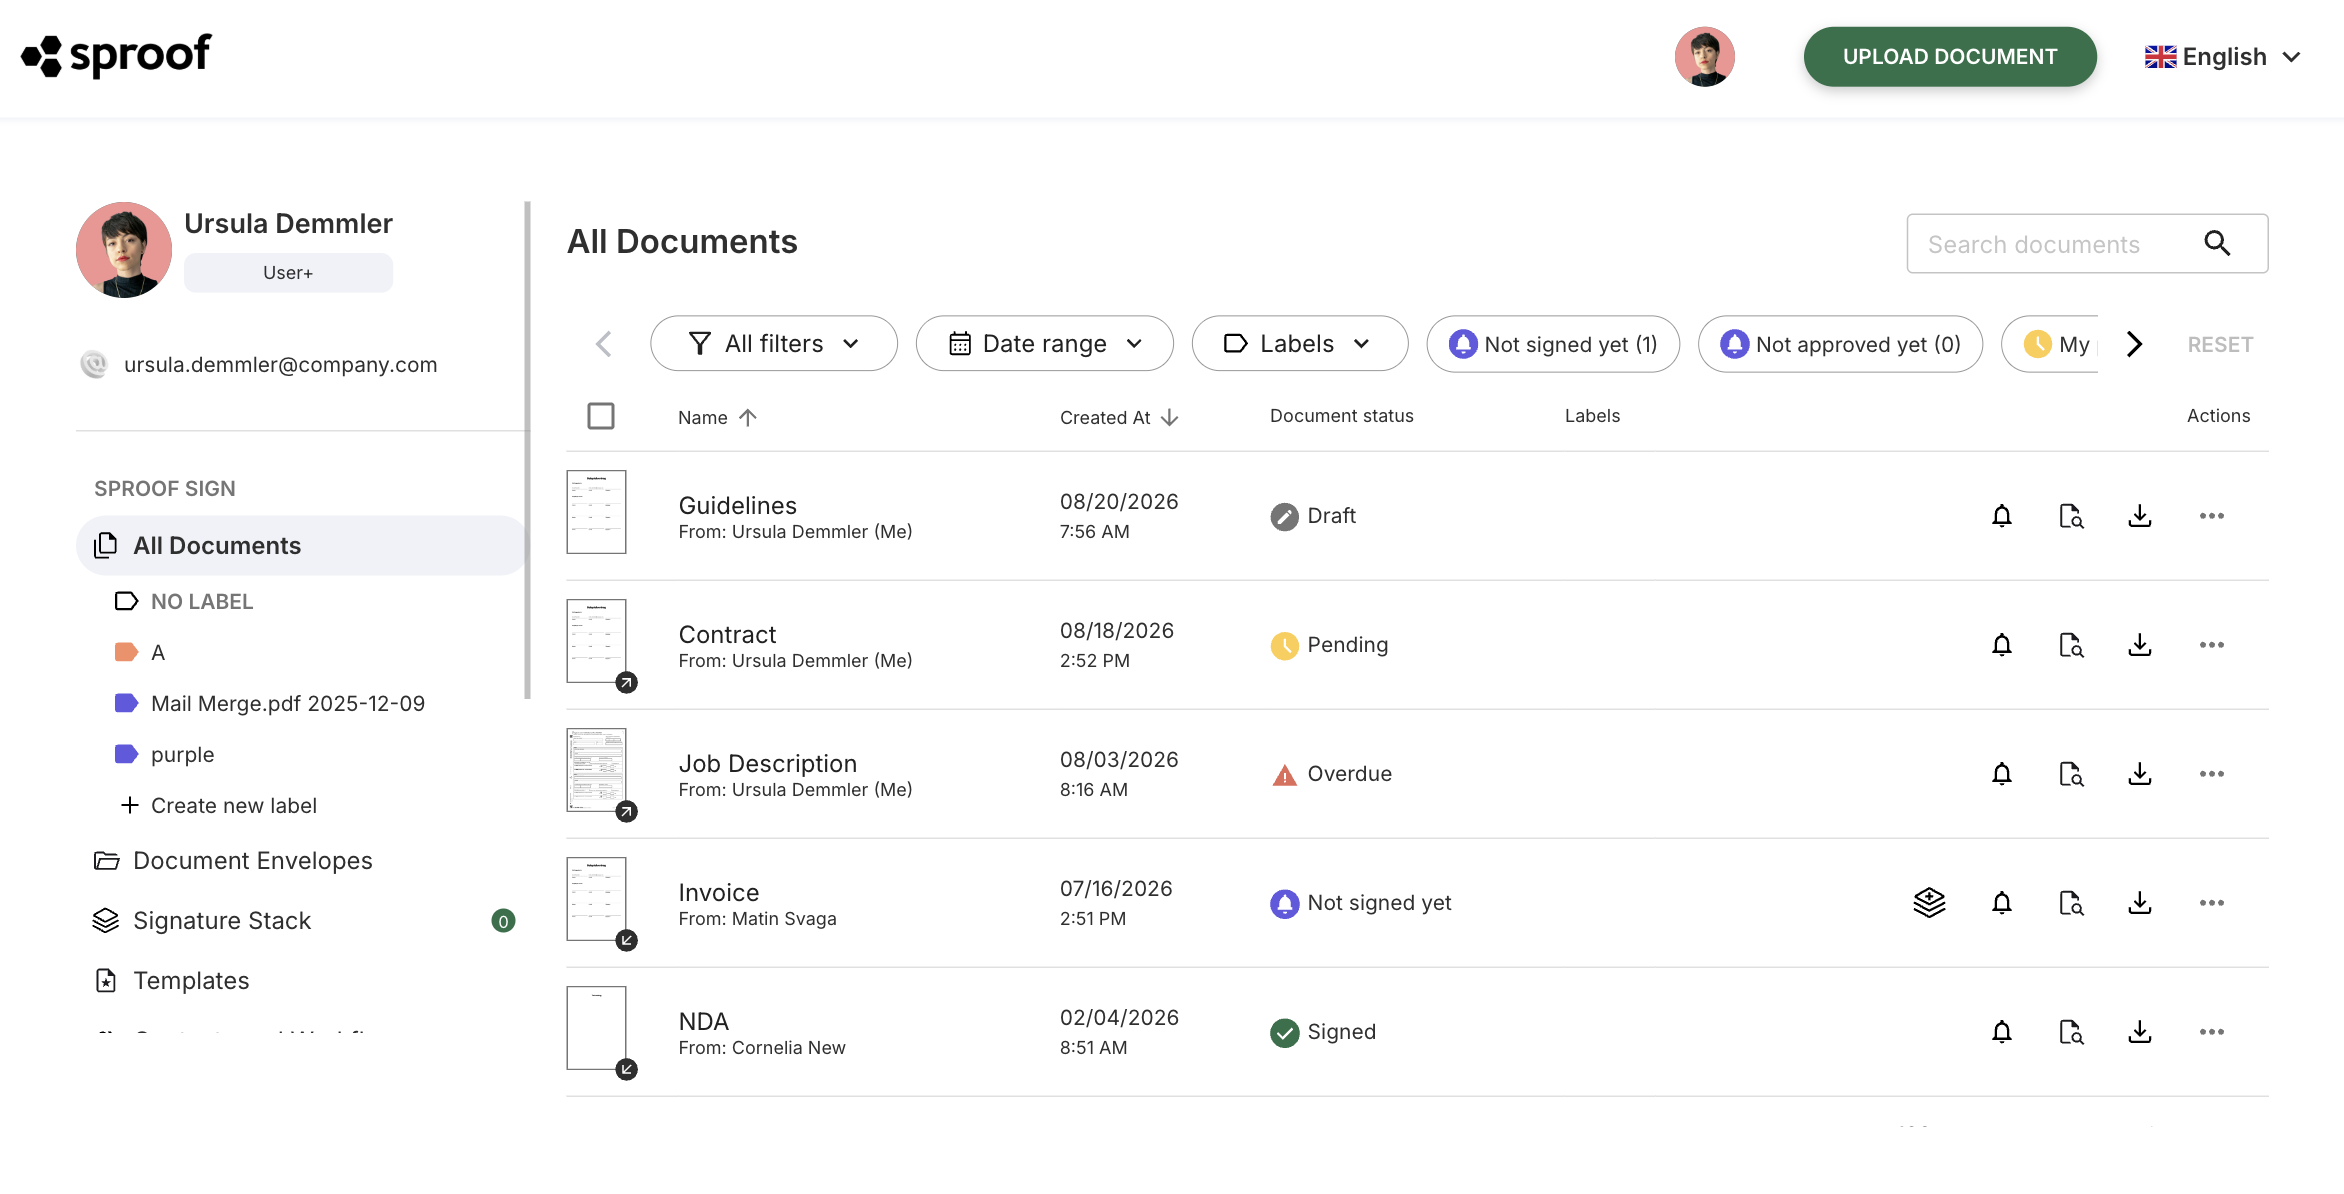
After you log in, you will be automatically redirected to the dashboard. From the editor or the settings you can always navigate back to the dashboard with one click on the sproof logo.
-
Click “All documents” in the left sidebar to go to the document view. The document view collects all documents you send or that are sent to you.
-
You can sort the entries in the document list by name and creation date.
-
To search for documents, enter a search term directly in the search field at the top right.
-
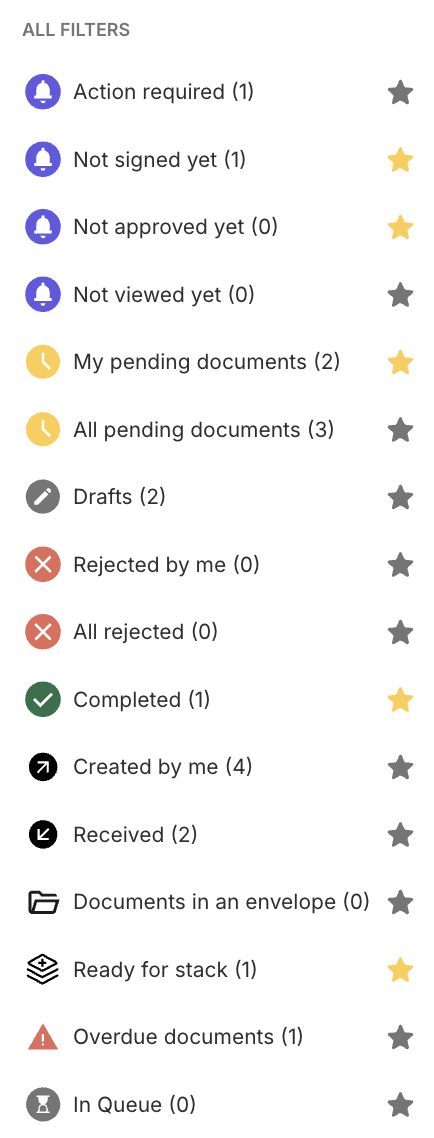
By clicking “All filters” you can filter your documents by status or other criteria. Frequently used filters can be favorited with a click on the star icon.
-
Next to the “All filters” button you will find the “Time range” filter to display documents within a specific timeframe.
-
In the left sidebar or the filter bar you can also filter documents by labels . You can create as many labels as you like and assign them to your documents individually.
2. Using the Document List
Each document is its own entry in the document list:

-
On the far left you see a thumbnail of the document or documents (for folders). The icon with the arrow in the lower corner of the thumbnail indicates whether it is a received document or a document you sent.
-
Next to the document thumbnail you see the document name and the creator of the document. The stack icon next to it indicates that the document is on the stack and ready for signature. There is a separate guide for stack signing.
-
To the right of the name and creator the creation date and time are displayed, followed by the document status. If you hover over the icon with the mouse, an info window with the exact description of the respective status will appear.
-
If you are required to sign a document and have a User+ license, you can add it to the stack with a click on the stack icon with a plus and remove it from the stack again with a click on the stack icon with a minus.
-
Click the bell icon to mute notification emails.
-
Click the document icon with the magnifying glass to open the document preview.
-
Click the download icon to download the current status of the document including existing signatures as a PDF.
-
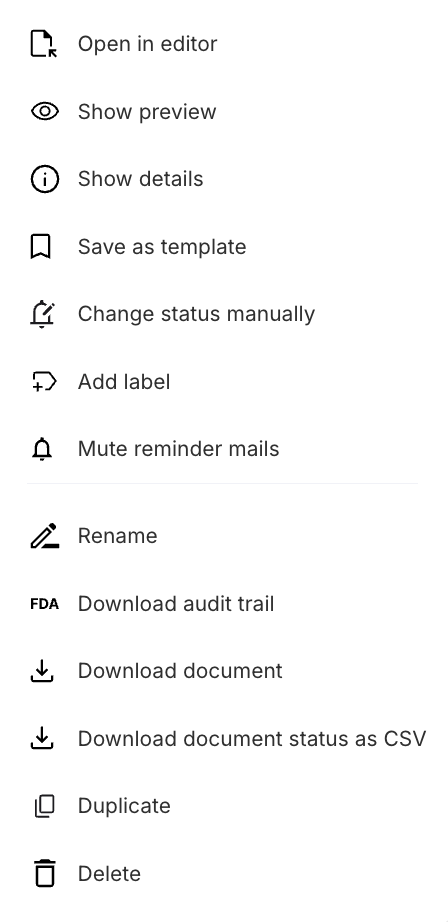
Click the three-dots icon to open the actions menu, where you will find all other actions for a document.