

💡 At a Glance
In this module you will learn how to activate your personal Qualified Electronic Signature (QES) in sproof Sign to sign documents with the highest legal validity. We guide you step by step through the necessary one-time identification. We also show you how to additionally use an existing eID from the eID Hub.
The sproof QES is legally 100% equivalent to a handwritten signature and complies with the strict requirements of the eIDAS Regulation (EU) and the Swiss Signature Act (ZertES). At the end of the module we have compiled the most important information and background information on the qualified electronic signature including identification for you.
📑 Step-by-Step Guide
Activate sproof Qualified Electronic Signature (QES)
You need a User+ license for the identification for an sproof QES.
As a Plan Admin you can learn in the module “QES settings for Plan Admins” how to make global settings for identification and signing with the sproof QES.
To be able to use a QES with sproof Sign, a one-time identification is required. This process ensures that your digital signature is uniquely assigned to you and legally recognized. For the sproof QES including the identification process, sproof collaborates with Swisscom Trust Services AG.
Start identification
A valid identity document is required (passport or ID card with or without NFC functionality), a smartphone with a camera and a stable internet connection. Also go to a quiet place.
Navigate in your sproof Sign account to Settings > QES Setup. Click there to start the process of creating your personal qualified signature.
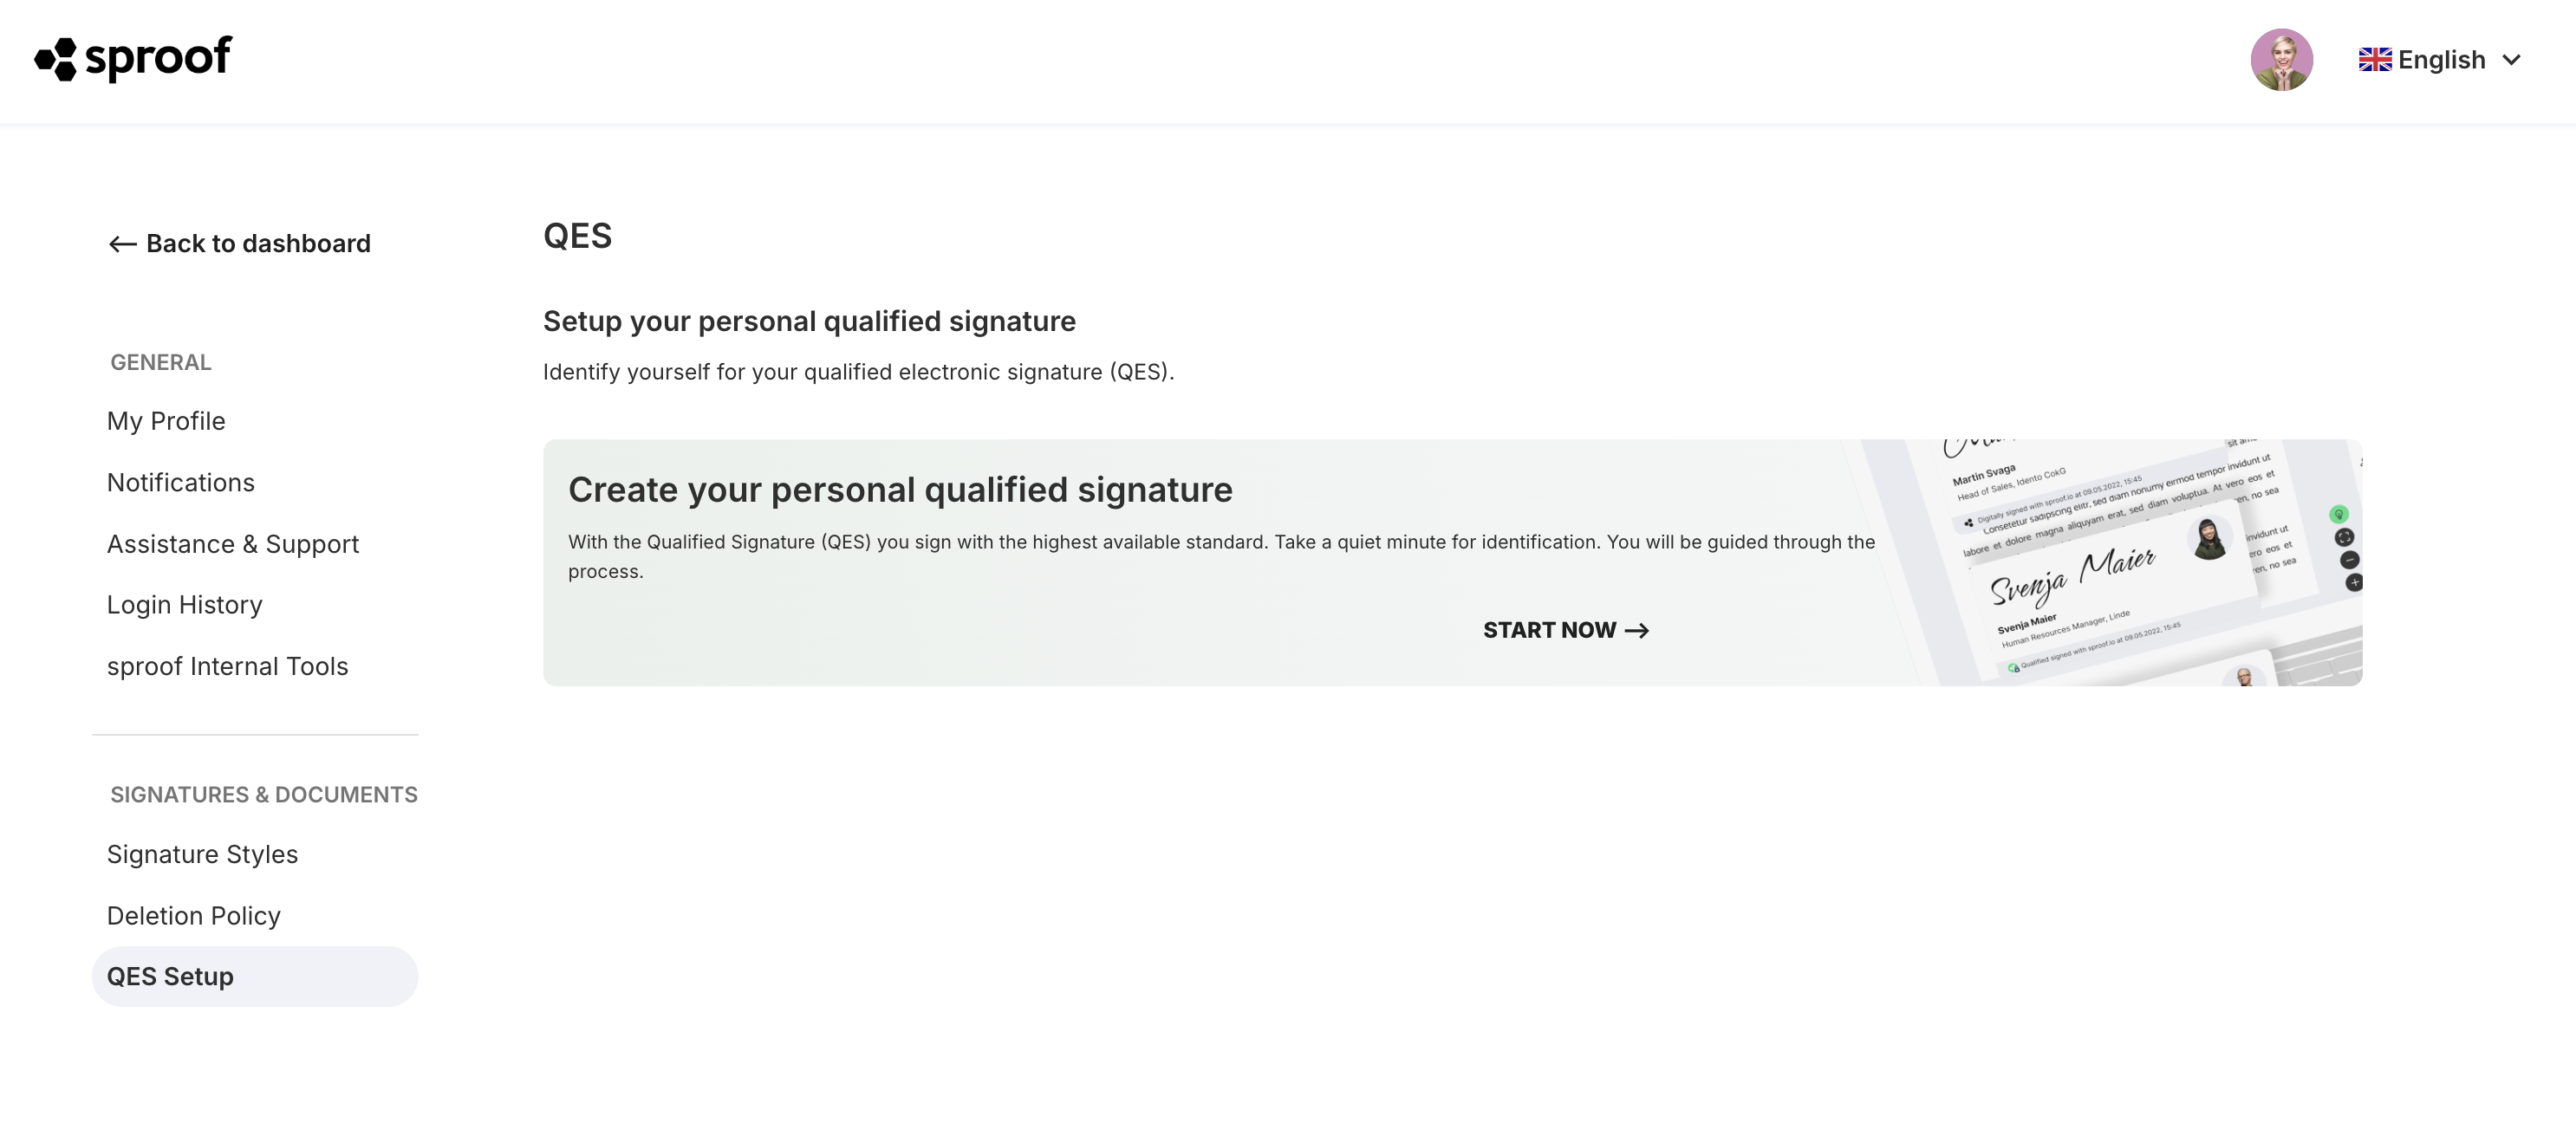
Alternatively, click the gray display text on the dashboard: “Create your personal qualified signature now: Start identification → ”
QES identification with Mobile ID App (Option A)
Note: Option A corresponds to the standard configuration in sproof Sign. It is possible that “Passkey” is set as the authorization method for your plan. In that case proceed to Option B.
Video guide: This is how identification with Auto-Ident and Mobile ID works – explained step by step.
Video available in German, but with English subtitles.
-
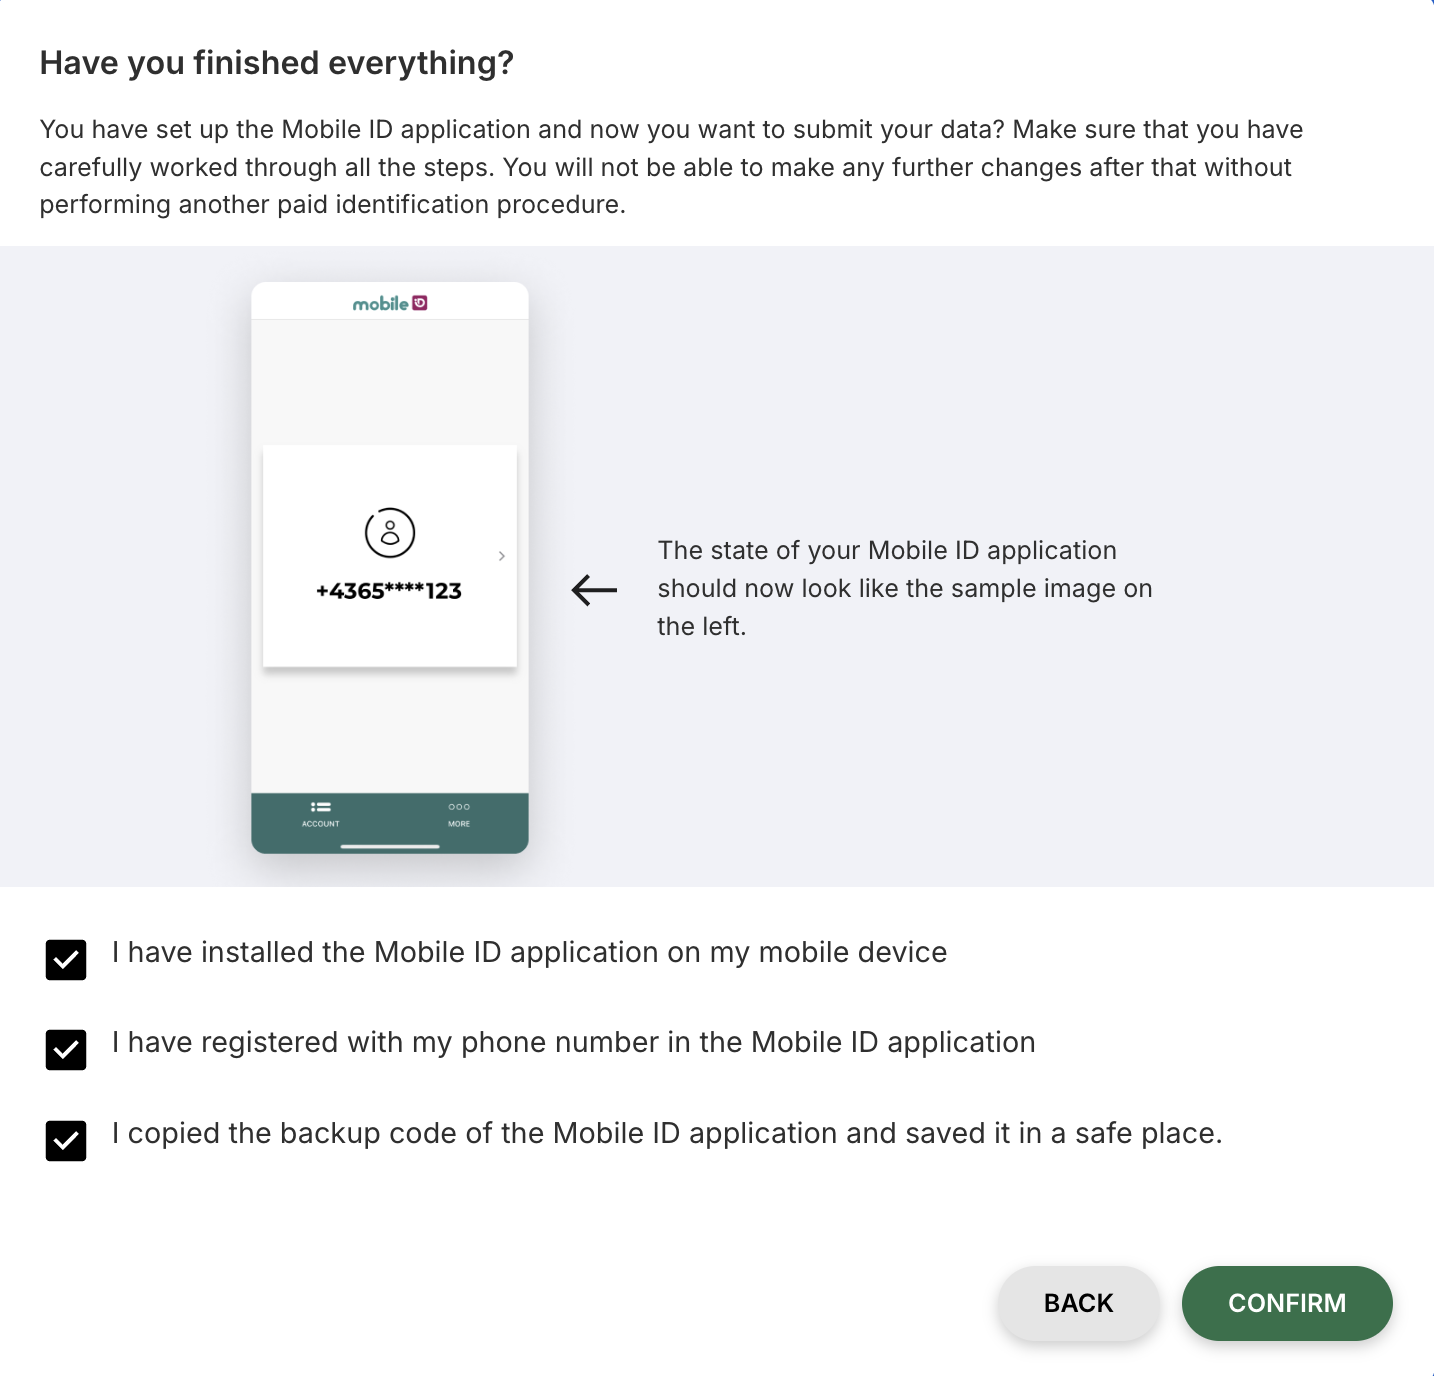
You will be asked to first install and set up the Mobile ID App on your smartphone. This is a necessary preparatory step. You will subsequently use the same app to approve your qualified electronic signatures (authorization). After you have completed the steps guided in the app, return to sproof Sign and confirm again that:
-
You were able to successfully install the app
-
You were able to register in the app with your personal phone number
-
You have safely stored the backup code
Click Confirm.
-
Re-enter mobile number
In the next step you will be asked again to enter your phone number. It must be the same one you used when setting up the Mobile ID App. The details will be matched.
-
Auto-identification
In the next step you scan the QR code that appeared on your screen. You will then be automatically forwarded to the one-time identification (this step is omitted if you performed the process entirely with your mobile phone). The Auto-Ident procedure enables a fully automated identification – completely without a video agent – and of course meets all requirements of the eIDAS Regulation. The identification process begins with a short video recording of your face, followed by scanning the identity document. The technology automatically compares the recorded face with the photo on the ID.
If the identity document can be successfully read via the NFC chip, the entire procedure will be completed within one session. If reading is not possible, a manual verification of the identity data by an identification agent will follow.
Please note: Manual verification is only possible during business hours – Monday to Friday between 08:00 and 18:00 and Saturdays from 08:00 to 12:00.
-
Sign qualified for the first time: Approval (authorization) with Mobile ID
Your qualified signature is now ready to use! After you have successfully identified yourself, you can upload a document, select the signature standard “sproof QES”, place a signature field and click “Sign now”. You will receive a push notification from the Mobile ID App and then authorize the QES with that app. In sproof Sign you can then download the qualified signed document.
QES identification with Passkey (Option B)
Video guide: This is how identification with Auto-Ident and Mobile ID works – explained step by step.
-
Scan the displayed QR code
-
Auto-identification: After scanning with the smartphone you will be forwarded to the one-time identification. This is a self-guided process (Auto-Ident) in which you do not need to speak with a video agent and which complies with the strict requirements of the eIDAS Regulation. You will be asked to present your face and then your identity document to the camera. The technology automatically verifies the authenticity of the document and compares your face with the photo on the ID. This process takes only a few minutes and can be carried out anytime and from anywhere.
-
Sign qualified for the first time: Approval (authorization) with Passkey
Your qualified signature is now ready to use! After you have successfully identified yourself, you can upload a document, select the signature standard “sproof QES”, place a signature field and click “Sign now”. Scan the QR code on the screen. This step is omitted on the mobile phone. You will be forwarded and asked whether you already have a Passkey. Otherwise you can now create a new one. You then authorize the signature with your Passkey (a fingerprint scanner is usually required on the desktop device for this).
Alternative to sproof QES: The sproof eID Hub
If you are already registered with a European eID provider (e.g. ID Austria or German identity card), you can also use these credentials directly in sproof Sign to sign qualified electronically.
Note: The use of the eID Hub is disabled for some plans.
Instructions:
-
Open the document to be signed
Open the document you want to sign qualified as usual. -
Select provider in the eID Hub
Open the tab "Sign yourself" and the menu "Type of signature". Under "Other QES signature providers (eID Hub)" you will find a list of all integrated providers. Select your existing provider here. -
Authorize the signature as usual
You will be redirected to your provider's login window. Complete the signature there with the method you know. Your qualified signature will then be applied to the document in sproof Sign.
Having problems with identification?
If you encounter difficulties during identification for the integrated sproof QES, please contact us here: support@sproof.com
Did you reinstall the MobileID App or get a new smartphone?
Did you reinstall the MobileID App or get a new smartphone? If you have previously completed an identification procedure successfully, you can restore your MobileID to sign qualified with sproof Sign again.
Restoration with backup code:
-
Visit mobileid.ch and enter your phone number to restore your identification with the backup code.
-
You can now sign qualified again without further VideoIdent procedure.
Without backup code:
-
Uninstall the MobileID App (if not already done).
-
Install the app again and note the new backup code.
-
Perform a new identification under QES Setup in the settings.
FAQ
What is a Qualified Electronic Signature (QES)? The Qualified Electronic Signature (QES) is the highest level of electronic signature and has the highest legal validity. The sproof QES is legally 100% equivalent to a handwritten signature. It meets the strict requirements of the European eIDAS Regulation as well as the Swiss Signature Act (ZertES).
What is the sproof QES? The sproof QES is the solution integrated into sproof Sign for creating a personal qualified electronic signature. For the provision of this service, including the identification process, sproof works with the Trust Service Provider Swisscom Trust Services AG.
Why is identification necessary for the QES? To be able to use the sproof QES, a one-time identification is required. This process ensures that your digital signature is uniquely assigned to you as a person and thus receives the high legal recognition.
What is the Auto-Ident procedure? Auto-Ident is a fully automated identification procedure that does without a live video agent. It is a self-guided process in which you make a short video recording of your face and then scan your identity document. A technology automatically compares your face with the photo on the ID and checks the authenticity of the document. The procedure is eIDAS-compliant and can be carried out at any time.
What does "authorization" mean in the signature process? Authorization (or "approval") is the step by which you actively confirm a specific signature on a document after you have already identified yourself. Depending on the chosen method, this approval is done either by a push notification to your Mobile ID App or by confirmation using your personal Passkey (e.g. via fingerprint).
What do I need to start identification for the sproof QES?
-
License: You need a User+ license in sproof Sign.
-
Requirements: For the process itself you need a valid identity document (passport or ID card), a smartphone with a camera and a stable internet connection. A quiet place is also recommended.
What is the sproof eID Hub? The sproof eID Hub is an alternative to identification for the sproof QES. If you already have an existing eID with a European provider (e.g. ID Austria or the German identity card), you can use these credentials directly in sproof Sign to sign qualified without going through the sproof QES identification process.
Where can Plan Admins find more information about QES settings? Plan Admins can find detailed information about global settings for identification and signing with the sproof QES in the Academy module "QES settings for Plan Admins".