

💡 At a glance
In sproof Sign you can either sign, approve, or view a document or a document folder. This is managed via roles: As a ”Signer” you are authorized to sign a document. The role “Approver” means that you do not sign the document but must view it and then grant your approval. As a “Viewer” you are only allowed to view a document and cannot perform any actions. As the sender of a document/folder you assign these roles to your recipients. For document folders, a recipient can have a different role for each document in the folder. You can also add yourself as a recipient to a document and assign yourself a role. This is often implemented in combination with an order, for example if you want to approve the document as the final instance.
📑 Step-by-step guide
The Editor
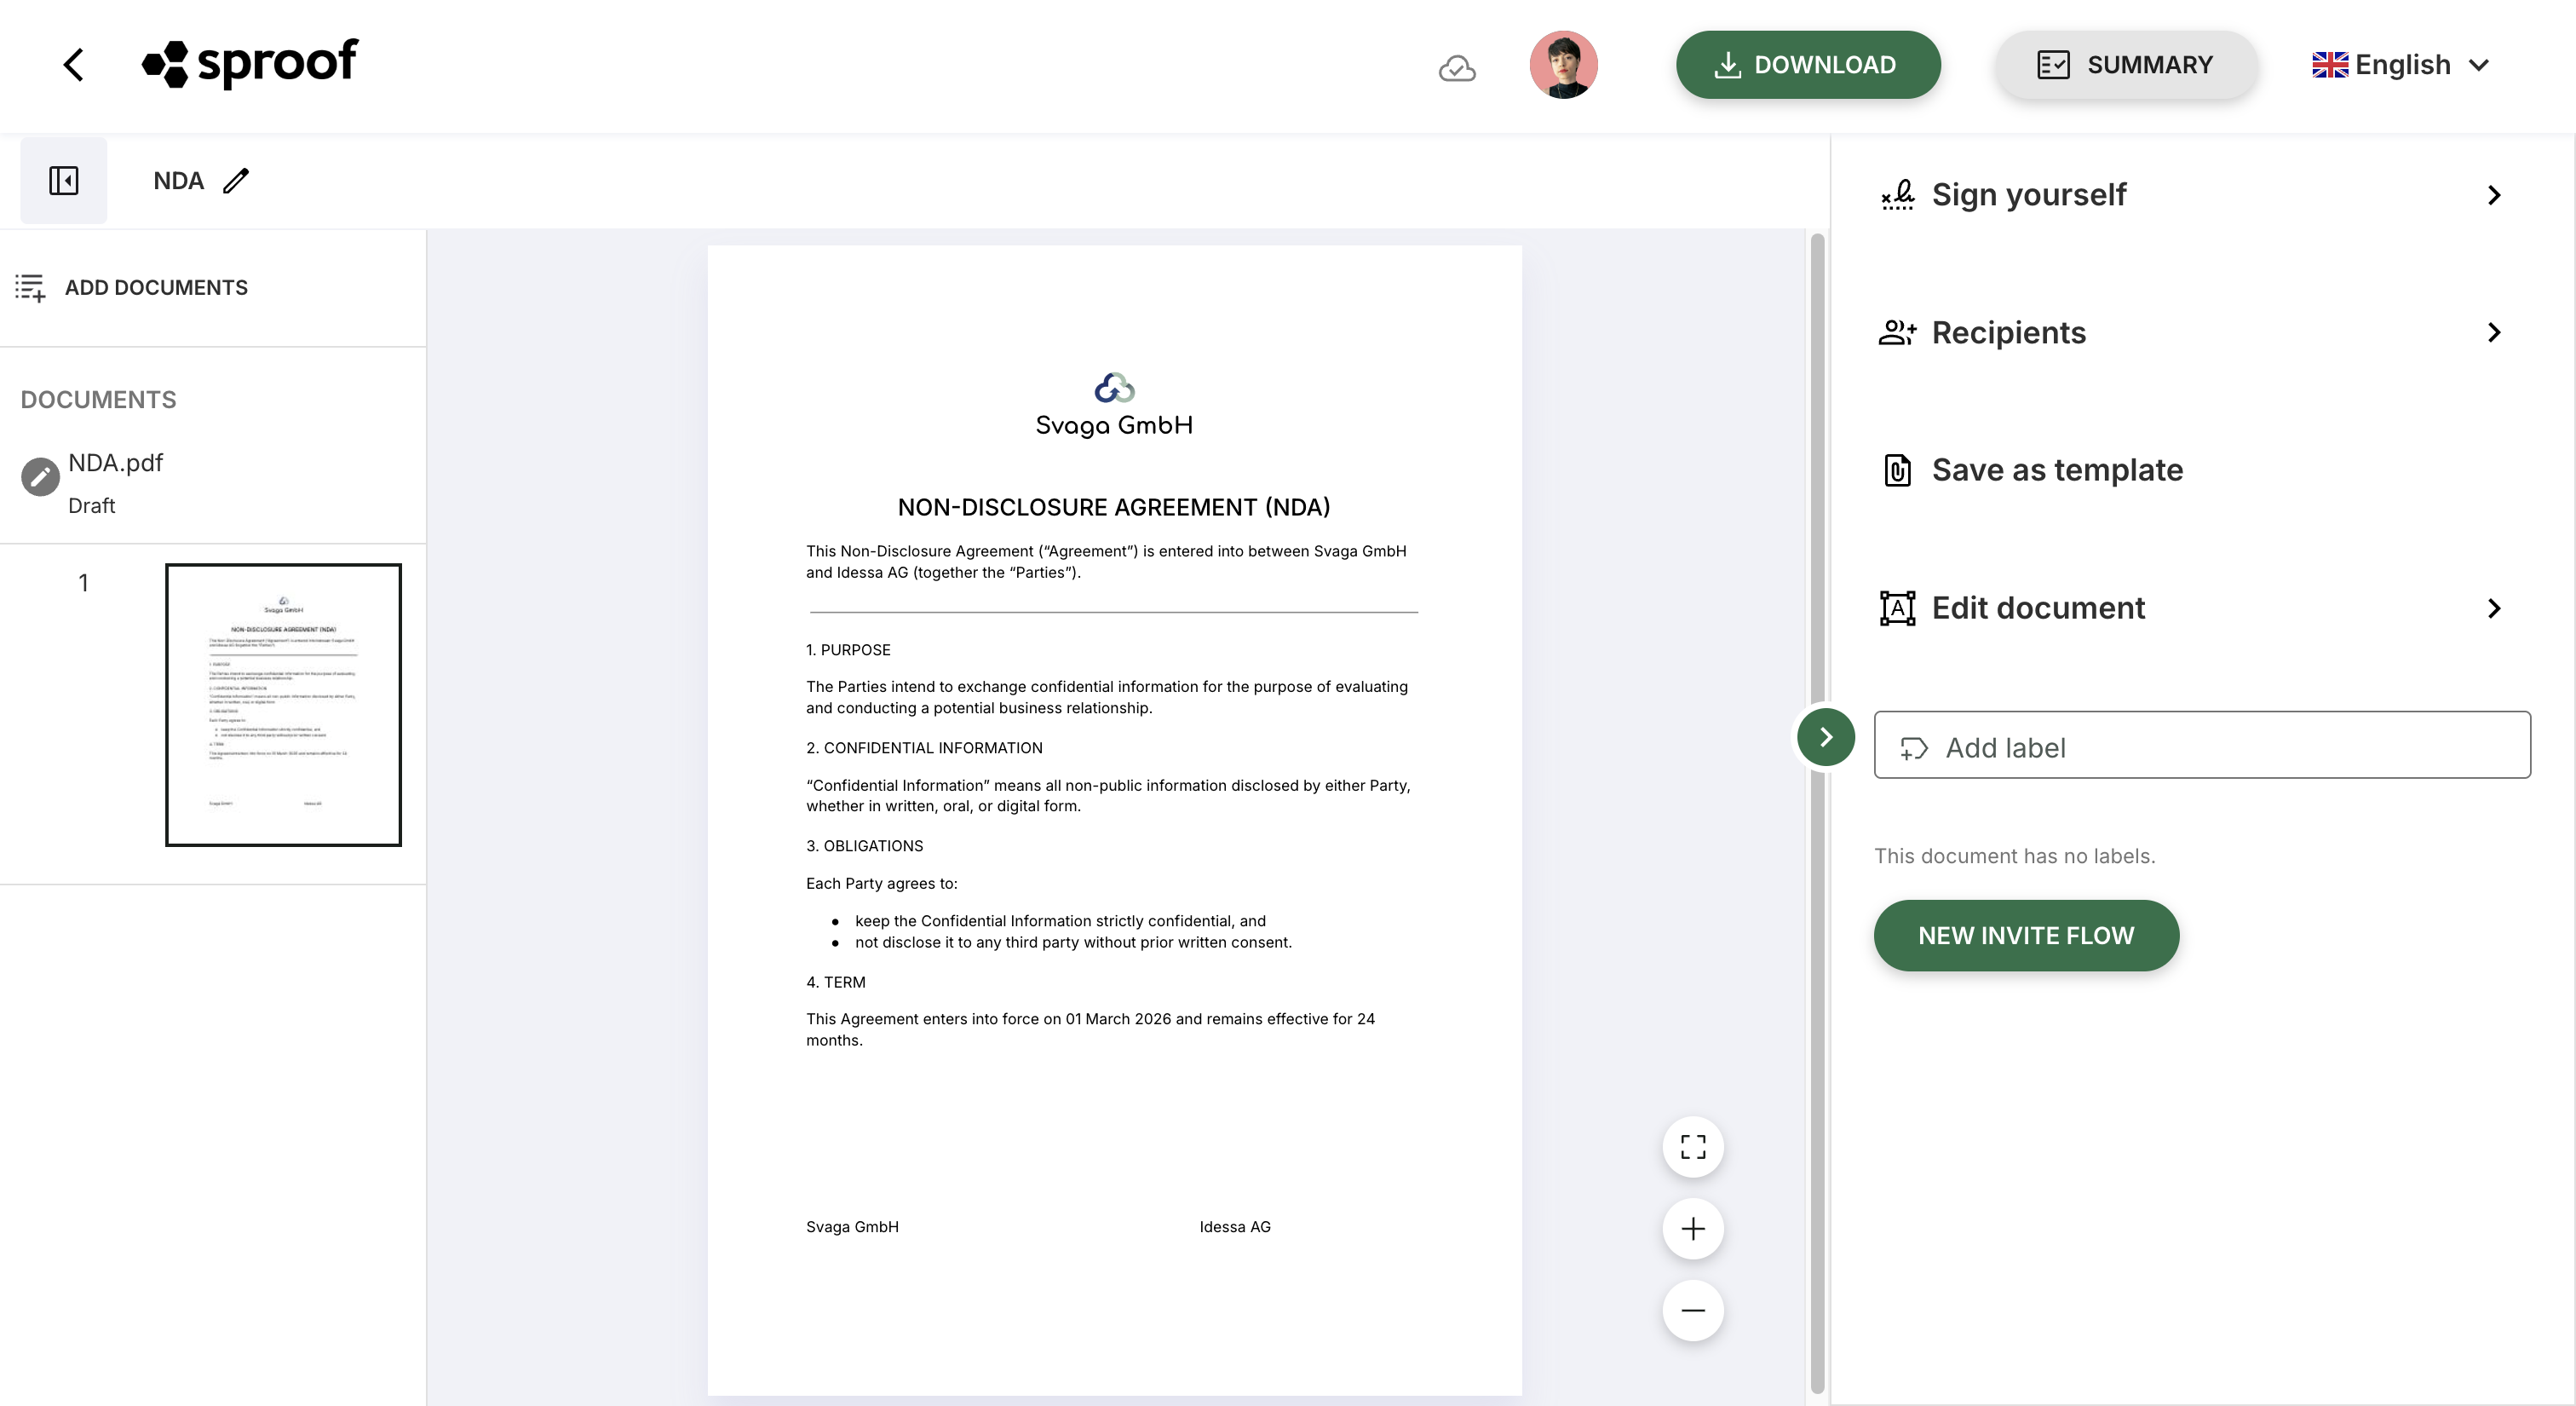
Before the three actions “Sign”, “Approve” and “View” are described, we will explain how to navigate the sproof Sign Editor. You get to the editor by opening a document from your dashboard or uploading one yourself:
-
Execute actions: In the right sidebar you can perform actions, such as signing yourself, placing form fields, inviting people, or sending messages in the chat.
-
Zoom settings: Use the three round buttons to adjust the size of the documents in the editor
-
Leave editor: Click the arrow icon in the top left of the navigation bar or the sproof logo to return to the dashboard.
-
Auto save: sproof automatically saves your changes. The cloud icon indicates that your changes have been saved successfully. During the saving process, the icon turns into two rotating arrows. If there are problems saving, you will see an icon with a crossed-out cloud.
-
User actions: Click your profile picture to open the user actions menu.
-
Download document: Click the “Download” button to download the current state of the document (including signatures already placed) as a PDF.
-
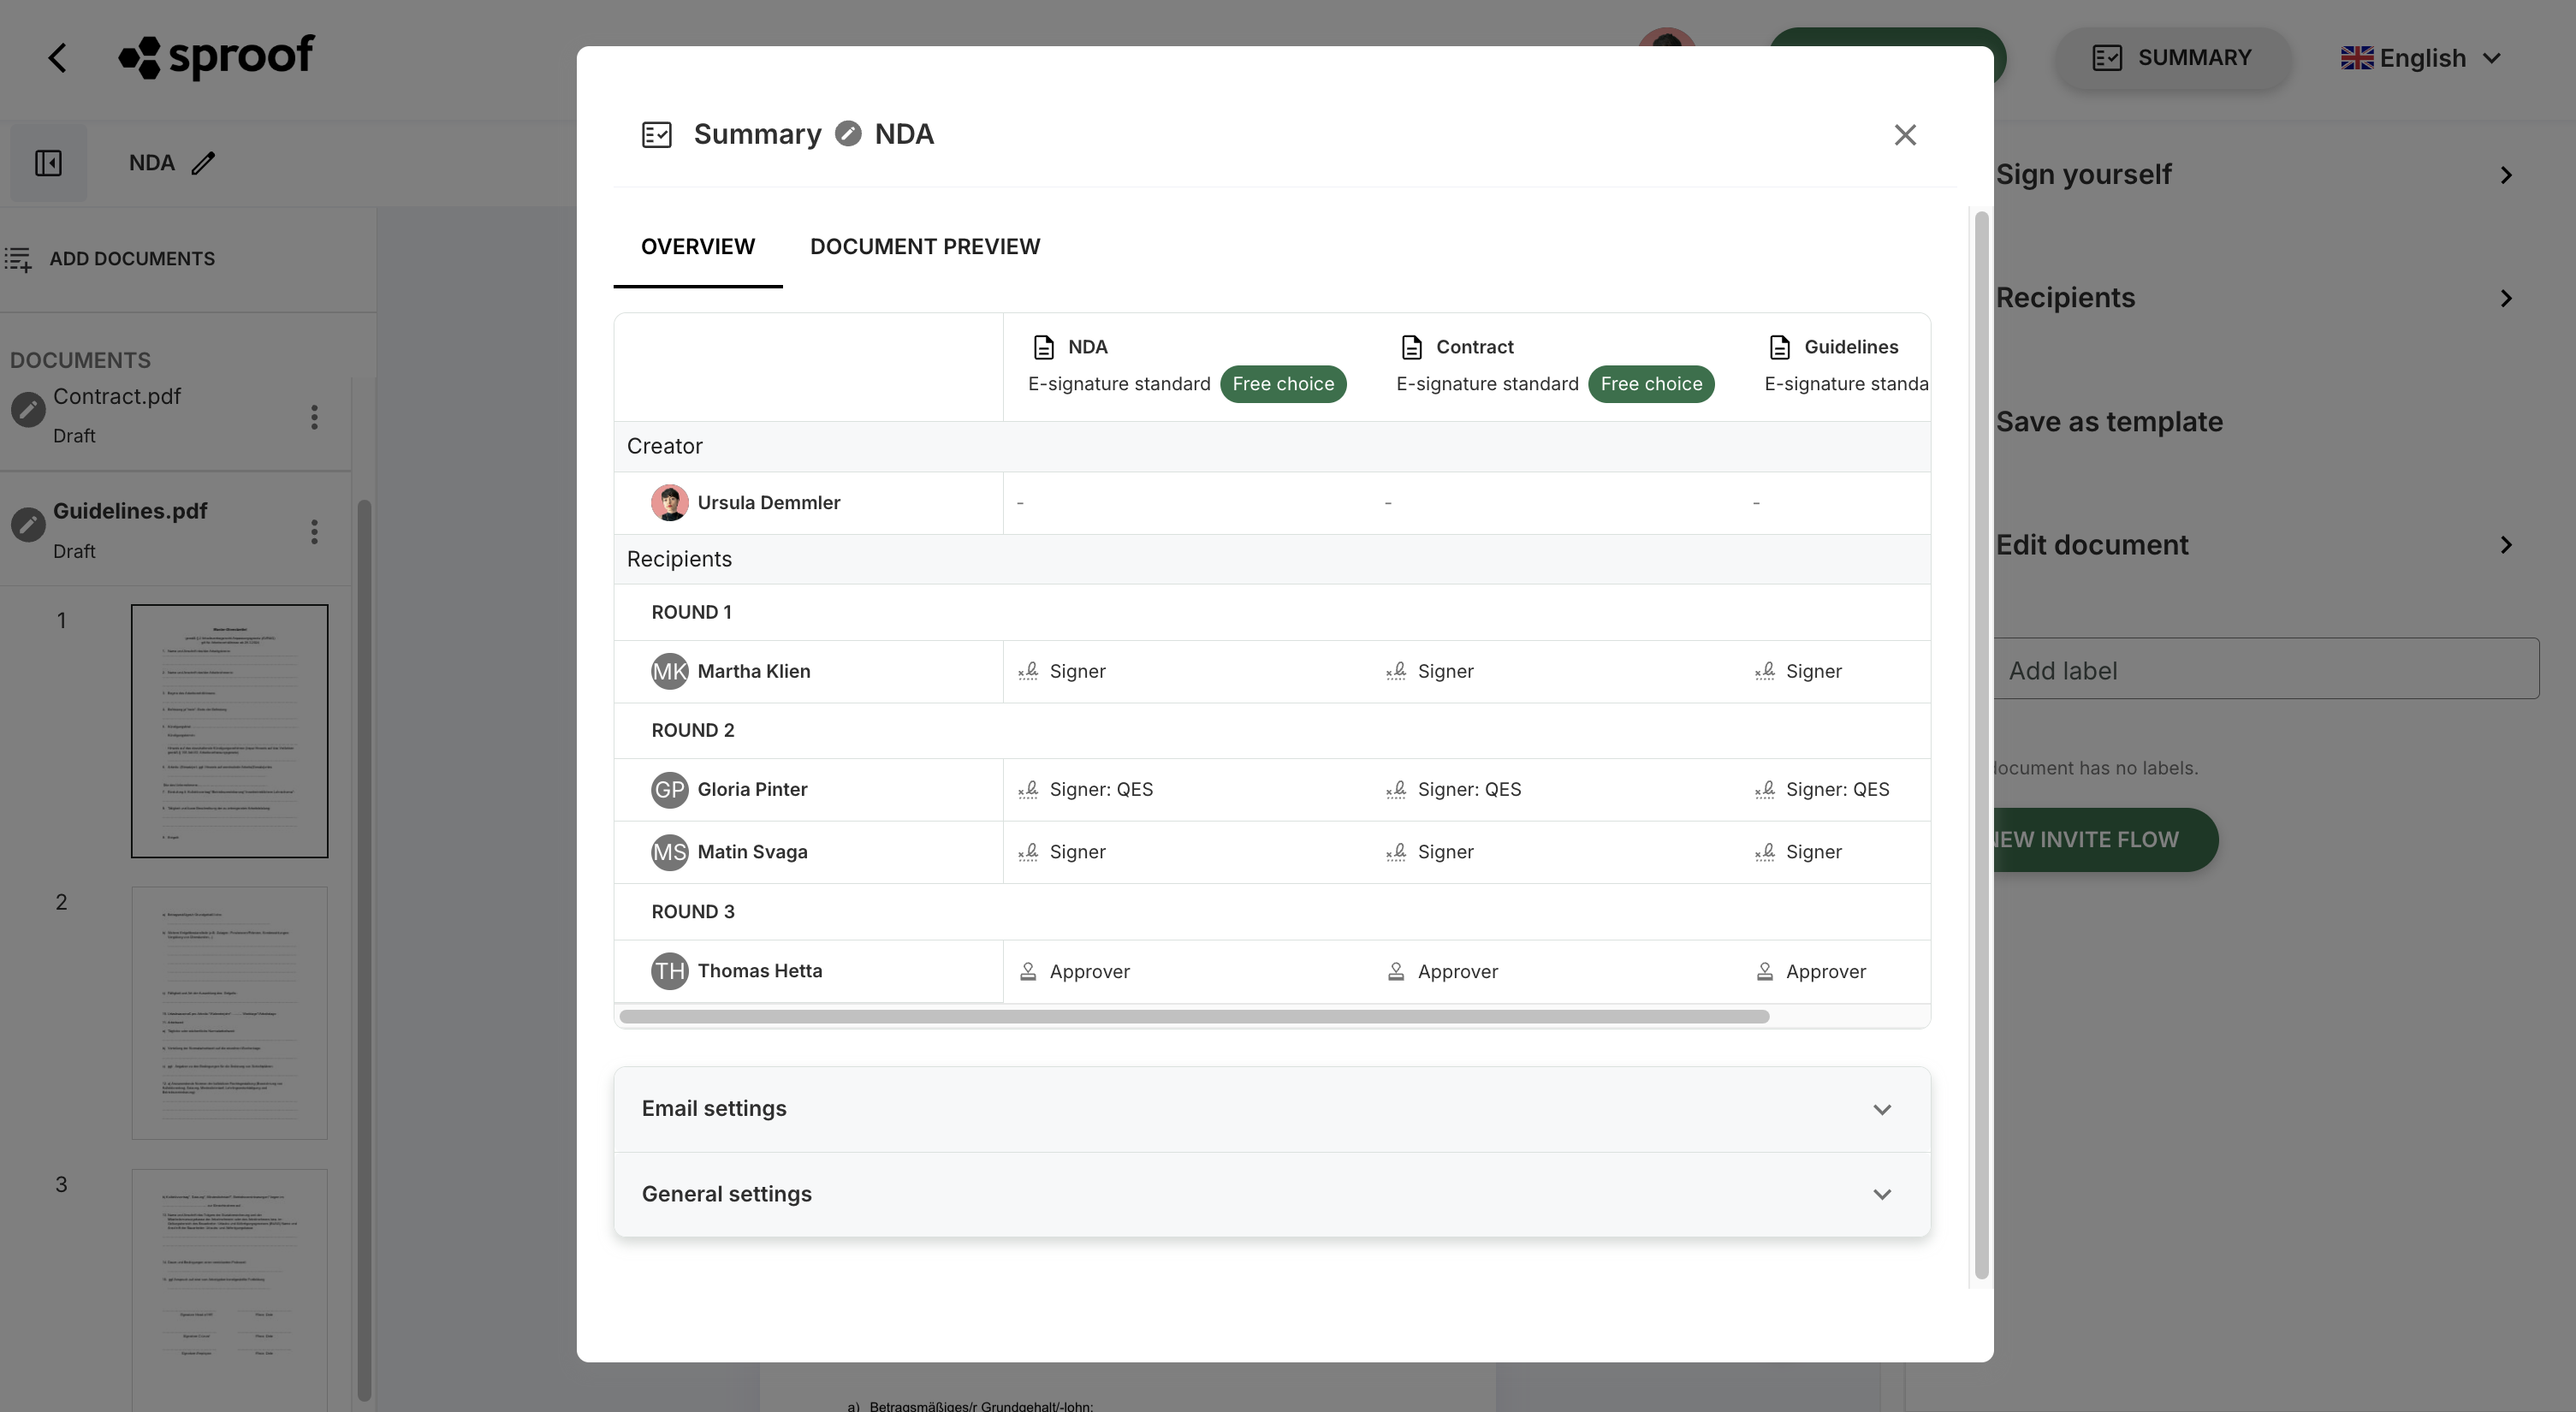
Summary: The “Summary” button opens a clear overview that shows you all details of the configuration (roles, rounds, e-signature standards). The second tab “Document preview” shows the document as it would currently look when downloaded.
-
Page thumbnail view: The left sidebar displays the pages of the document(s) as thumbnails. In a document folder you can convert documents in this area into an attachment or remove them from the folder. To collapse or expand the sidebar, click the collapse icon.
-
Rename document/folder: Click the pencil icon to change the name of the document/folder.
Sign
Upload the document yourself and sign
If you are authorized to upload and sign documents yourself, proceed as follows:
-
When you are logged in, click the “Upload document” button in the top bar.
-
Click the gray field to add your file(s) or drag & drop them into the field. Then click “Start now“. The document will open in the editor.
Note: sproof Sign supports a wide variety of file formats. When uploading, files are automatically converted into a PDF.

-
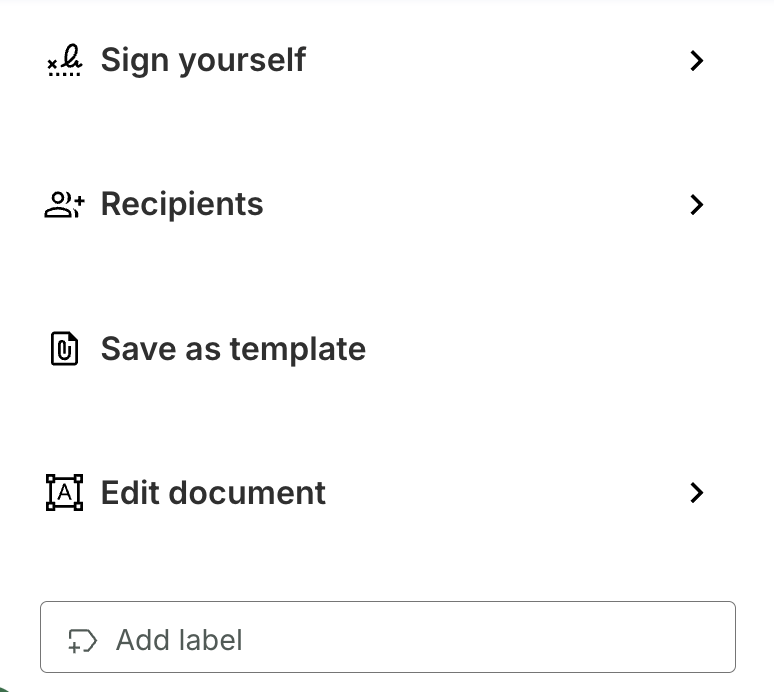
To sign the document, click the first entry in the right sidebar “Sign yourself”.
-
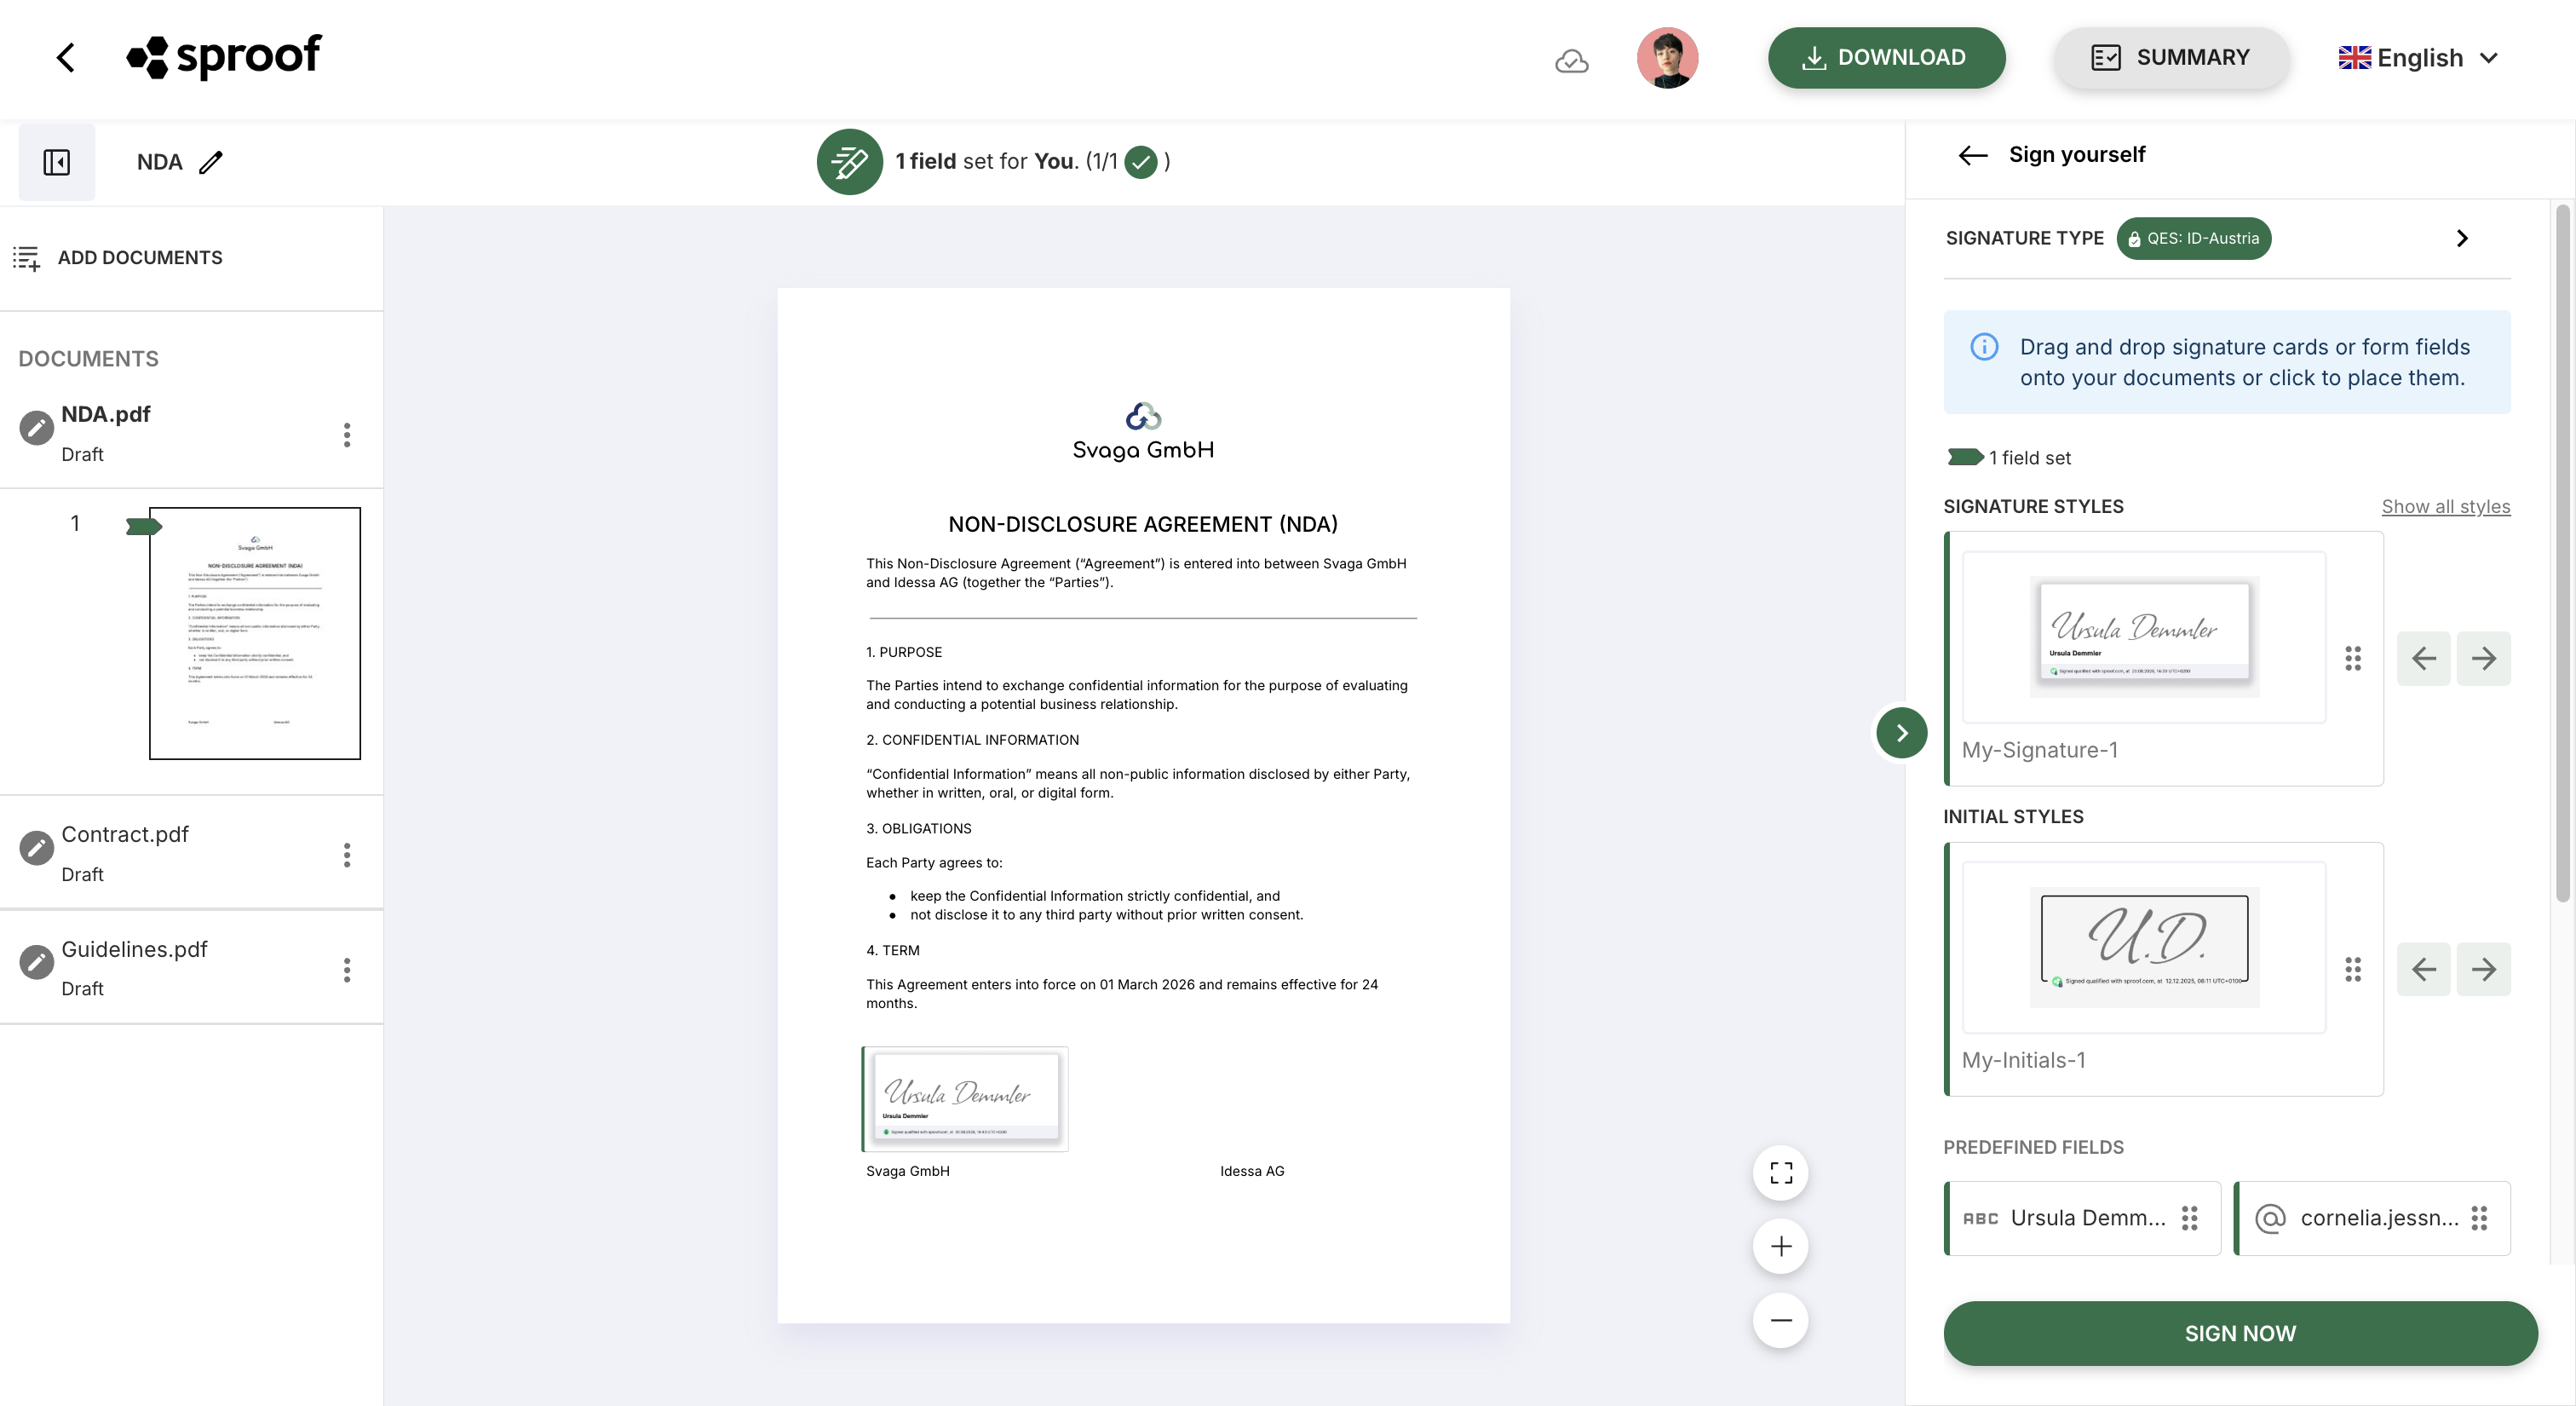
Then click “Type of signature” and first choose your desired signature provider or standard (Simple, Advanced, Qualified). You can search for a specific provider or filter by country.
Confirm your selection with the button “Apply & Back”. The back arrow brings you back to the main sidebar menu.
-> Learn more about signature types and providers in the modules E-Signature standards and eID Hub.
-
You come back one step and your chosen signature type will be displayed in green next to the “Type of signature” tab. Now choose a style for your signature and your initials with the arrows or create new styles. Your signature will be “stamped” onto the document in the selected style.
If you click “Show all styles”, all signature and initial styles will be shown, you can edit existing styles and create new ones.
-> Learn more about signature styles in the module Signature Style Setup.
-
In the final step you can place signature and form fields on the document (by drag & drop or double-click). At least one signature or initial field must be placed.
-> Learn more about form fields in the module Prepare forms.
-
Finally click the “Sign now” button.
Important: If you sign the document qualified, you must complete the signature with the corresponding second factor. Done!
Being invited to sign a document
If you were invited by another person to sign a document, proceed as follows:
-
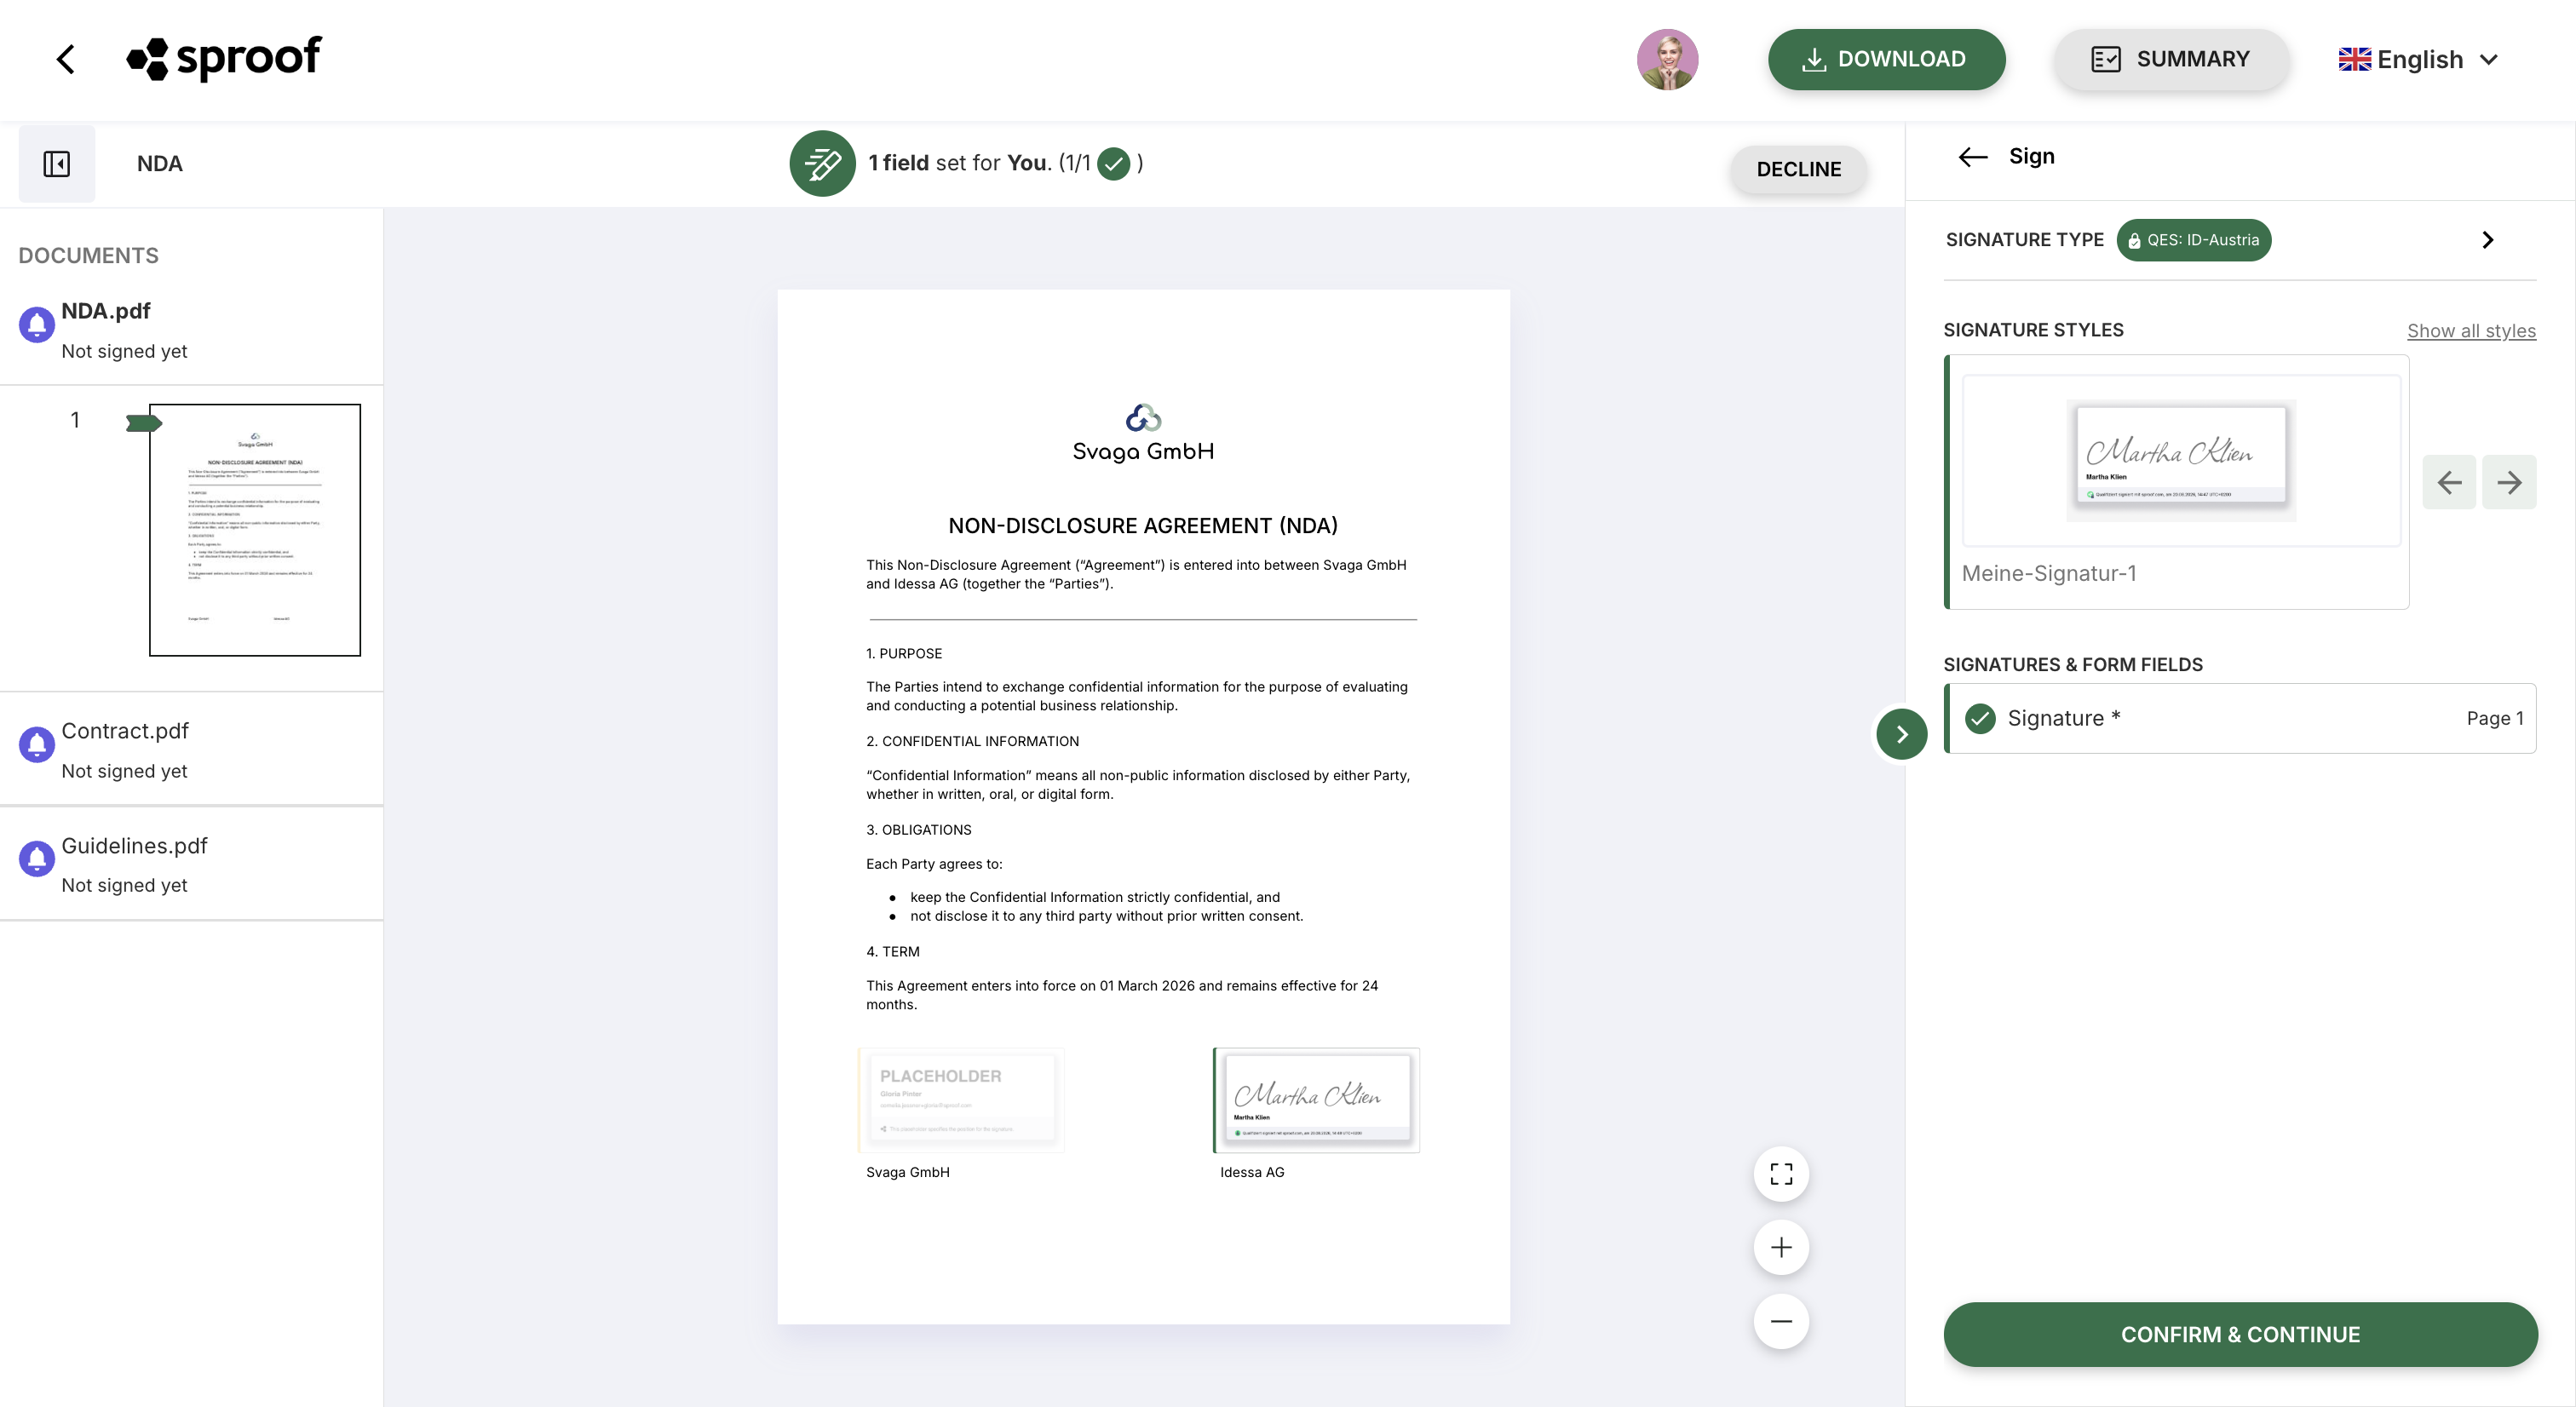
Open the document via the link in the invitation email or from your dashboard. You will land directly in the “Sign yourself” tab.
-
Under “Type of signature” choose the desired signature provider or standard – if this has not been specified by the sender.
-
Choose the desired style – unless your plan admin has specified a particular style.
-
You can fill in the form fields to be completed directly on the document or via quick access. Instructions on filling in form fields can be found in the module “Fill out forms“.
-
When you have filled in all (required) fields, click the “Sign now” button. Important: If you sign the document qualified, you must complete the signature with the corresponding second factor. Done!
-
If you do not want to sign a document, click the “Decline” button.
Approve
If you were invited to approve a document, proceed as follows:
-
Open the document via the link in the invitation email or from your dashboard.
-
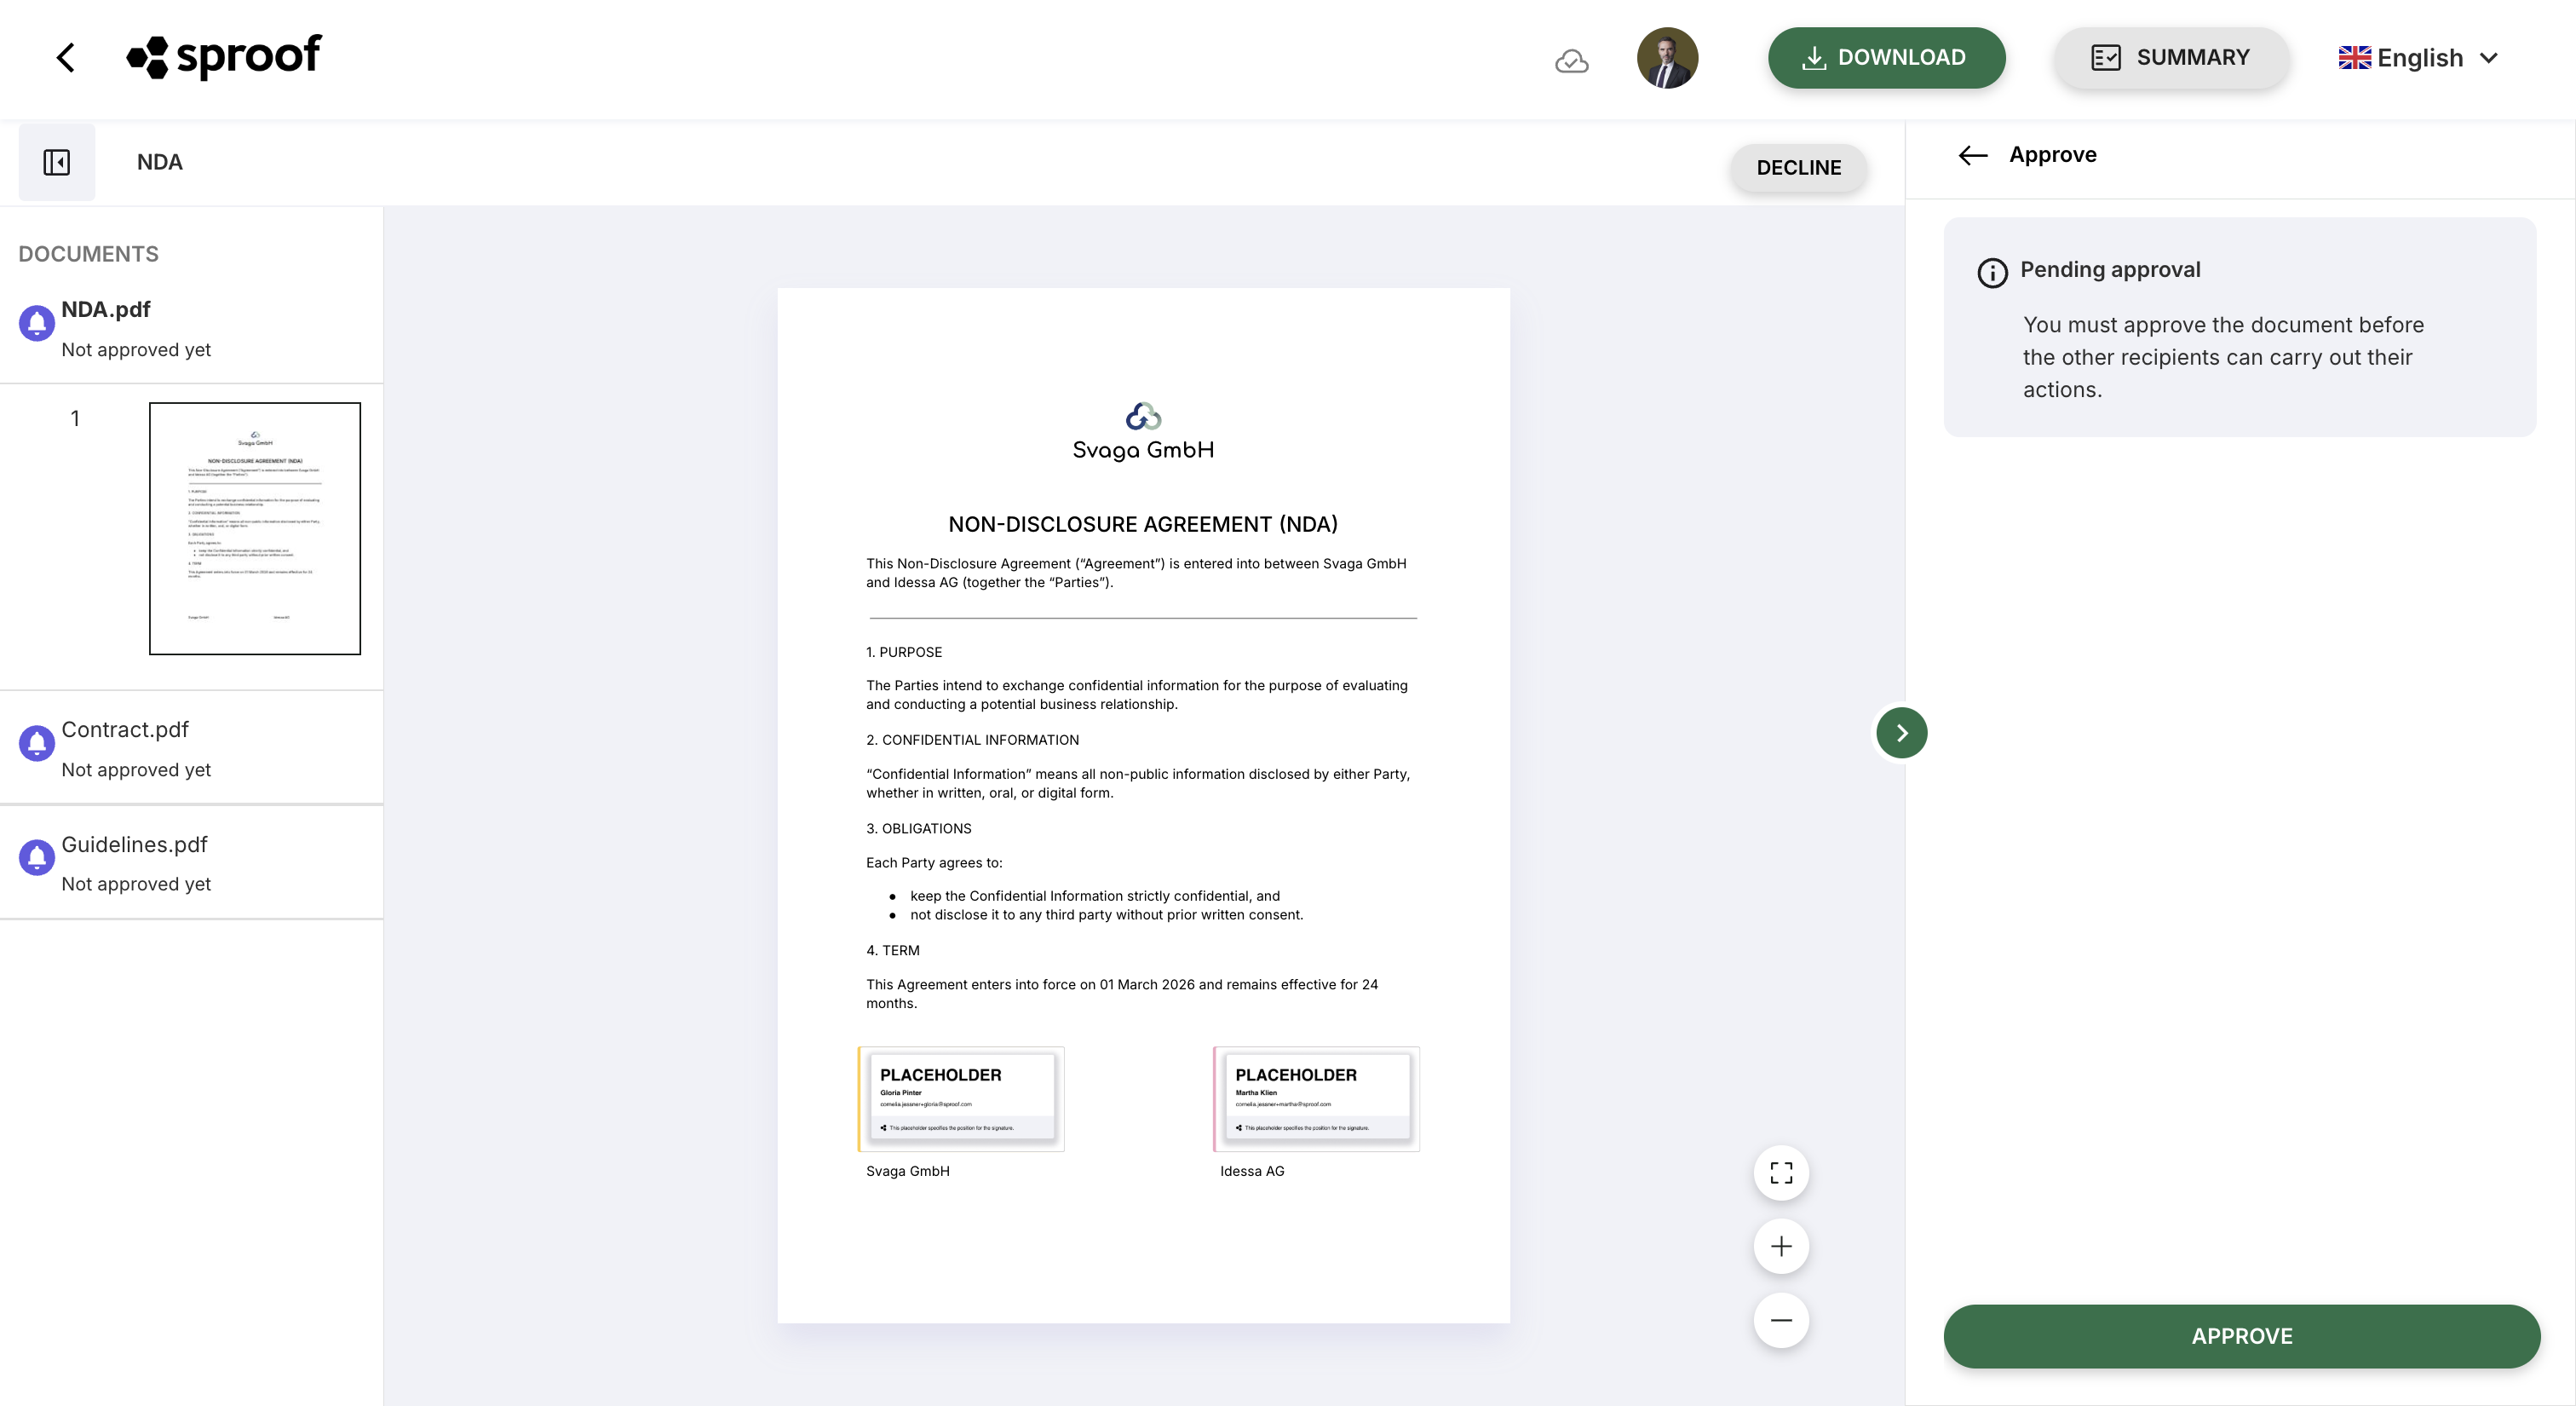
Navigate to the “Approve” tab in the right sidebar.
-
Read the document carefully and click the “Approve” button to grant your approval.
View
If you were invited to view a document, proceed as follows:
-
Open the document via the link in the invitation email or from your dashboard.
-
Done – Since you are only viewing the document and cannot perform any actions, your task is complete. You can continue to track the progress of the document.