

💡 At a glance
A form in sproof Sign is a document with input fields. Forms can be uploaded to, created in, and completed in sproof Sign. This allows you to cover and process a variety of use cases efficiently. Forms that you need regularly can also be saved as templates and reused.
Form fields can either be assigned to a specific person so that only that person can fill the field, or have the status “Unassigned”. These fields can be filled in by anyone who has the role “Signer” on the document — but only until the first person signs the document. Because with the signature the data from form fields on the document are committed. More information about filling in form fields can be found in the module “Fill out Forms”.
In our video tutorial we explain how you can efficiently create and send forms.
📑 Step-by-step guide
1. Place form fields on the document
If you want to add form fields that are not assigned to a specific person or if you want to add something to the document yourself, proceed as follows:
-
Upload a document/document package as usual.
-
Click the entry “Edit document” in the right sidebar.
-
There you will find a selection of form fields with a gray color indicator. The color shows that these fields are not assigned to anyone.
-
Place the desired fields on the document by drag & drop or by double-clicking.
-
After placing the form field, you can move it using the arrow keys on your keyboard or hold down your mouse and drag the field to the desired position.
Note: Fields of this type are not assigned to a specific person and can later be filled in by anyone who has to sign the document – but only until the first recipient signs the document. Then the data from unassigned form fields are committed. Fields that have not been filled in by then are not visible on the document.
Tip: The form field “Text (Fixed)” places read-only text on the document that cannot be changed by other people. This type of form field is well suited when you want to add text to a document before sending it.
If you want to place form fields for yourself, proceed as follows:
-
Upload a document/document package as usual.
-
Click the entry “Sign yourself” in the right sidebar.
-
After you have selected a signature type and a style, you can place form fields under “Form fields”.
-
Place the desired form fields with drag & drop or by double-clicking on the document. Some form fields are already populated with your data from the profile settings (e.g., name, email, company, date). This saves you time by not having to enter frequently used data separately.
-
When you select a form field by clicking on the document, actions for the field are displayed:
-
Click the pencil icon to open the settings for the form field.
-
Click the copy icon to duplicate the form field including content.
-
Click the A+ icon to increase the font size.
-
Click the A- icon to decrease the font size.
-
Click the trash can icon to delete the form field.
-
Note: If you place form fields in this way, you must also sign the document afterwards. Otherwise the data from the form fields will not be committed to the document.
If you want to add form fields for your recipients, proceed as follows:
-
Upload a document/document package as usual.
-
Click the entry “Recipients” in the right sidebar.
-
In the first step, add recipients and click the button “Next”.
-
(Optional) If you previously added form fields under “Edit document” that are unassigned, you will be asked whether you want to assign them to someone now.
-
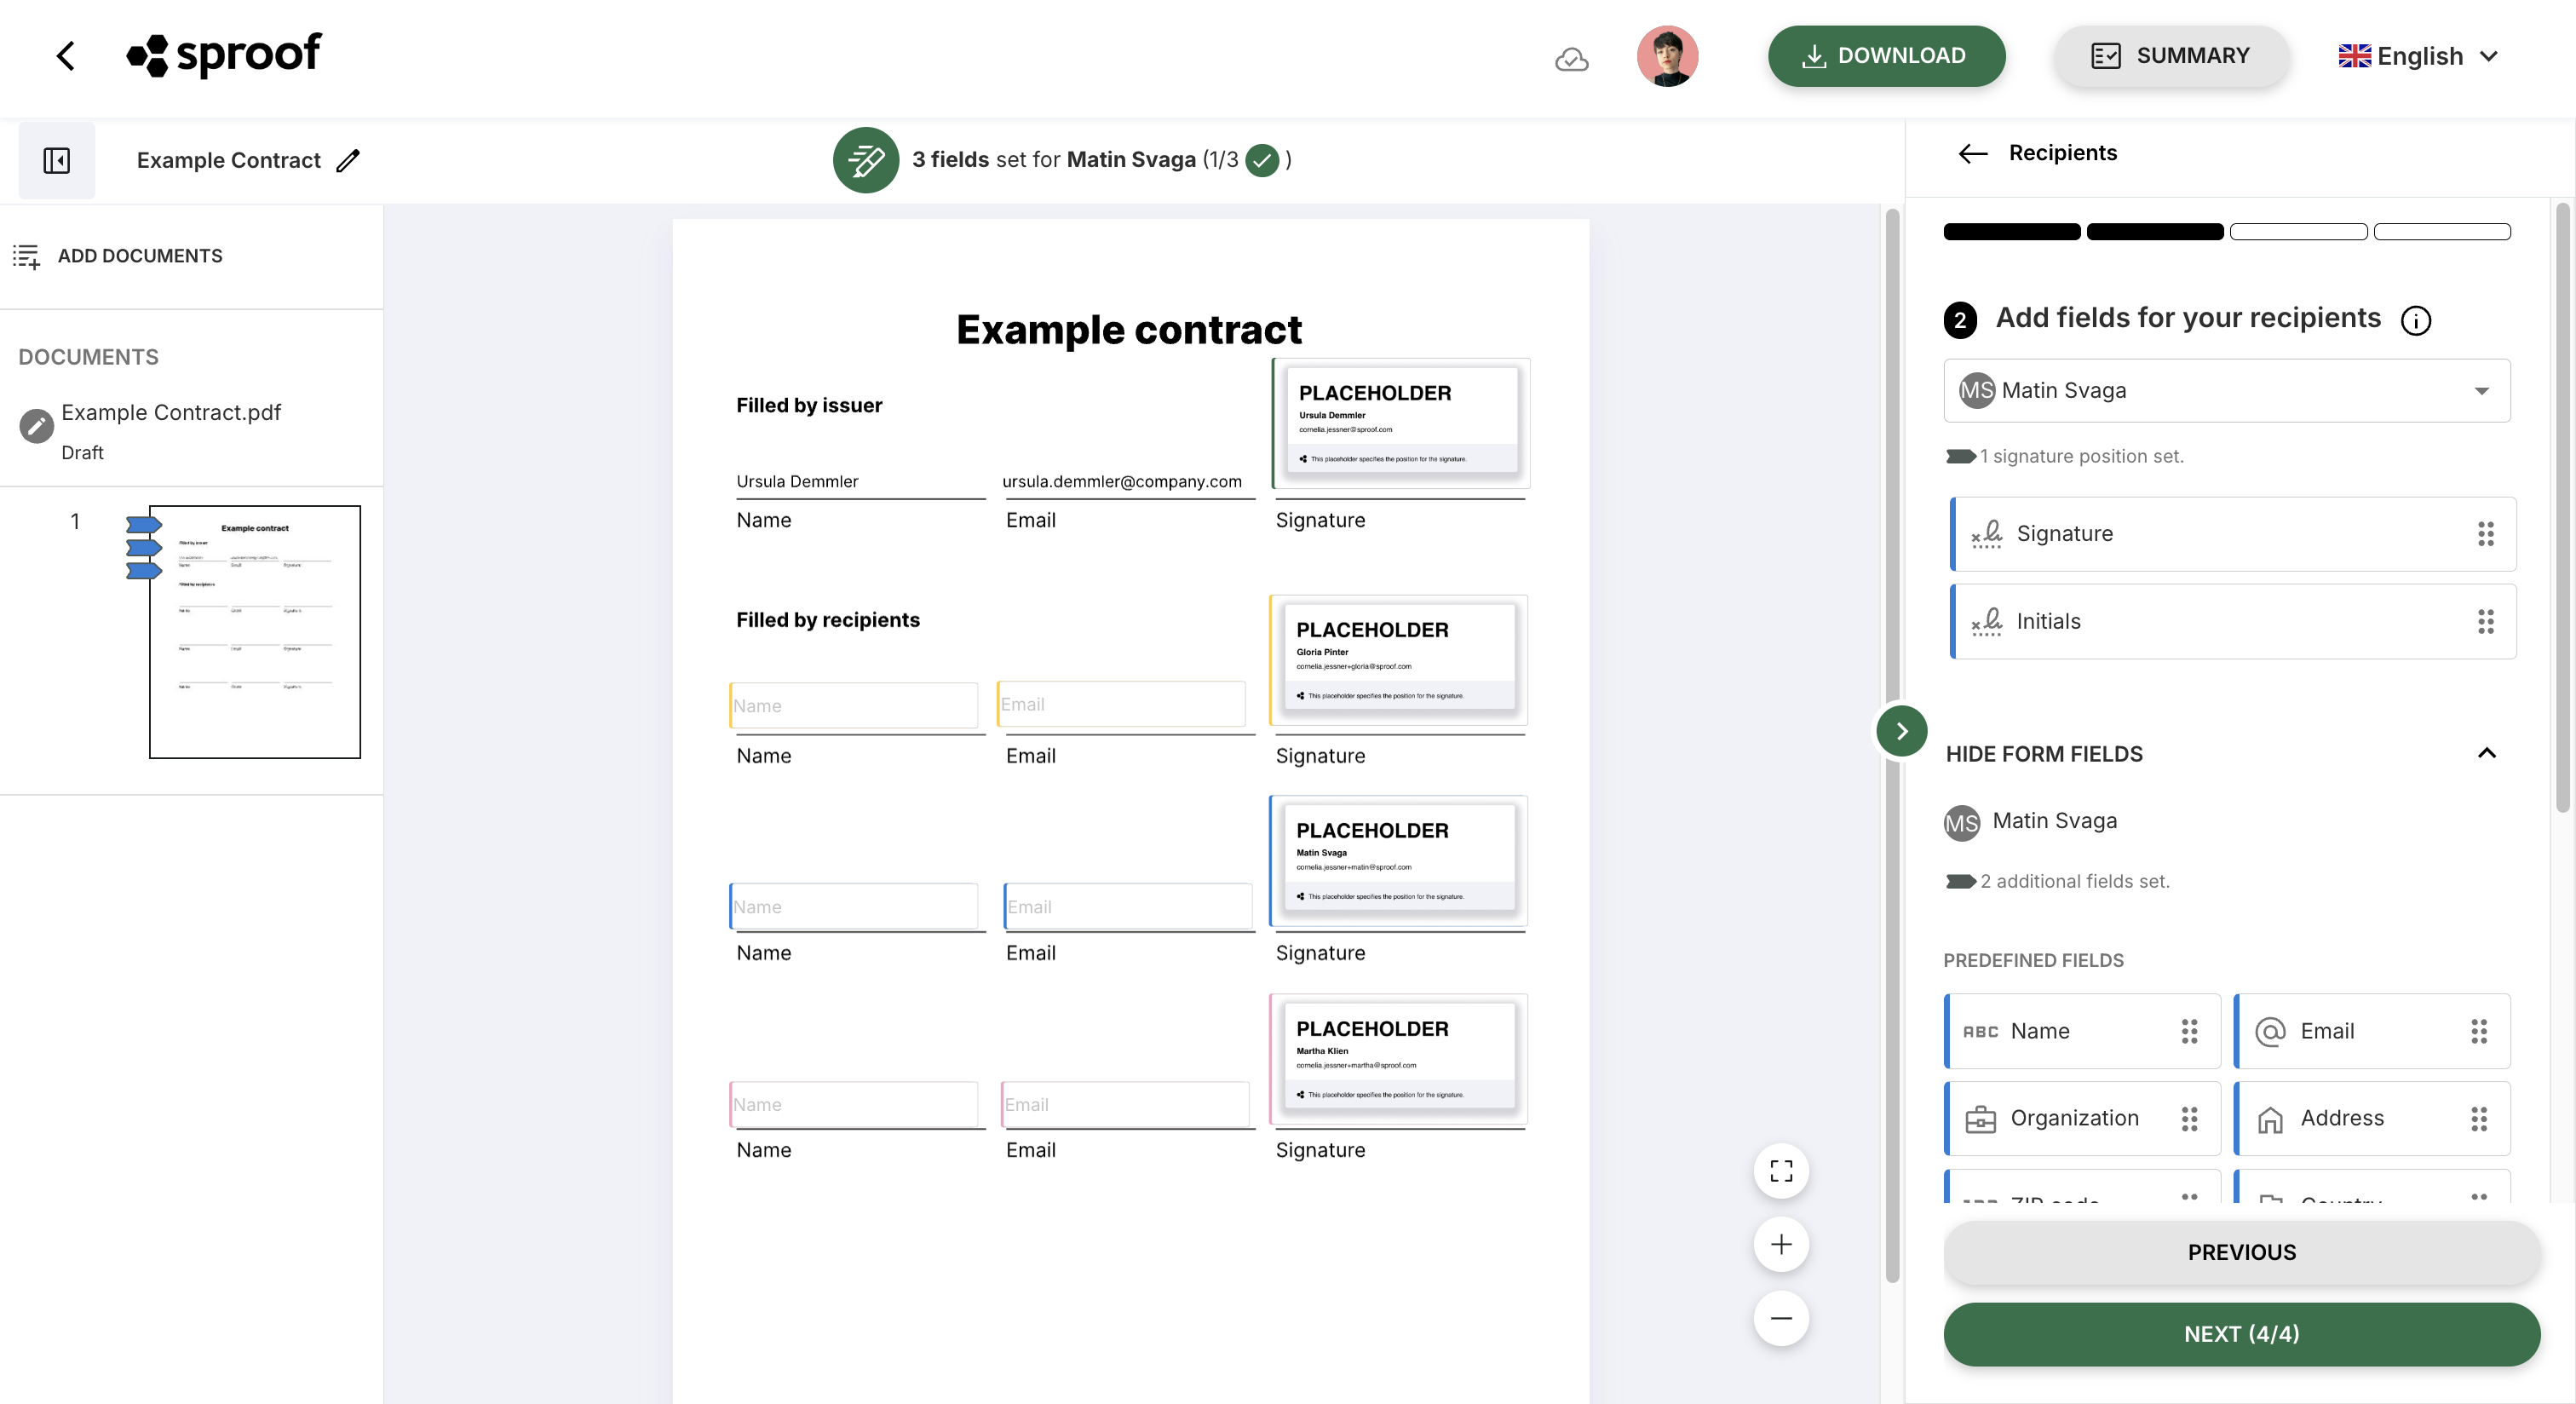
In the second step you can now add signature, initial, and form fields for each signer. In the dropdown above you can see which person is currently selected.
-
Additionally, you can check in the bar above the document how many form fields you have set for a person.
-
The number of set form fields for a person is also visible on the indicator icons in the left sidebar at the page thumbnail view.
-
After you have finished with the first person, click the button “Next recipient” or select the next person from the dropdown above. (only applicable if there is more than one signer)
-
Repeat this until you have set at least one signature/initials position and, if applicable, further form fields for all signers.
-
You can change the assignment of a form field by going to the field settings or by selecting it on the document and adjusting the assignment directly in the dropdown.
-
Then click the button “Next”.
-
Go through the remaining steps and send the invitations to your recipients.
Note: Each recipient has a unique color indicator so that form fields can be easily distinguished from one another.
Note: You can only add form fields for people with the role “Signer”.
2. Form field settings
Settings can be made for all fields except the signature or initials field. Proceed as follows:
-
Place the desired form field on the document.
-
When the field is selected, click the pencil icon to open the settings for the form field.
-
In the right sidebar you can now make settings:
-
Enable the checkbox “Required” to make a field mandatory.
-
Enable the checkbox “Multiline” to allow more than one line of text for the form field.
-
In the field “Content” you can fill the form field.
-
In the field “Font size” you can set the font size.
-
For some fields (e.g., checkboxes, selection fields, …) there are additional specific settings that are necessary for that type of field.
-
3. Uploading a document with existing form fields
If you upload a document that already contains form fields, these will be recognized by sproof Sign. Proceed as follows:
-
Upload the document with the existing form fields to sproof Sign.
-
A window will open. Choose one of the following options:
-
Import fields: The form fields will be imported and placed on the document as unassigned fields (gray). You can assign them to someone later or fill them directly.
-
Commit fields: If the form fields were already filled in another tool (e.g., Adobe Acrobat Reader), you can commit the entered data directly to the document. They can no longer be edited afterwards.
-
Delete fields: All recognized fields and their content will be removed from the document.
-
→ Detailed information about filling in form fields can be found in the module Fill out Forms.
4. Define fields in the source document (placeholder syntax)
You can define signature and form fields already when creating your document (e.g., in Microsoft Word) by inserting special placeholder texts. sproof Sign recognizes these automatically when uploading and converts them into the corresponding fields.
Signature placeholders: To set a signature position for a person, use the format {sproof{FirstName,LastName,Email,Order}sproof}. For example, if you want Max Mustermann to sign first, write: {sproof{Max,Mustermann,max@sproof.com,1}sproof}. You can also format the text in white font color so that it is invisible in the document but still recognized.
Form field placeholders: For input fields such as textboxes or checkboxes use the format {sp{Type, [optional] Label, [optional] Content, [optional] Recipient-Email, [optional] Required}sp}. The "Type" defines the kind of field: "TB" for textbox, "IB" for IBAN, "DB" for date field and "CB" for checkbox. An example of a required textbox for the name would be: {sp{TB, Name, , , true}sp}.
Further details and examples of the placeholders can be found in the following documents:
FormField-Demo.pdfPlaceholder.pdf