

💡 At a Glance
The sproof Dynamics 365 Integration extends existing Dynamics 365 Model-driven Apps with signature workflows using sproof Sign. Users can directly from Dynamics select PDF documents from SharePoint or Dataverse Notes, add a recipient, and either send documents immediately or prepare them in sproof first. Upon completion, signed PDFs are automatically saved back to their original storage location. Currently, Account and Contact records are primarily fully supported. For other record types, an additional manual integration into the Command Bar is required.
You need an sproof API Key to use it.
📑 Step-by-Step Guide
Important: The Dynamics integration is currently under review by Microsoft and will soon be available directly in Dynamics 365. Would you like to use the integration now? We are happy to provide the sproof Dynamics 365 Integration package to import into your environment in advance.
Contact us anytime. We will support you personally with the setup!
📧 Contact: support@sproof.com
🤝 We look forward to your inquiry!
Once you have received the import package from us, start as follows:
1. Import solution
First import the solution sproof Dynamics 365 Integration into your Dynamics environment.
During the import, make sure the option Enable Plugin steps and flows included in the solution remains enabled.
1.1 Set Connection References
Specify the required Connection References during the import:
-
Microsoft Dataverse
-
Microsoft SharePoint
-
sproof Sign
-
Power Automate Management
1.2 Configure Environment Variables
Then configure the Environment Variables:
-
Callback URL: Leave this field empty for now. The URL will be set automatically in a later step.
-
Primary Document Storage: You can keep the default value all or choose another option according to the variable description.
-
Editor Base URL: Keep the existing value.
-
Upload Audit Trail: Configure this option if required.
1.3 Set Callback URL automatically
After completing the import, the message “1 environment variable need to be updated” may appear. Then run the setup flow sprf_ConfigureIntegration.
If your connections are configured correctly, this flow sets the Callback URL automatically. It will then be used for sproof Signature and Prepare requests.
Important: Check the value of the Environment Variable sproof Callback URL. The value should be in the following format: https://38cc0f3e…
1.4 Activate Cloud Flows
If Dynamics did not automatically activate the imported Cloud Flows, activate them manually.
1.5 Assign security role
Assign the relevant Dynamics users the security role sproof Sign User.
-
Open the Power Platform Admin Center.
-
Go to the settings of your environment.
-
Open Users + Permissions → Users.
-
Select the relevant users.
-
In the Manage security roles menu, enable the sproof Sign User role.
2. Set up Page Integration for supported record types
For supported record types such as Account and Contact, the integration can be embedded directly into your Model-driven App.
2.1 Open App Designer
Open your Model-driven App in the App Designer.
2.2 Add sproof Custom Pages
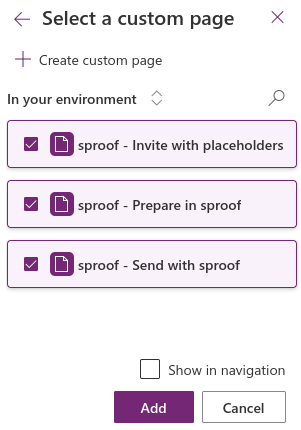
Click Add Page → Custom Page and add the three sproof Pages. Do not enable these Pages to be shown in the regular navigation for users.
2.3 Save and publish changes
Save and publish the changes in the app.
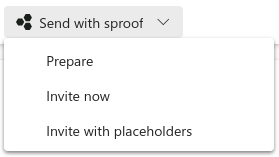
2.4 Check dropdown menu
The dropdown menu should now be visible in supported record types.
3. Set up Page Integration for other record types
Other record types do not automatically display the Sign with sproof menu. However, you can manually add the integration via the Command Bar.
Important: For other record types the sproof Signatures tab/subgrid is not shown automatically. Also, writing back signed documents to Dataverse Notes is not supported. For SharePoint documents, however, this function is possible.
3.1 Open App Designer
Open your Model-driven App again in the App Designer.
3.2 Check that sproof Custom Pages are present
Ensure that the sproof Custom Pages have already been imported. They should still be hidden from the normal navigation.
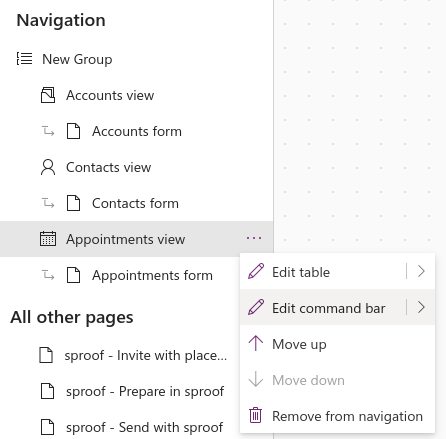
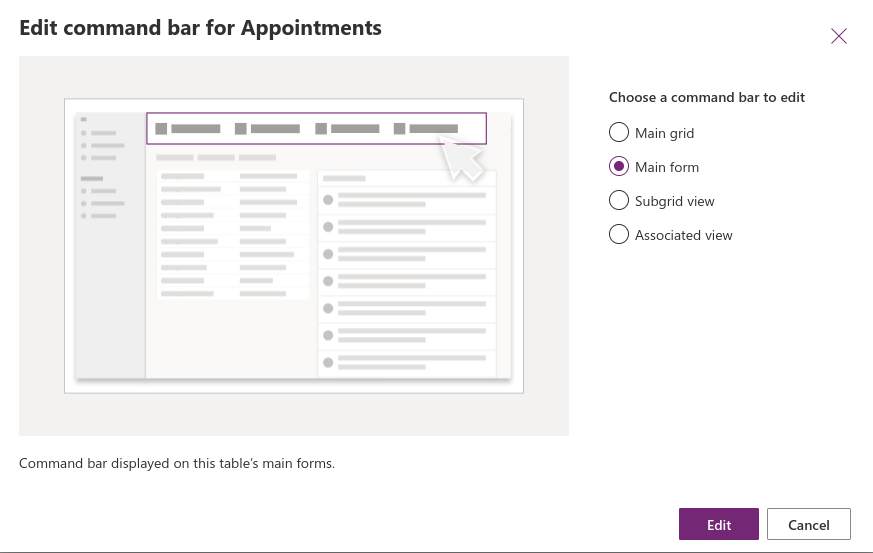
3.3 Open Command Bar Editor
In the navigation, open the Command Bar Editor and select the Main Form.
3.4 Add Dropdown Command
Add a new Dropdown command in the top left and place it where desired. Alternatively, you can place a single command if you only want to use one of the three functions.
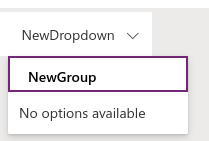
3.5 Configure grouping
If needed, you can name the grouping or hide it using the Hide Title option. In the normal dropdown it is hidden.
3.6 Set Dropdown properties
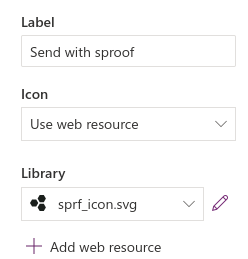
Set the properties of the dropdown. The sproof icon should be selectable. If it is not available, add it first via the Add web resource dialog.
3.7 Create new JavaScript Command
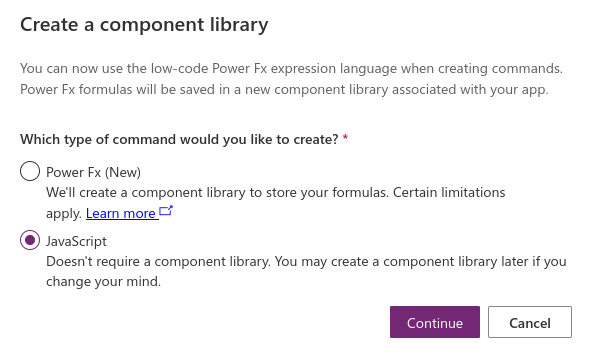
Within the dropdown, create a new Command and set it to JavaScript.
3.8 Configure "Prepare" Command
First create the Prepare command. Set the Function Name to Sproof.openPrepare and apply the properties as shown in the screenshot.
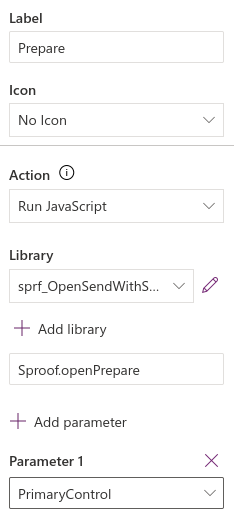
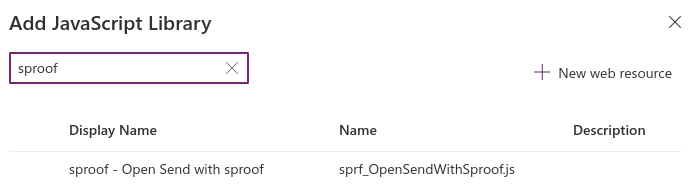
If necessary, add the correct library. For this, select sproof - Open Send with sproof.
3.9 Configure "Invite now" and "Invite with placeholders" Commands
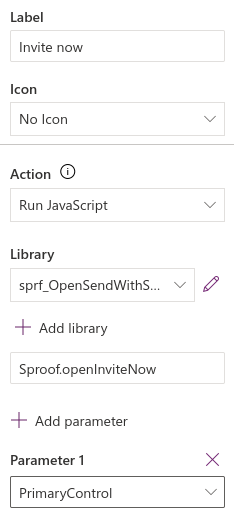
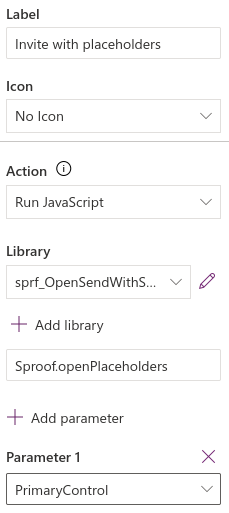
Repeat the steps for the Invite now and Invite with placeholders commands. Use the respective properties shown in the screenshots.
3.10 Save, publish and test
Save and publish the app. Afterwards the dialog should be available in the Command Bar of the form.
Important: Full signature support for other tables additionally requires backend Flow support as well as a Sign Tracker Relationship for the respective target table.
4. Use documents with sproof from Dynamics
After setup, users can use the sproof features directly from Dynamics. Depending on configuration, features such as Prepare, Invite now and Invite with placeholders are available.
-
Open a supported record in Dynamics, for example an Account or Contact.
-
Select the desired action via the sproof dropdown.
-
Select the PDF documents to be signed. Documents can come from SharePoint, from Dataverse Notes, or from both sources simultaneously.
-
Add a recipient.
-
Send the document directly or prepare it in sproof first.
-
Then track the signature status in Dataverse.
-
Upon completion, the signed PDFs will be synchronized back with the original SharePoint document or original Note, where supported for the given record type.