

💡 At a glance
As a plan admin you control the use of the Qualified Electronic Signature (QES), the highest signature standard for the entire plan. The QES is legally equivalent to a handwritten signature. Electronic signatures in Europe are governed by two central regulations: the eIDAS Regulation, which establishes a uniform legal framework for electronic signatures across the European Union, and the ZertES Act, which sets the corresponding rules for Switzerland. This module explains the basics of how to centrally configure the available QES options via role management and what your plan members can expect during the identification process.
sproof Sign offers two ways to QES:
-
The sproof QES: The deeply integrated solution that enables exclusive features such as qualified batch signing. The sproof QES is reserved for sproof customers.
-
The eID Hub: An interface that allows all sproof Sign users (including external users invited to sign) to use their existing electronic identity from various European eID providers (e.g., ID-Austria, German ID card, etc.).
-> Details can be found in the module “eID Hub”.
📖 Basics for plan admins
What is the sproof QES?
The “sproof QES” is the deeply integrated qualified signature in “sproof Sign”, for which plan members can identify themselves directly via sproof Sign. Each plan in sproof Sign optionally has a quota of so-called “sproof QES” certificates. To be able to use the sproof QES, individual plan members need a user account and a User+ upgrade, which includes the necessary identification procedure for the sproof QES.
Once the mentioned plan members have completed the identification procedure, they can sign with the sproof QES.
For the “sproof QES” sproof GmbH collaborates with Swisscom Trust Services AG.
The benefit for your team lies in the seamless integration of the QES into the platform, enabling exclusive features such as qualified batch signing. This allows your plan members to validly sign multiple documents with a single confirmation and work significantly more efficiently.
-> A detailed explanation of batch signing can be found in the module “Batch Signing”.
Important note for existing customers
The new Swisscom API (Swisscom MAB) offers extended QES identification and authorization methods, which have been available in sproof Sign since October 2025. These new procedures are described in this module.
The previous video identification procedure via Mobile ID can still be used until 15.02.2026 and will then be discontinued by Swisscom.
Information about the existing (phasing-out) QES setup can still be found in the module “QES Identification”.
📑 Step-by-step guide
Central control of QES configurations in role management
As a plan admin you centrally control in the rights and role management which QES configuration is available to your plan members per role.
Only plan members with a User+ upgrade can sign with an sproof QES.
How to change the QES configuration for a selected role:
-
Navigate in sproof Sign to “License & Team” and then to the “Role Management” tab.
-
Click the “Create role” button or edit a role you have already created under the 3-dot icon.
-
Within the function “Sign and approve documents” define the specific QES configurations that should apply to this role.
-
When you assign a role configured this way to a plan member, only the options you allow will be shown to them when signing.
An sproof QES configuration determines:
-
In which legal area (jurisdiction) the QES are valid.
-
Which signature provider (QTSP) issues the signatures.
-
How plan members authorize (confirm) the QES signatures.
-
By which method plan members obtain the digital certificate required for the QES (identification).
Currently identification via Webident is the only option, which is why there are no selection choices available in the settings.
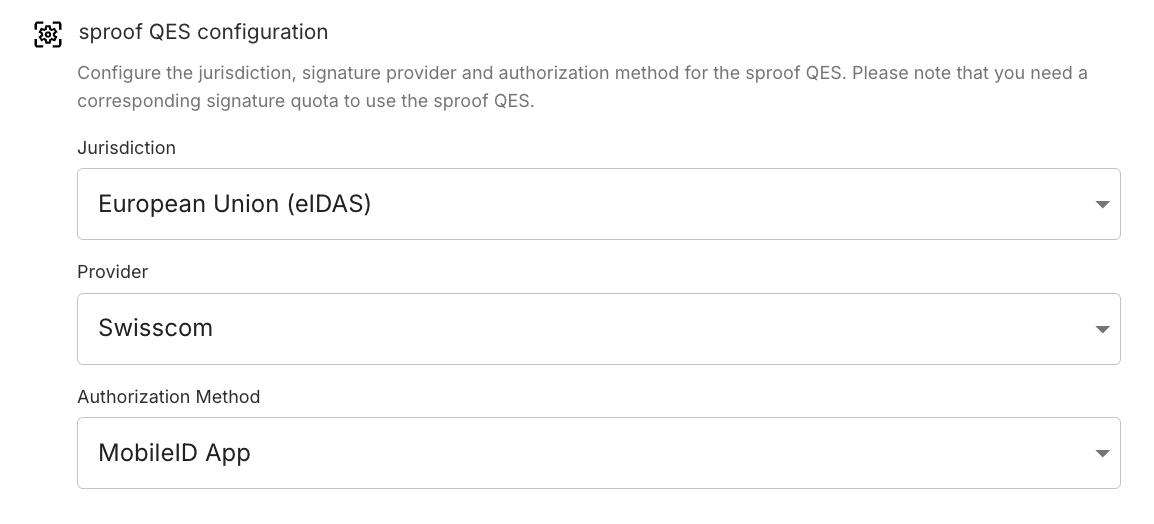
-> A detailed guide on creating and assigning roles can be found in the module “Rights and Role Management”.
The sproof QES configurations in detail
There are currently four possible configurations for the sproof QES in sproof Sign. A configuration determines how plan members identify themselves, how they release (authorize) qualified signatures, in which legal area (jurisdiction) the signature is valid, and which QTSP issues the signatures.
|
sproof QES configuration |
sproof QES provider (1) |
Identification method (2) |
Authorization method (3) |
Jurisdiction (4) |
|
A |
swisscom |
Webident |
Mobile ID |
eIDAS |
|
B |
swisscom |
Webident |
Mobile ID |
ZertES |
|
C |
swisscom |
Webident |
Passkey |
eIDAS |
|
D |
swisscom |
Webident |
Passkey |
ZertES |
Video tutorials: The setup of the sproof QES is jurisdiction-independent. For the two possible identification methods, you and your plan members will find step-by-step video guides here for each method.
sproof QES provider (1)
sproof Sign works with the certified trust service provider Swisscom for issuing your qualified certificate.
QES identification methods (2)
For this, sproof Sign uses the web-based AutoIdent procedure from Fidentity, a partner of Swisscom Trust Services AG. This procedure enables a fast, secure, and fully digital verification of the identity of all plan members. Below you will find a step-by-step guide that applies equally to you as a plan admin and to all plan members:
-
Preparations: A valid identity document (passport or ID card with or without NFC function) is required, a smartphone with a camera, and a stable internet connection.
-
Start the process: There are three starting points for the QES identification:
-
Settings > QES Setup
-
In the dashboard: grey placeholder text: “Create your personal qualified signature now: Start identification”.
-
At the first signing process, when selecting the signature provider you will be prompted to set up the QES.
-
-
Auto-Ident process: The identification process begins with a short video recording of your face, followed by scanning the identity document. The technology automatically compares the recorded face with the photo on the ID.
If the identity document can be successfully read via the NFC chip, the entire process is completed within one session. If reading is not possible, a manual verification of the ID data is carried out afterwards by an identification agent.
Please note: Manual verification is only possible during business hours – Monday to Friday between 08:00 and 18:00 and Saturdays from 08:00 to 12:00.
The previous "Mobile ID VideoIdent" procedure is being phased out. Existing certificates remain valid. All new identifications will use the AutoIdent procedure.
Authorization method (3)
Each qualified signature requires an additional release per the eIDAS regulation before the signature is triggered (authentication with a second factor). This authorization ensures that only the signer can approve the process (authenticity). To enable qualified signing, the authorization method is also set up as part of the identification procedure. sproof Sign supports two modern and secure methods for this:
-
Mobile ID App: During the identification process you are guided to install the Mobile ID App on your smartphone. After downloading, you register the app with your phone number and link it to your personal identity. This one-time setup process turns the smartphone into a personal digital key. For future authorizations you then receive a push notification that is confirmed in the app.
-
Passkeys: Instead of a separate app, you can also set up passkeys as an authorization method. A passkey is a digital key securely stored on your device (e.g., laptop or smartphone). During setup you create a passkey for sproof Sign and authorize its storage using the device's security feature (e.g., face recognition, fingerprint, or device PIN). Future approvals then occur seamlessly via the same method.
Jurisdiction (4)
Depending on the certificate used, sproof Sign creates a Qualified Electronic Signature (QES) that complies either with the requirements of the eIDAS Regulation (EU) or the ZertES Act (Switzerland).
QES configuration settings by Customer Service
If your company does not use rights and role management, the available QES settings can also be set globally for the entire plan directly by sproof Customer Service. These global defaults always take precedence and override any individual choices.
Important note for plan owners: A plan owner cannot change or adjust their own role. If different permissions are required for you as an owner, please contact sproof Customer Service.
Additional QES settings in role management
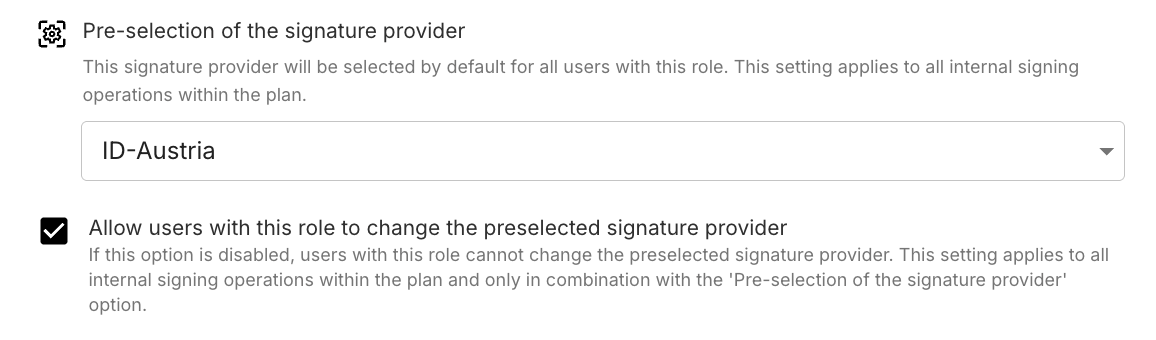
Preselection of the signature provider
You can set which signature provider is preselected for every signing process for all plan members. This can be the standard sproof QES provider (see above) or a provider from the eID Hub (see below).
-
Navigate to Settings > "License & Team"
-
Create a new role, or edit an existing one
-
Under the functions enable the option "Sign and approve documents".
-
Select a provider in the "Preselection of the signature provider" dropdown menu
If you select a provider from the eID Hub (e.g., ID Austria), batch signing will still automatically fall back to the sproof QES.
You can also enable or disable the setting below to decide whether plan members with the corresponding role can change the preselected provider.
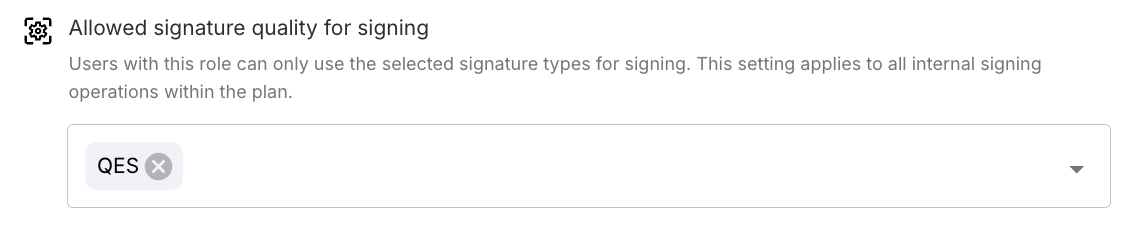
Setting: “Signing is only allowed with QES”
In the same view as the setting described above you can define the signature types available to plan members in each signing process. For example, you can specify that only QES signatures are possible for the associated role.
sproof-QES alternative: The sproof eID Hub
In addition to the standard sproof-QES, sproof Sign provides the eID Hub. The eID Hub is an interface that makes it possible to choose from a variety of qualified trust service providers (QTSPs) across Europe for the QES. This option simplifies legally valid signing and obtaining signatures for contracts across national borders.
-
Upload or open the document to sign
The document to be signed is opened in sproof Sign as usual. -
Choose provider in the eID Hub
In the "Sign yourself" tab > "Type of signature" the e-signature standard can be selected. Under the section "Other QES signature providers (eID Hub)" the eID Hub provider you defined as admin appears.
-
Authorize the signature with the external provider
After selection you are redirected to the login window of the respective provider. There the signature is completed using the method known to the user (e.g., confirmation in the Mobile ID App). The qualified signature is then applied to the document in sproof Sign.
Troubleshooting
If you encounter difficulties during the identification for the integrated sproof QES, please contact: support@sproof.com
Did you reinstall the MobileID App or get a new smartphone?
Did you reinstall the MobileID App or get a new smartphone? If you have already successfully completed an identification procedure once, you can restore your MobileID to continue signing qualified with sproof Sign.
Restore with backup code:
-
Visit mobileid.ch and enter your phone number to restore your identification with the backup code.
-
You can now continue to sign qualified without another VideoIdent procedure.
Without backup code:
-
Uninstall the MobileID App (if not already done).
-
Install the app again and note the new backup code.
-
Perform a new identification under QES-Setup in the settings.
FAQ
What is the Qualified Electronic Signature (QES)? The Qualified Electronic Signature (QES) is the highest signature standard. It is legally equivalent to a handwritten signature and meets the strict requirements of the European eIDAS Regulation as well as the Swiss ZertES Act.
What is the "sproof QES" and who is the provider? The "sproof QES" is the deeply integrated qualified signature in sproof Sign, for which plan members can identify themselves directly via the platform. sproof collaborates with Swisscom Trust Services AG for this service.
How do I, as a plan admin, control QES usage in the plan? As a plan admin you centrally control in the rights and role management which QES configurations are available to your plan members (per role). You can find this under "License & Team" -> "Role Management".
What exactly does an "sproof QES configuration" define? A QES configuration defines four core aspects for the signature:
-
Signature provider (QTSP): Who issues the certificate (e.g., Swisscom).
-
Jurisdiction: In which legal area the QES is valid (eIDAS for EU or ZertES for Switzerland).
-
Identification method: How the member proves their identity (currently Webident).
-
Authorization method: How the member releases a signature (Mobile ID App or Passkey).
What do plan members need to do to use the sproof QES? Plan members need a user account and a User+ upgrade. They must then complete the digital identification procedure (Auto-Ident) once.
Which identification procedure is used for the sproof QES? sproof Sign uses the web-based AutoIdent procedure. This is a digital process in which a short video recording of the face is automatically compared with a scan of the identity document.
What is the difference between "Mobile ID" and "Passkey"? Both are authorization methods (2nd factor) to release a QES:
-
Mobile ID App: A separate app on the smartphone. The signature is confirmed via a push notification in the app.
-
Passkeys: A digital key securely stored on the device (e.g., laptop or smartphone). The release is performed seamlessly using the device's security feature (e.g., fingerprint, face recognition, or device PIN).
Can I specify that members only sign with QES? Yes. In role management you can set under "Allowed signature types" that a role only has the QES available.
What is the sproof eID Hub? The eID Hub is an interface and serves as an alternative to the sproof QES. It allows (also external) users to use their existing electronic identity from various qualified trust service providers across Europe (e.g., ID Austria).
What happens if my company does not use role management? If your company does not use rights and role management, the available QES settings can also be set globally for the entire plan directly by sproof Customer Service. sales@sproof.com
Can I, as a plan owner, change my own role? No, a plan owner cannot change or adjust their own role. If you require different permissions, please contact sproof Customer Service.