

👑 Enterprise Feature
Would you like to use this feature? Please contact us to activate it!
📧 Contact: support@sproof.com
🤝 We look forward to your inquiry!
💡 At a glance
The rights and roles management allows plan admins granular control over team members' access rights in sproof Sign. By assigning predefined or custom roles, as a plan admin you ensure that each person only has the permissions necessary for their tasks. This increases security and operational efficiency in your company.
Plan owners automatically hold the Administrator role, which is required to manage the rights & roles of other plan members or to enable additional plan members for plan administration.
Watch our video tutorial at the following link:
📖 Background
1. The difference between functions and roles
The system is based on two central concepts:
-
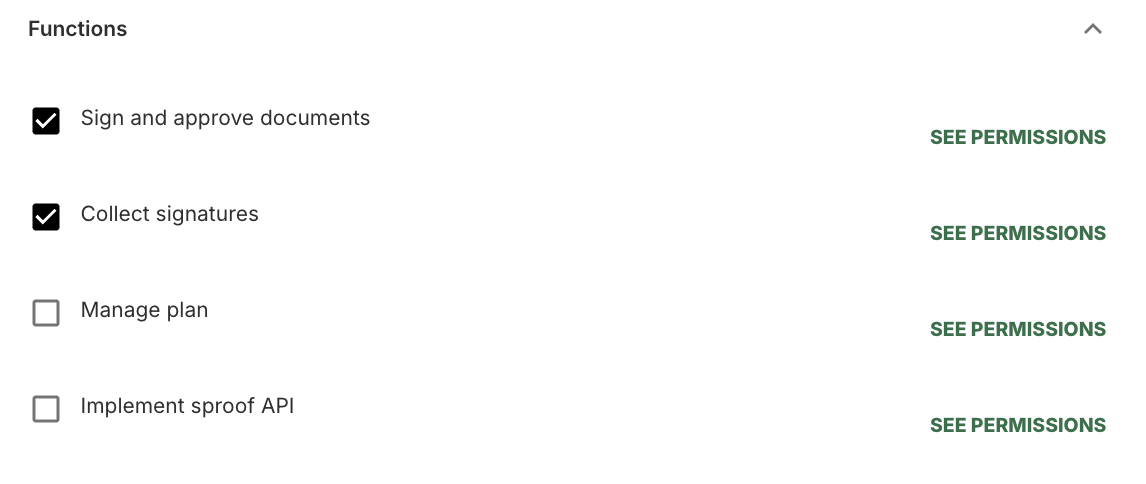
Functions: Functions are the basic building blocks of the system defined by sproof, such as "create signatures", "collect signatures" or "manage plan". Each function contains a fixed combination of permissions and configuration options.
-
Roles: A role is a combination defined by you of one or more functions. By combining functions, you can create tailored roles that fit the needs of different user groups in your company.
All configurations per function in detail
|
Function |
Configuration |
Description |
|---|---|---|
|
Sign and approve documents |
“Allow uploading documents” Default: enabled ✅ |
If this setting is disabled, the plan member cannot upload documents and the "Self-sign" tab in the editor is only visible when invited to sign. |
|
“Preselect signature provider” Default: No provider selected |
Determines whether a provider is automatically selected when the signer wants to sign themselves or is invited with QES. |
|
|
“Allow changing the preselected signature provider” Default: enabled ✅ |
This setting only works in combination with the Preselect signature provider setting and indicates whether the plan member is allowed to change their default provider or not. |
|
|
“sproof QES configuration” Default:
|
Specifies the scope, signature provider and authorization method used for the sproof qualified signature. The following options are available: Scope:
Signature provider: Currently only Swisscom is available. Authorization method:
|
|
|
“Allowed signature assurance levels for signing” Default:
|
Specifies the permitted signature types for self-signing. The availability of signature types depends on the plan's available quotas. |
|
|
Collect signatures |
“Allow creating, editing, deleting and sharing workflows” Default: enabled ✅ |
If this setting is disabled, the plan member can only use existing workflows. |
|
“Allow creating, editing, deleting and sharing groups” Default: enabled ✅ |
If this setting is disabled, the plan member can only use existing groups. |
|
|
“Allowed signature types when sending documents” Default:
|
Specifies the permitted signature types for invitation flows. The availability of signature types depends on the plan's available quotas. |
|
|
Manage plan |
This function has no configurable settings. |
The "Manage plan" function includes fixed configurations and cannot be edited. |
|
Implement sproof API |
“Create, read and delete documents and document folders (API)” Default: disabled ❌ |
Indicates whether the developer is authorized to create, read, update and delete all document/folder metadata (NOT the content) in the plan. This is required for certain sproof API integrations. |
|
“Download documents and document folders (API)” Default: disabled ❌ |
Indicates whether the developer is authorized to download the contents of all plan documents. By default, developers can download documents created with their API key. |
|
|
General settings |
“Download documents” Default: enabled ✅ |
Determines whether the plan member is allowed to download documents. |
|
|
“Delete own user account” Default: enabled ✅ |
Defines whether the plan member can delete their own account. |
|
|
“Profile information may not be edited” Default: disabled ❌ |
If this setting is enabled, the plan member cannot edit their own profile information. |
|
|
“Microsoft Entra ID” Default: no group ID added |
A Microsoft group ID can be added to automatically assign a role to all members of that group. |
2. Predefined roles
sproof provides a set of predefined roles that cover common use cases:
-
Signer: Can only sign documents but cannot invite anyone.
-
Sender: Can only send documents and create workflows, but cannot sign themselves (unless they are invited).
-
Standard: Can self-sign documents and collect signatures from others (equivalent to the previous standard user).
-
Administrator: Has full administrative control over the plan and can perform all actions.
-
Developer: Has access to all developer-relevant settings and the API.
These roles cannot be edited.
The predefined roles in detail
|
Role |
Signer |
|---|---|
|
Description |
People with this role can only sign documents; they may not invite other users and do not have access to the Contacts & Workflows area |
|
Function |
Sign and approve documents |
|
Configuration |
The configuration consists of the default settings of the function Sign and approve documents and the General settings. |
|
Role |
Sender |
|---|---|
|
Description |
People with this role can only send documents and create workflows, but they may not sign documents themselves. Exception! A role without the "Sign and approve documents" function can still sign if invited to do so. |
|
Function |
Collect signatures |
|
Configuration |
The configuration consists of the default settings of the function Collect signatures and the General settings. |
|
Role |
Administrator |
|---|---|
|
Description |
People with this role can manage the plan, collect signatures and sign and approve documents themselves. |
|
Functions |
|
|
Configuration |
The configuration consists of the default settings of all functions and the General settings. |
|
Role |
Standard |
|---|---|
|
Description |
People with this role can sign and approve documents and collect signatures. This standard role resembles the capabilities of a regular user before the introduction of role management. |
|
Functions |
|
|
Configuration |
The configuration consists of the default settings of the functions Sign and approve documents, Collect signatures and the General settings. |
|
Role |
Developer |
|---|---|
|
Description |
Users with this role can sign documents, collect signatures and have access to all developer-related settings. |
|
Functions |
|
|
Configuration |
The configuration consists of the default settings of the functions Sign and approve documents, Collect signatures, Implement sproof API and the General settings. |
3. Important notes
-
Transition for existing plans: For existing plans nothing changes in the usual functionality due to the introduction. Every member automatically receives the "Standard" role and plan admins the "Administrator" role, so all previous permissions remain in place.
-
Validity of roles: The restrictions defined in a role (e.g. allowed signature types) apply in almost all cases. An exception exists when a member of your plan is invited to sign by a person from a different plan; in that case the role settings have no effect.
📑 Step-by-step guide
1. Open role management
-
Click "Settings" in the dashboard at the bottom left.
-
Alternatively, you can click your profile picture in the navigation bar at the top and then "Settings".
-
In Settings, select "License & Team" from the left menu.
-
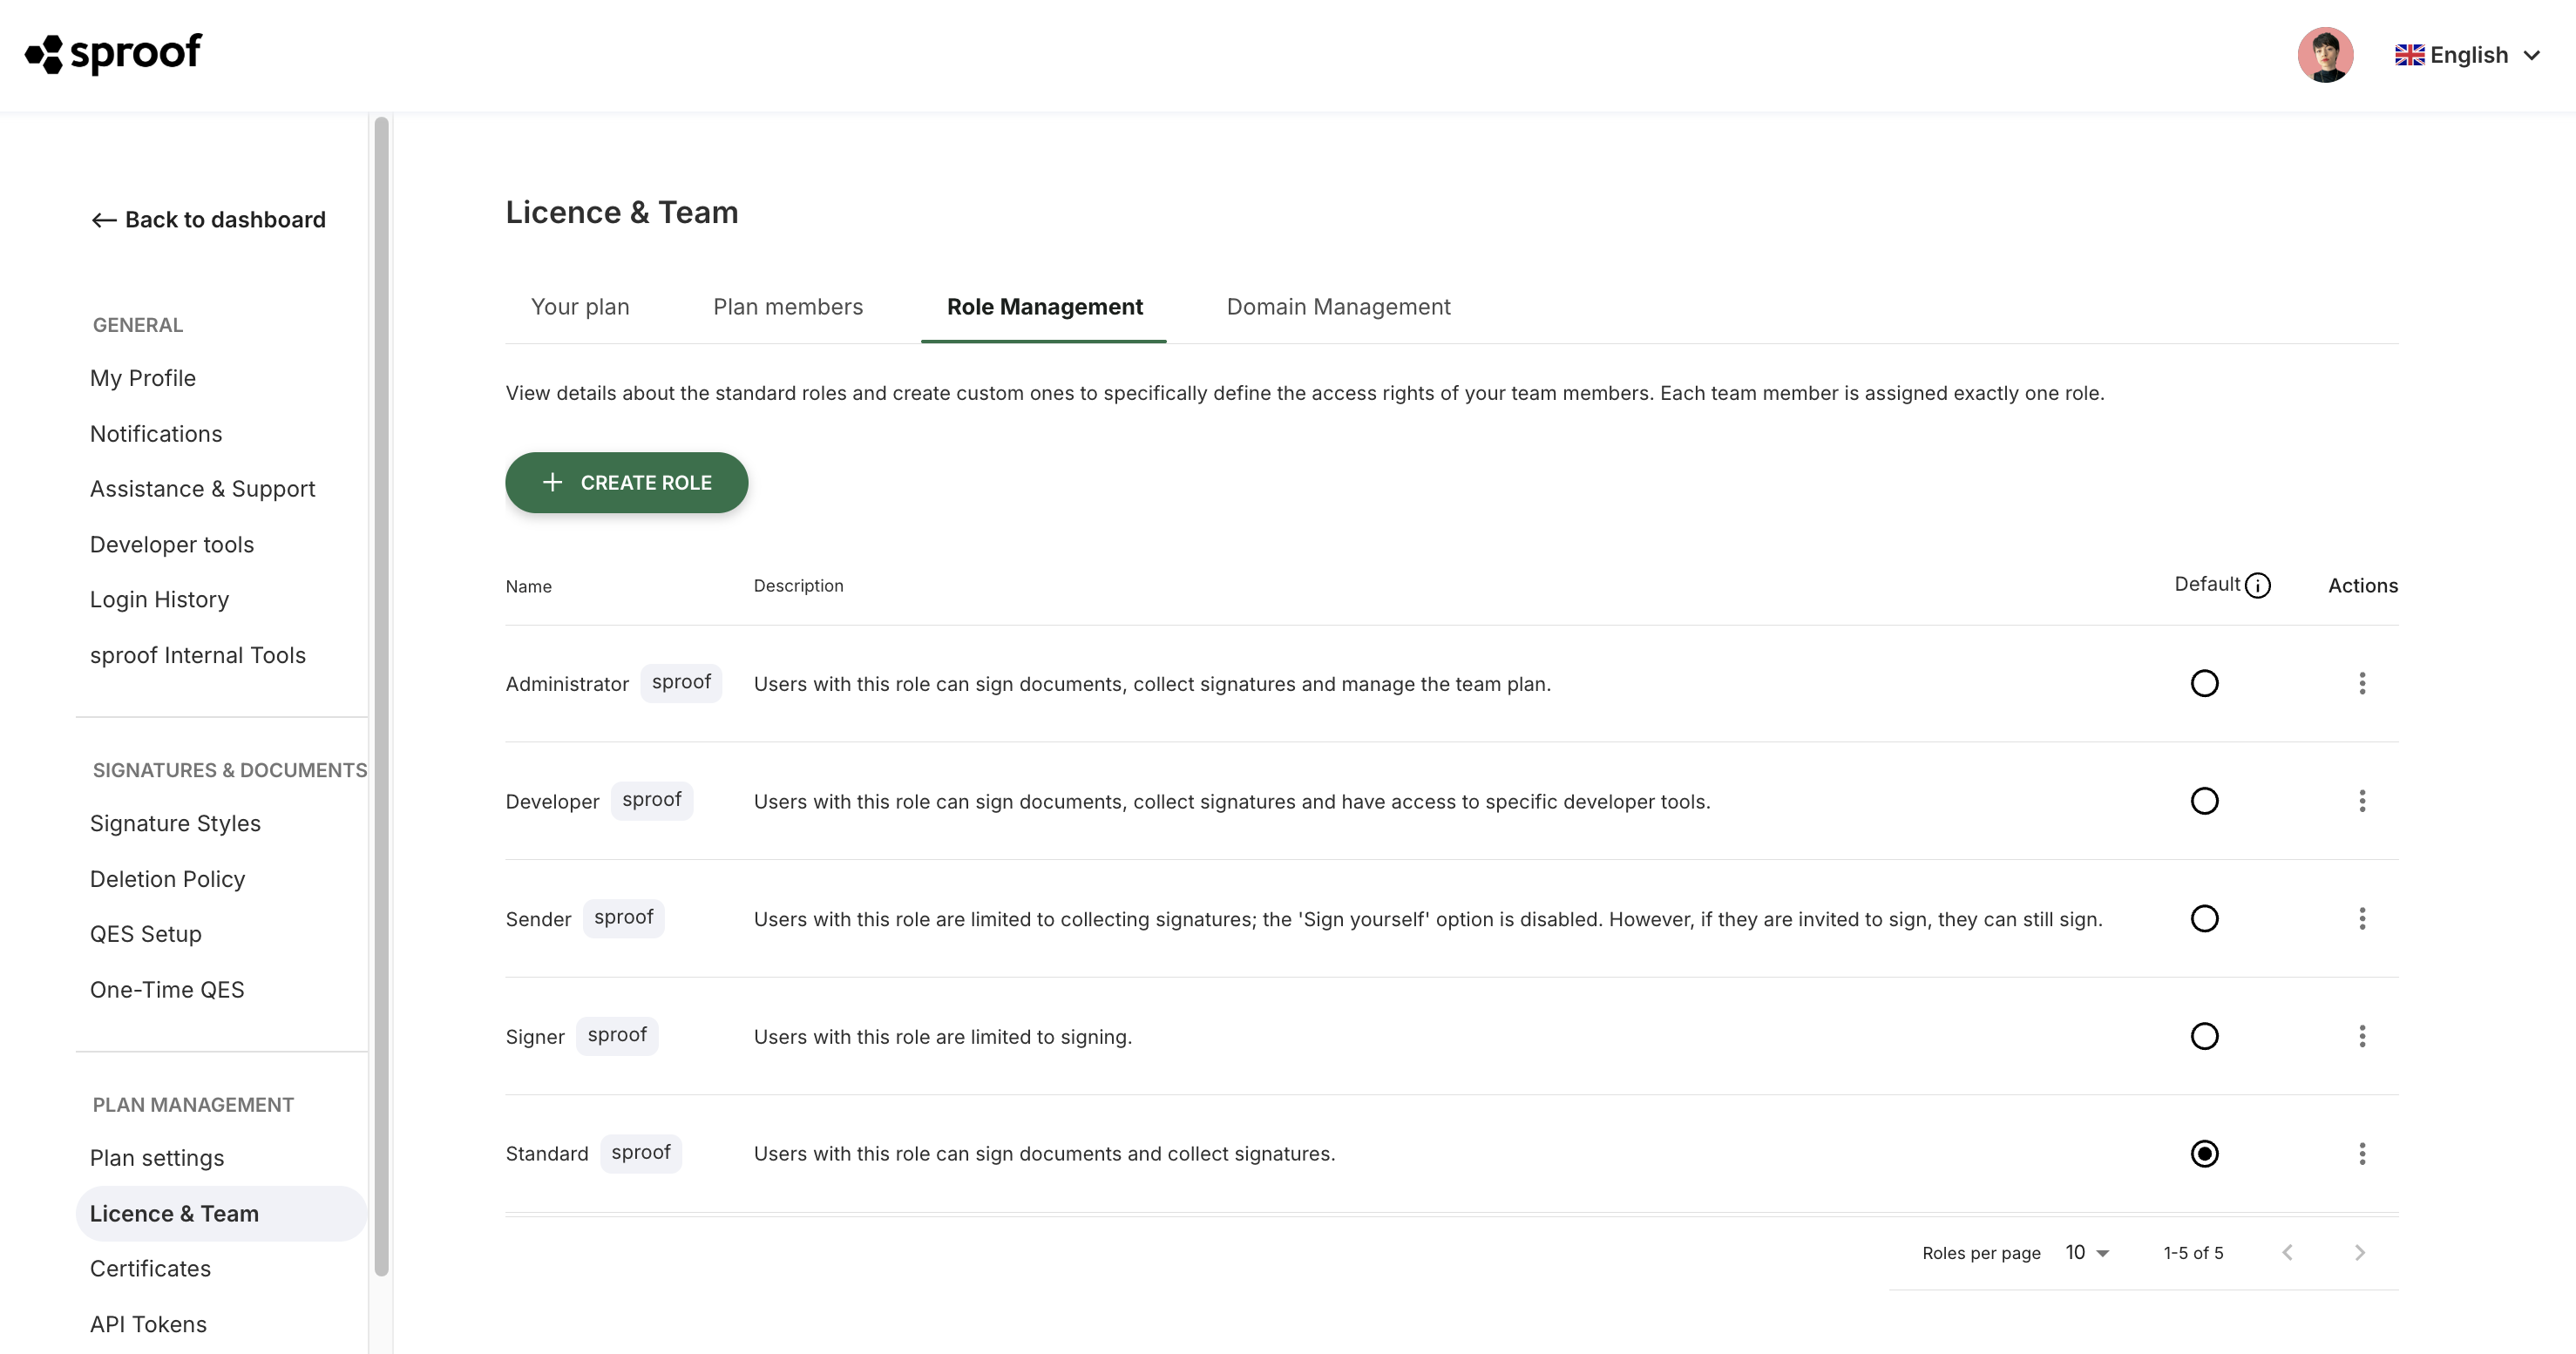
Select the "Role management" tab. Here you will see an overview of all existing standard roles and your already created custom roles.
2. Define default role
Plan admins can set a default role for all new plan members. This role is automatically assigned when a new member joins the plan.
-
Stay in the "Role management" tab.
-
In the "Default" column choose your desired role.
This ensures that permissions for new plan members are consistent from the start. The assignment can be changed manually at any time in the "Plan members" tab.
3. Create roles
-
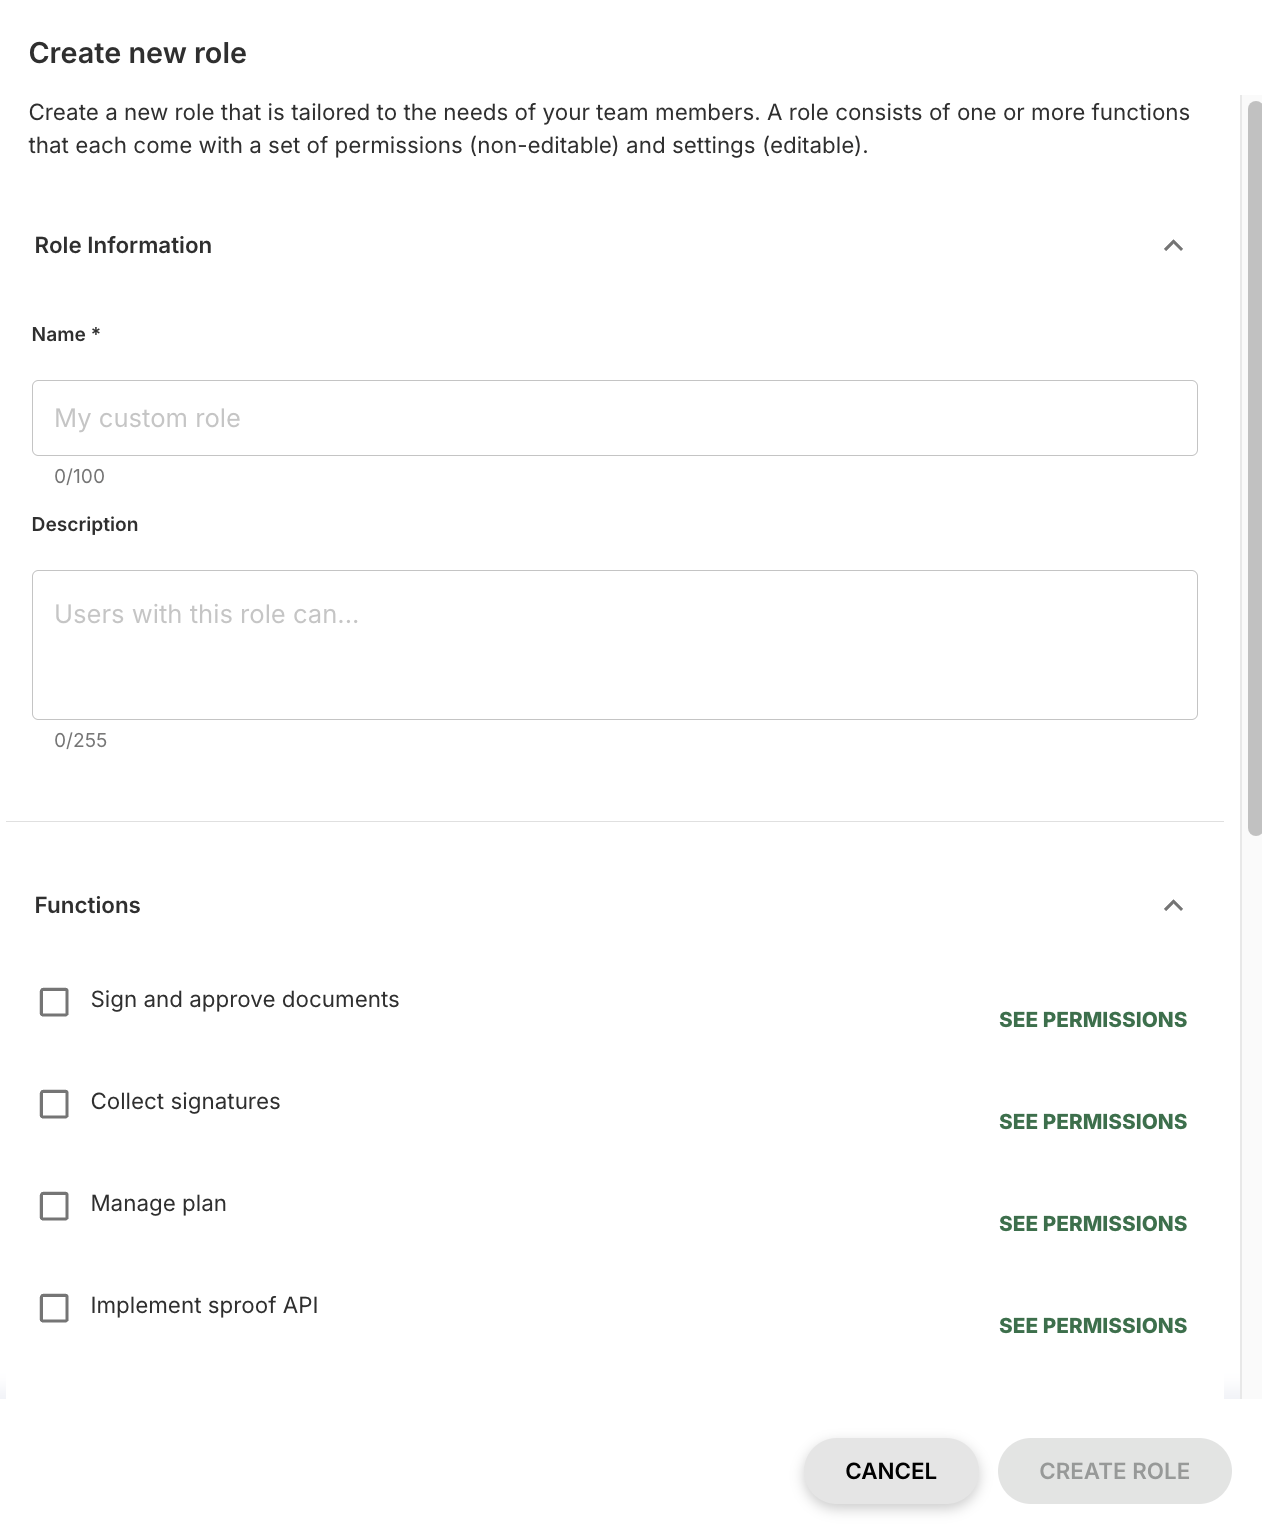
In the "Role management" tab click the "Create role" button.
-
A new window opens. Provide a meaningful name and description for the role.
-
Select the desired functions that this role should include (e.g. "Sign and approve documents", "Collect signatures", "Manage plan", "Implement sproof API").
-
For each enabled function you can now configure detailed permissions (e.g. which signature types are allowed).
-
Finally click "Create role". The new role will now appear in your list in "Role management".
4. Assign roles
After you have created a role, you can assign it to your plan members:
-
Switch to the "Plan members" tab (right next to "Role management"). All plan members will now be listed.
-
Find the desired plan member in the list.
-
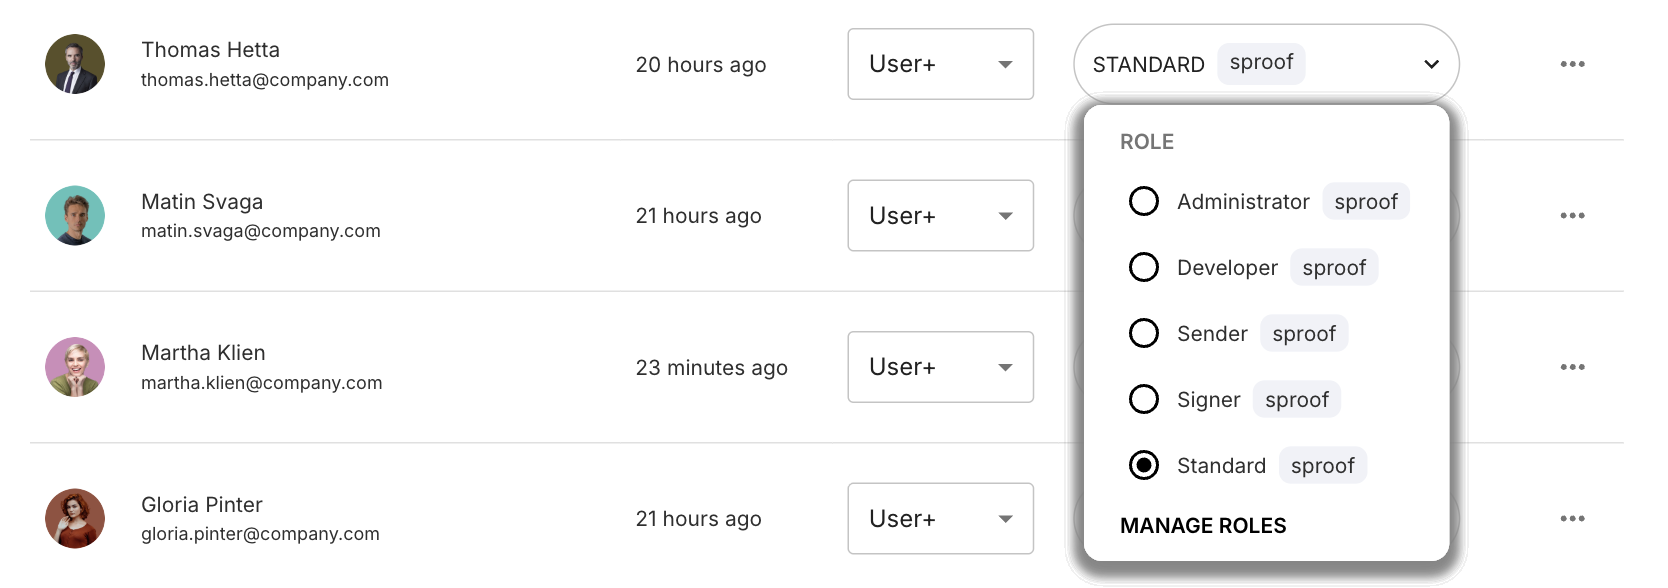
In the member's row you will find the "All roles" column. Click the drop-down menu in this column.
-
Select the desired role from the list. The assignment is saved immediately.
Roles marked with the "sproof" badge are the roles predefined by sproof.
-
You can also use the "All roles" column to filter your plan members by already assigned roles.
In the "All licenses" column you can upgrade your plan members' license to User+.