

💡 At a glance
With the batch signature you can sign any number of documents at once. It works with the sproof FES or the sproof QES. If you sign multiple documents on the batch qualified, you only have to confirm the second factor once – saving a lot of time! You can place and remove single documents as well as documents that are part of a folder on the batch with a few clicks. You sign the batch itself with just one click.
Under the following conditions you can use the batch signature:
-
You have a User+ license
-
For QES: You have an identification with the sproof internal qualified signature. By default this is done using the Swisscom solution integrated into sproof Sign.
-
For each document on the batch at least one signature field is defined. Regardless of whether you want to sign with FES or QES.
The providers of the sproof QES can be changed in the Swisscom role management to ID Austria or German identity card. Plan members can use these providers for batch signatures if this has been explicitly configured in the role management via a custom role.
When signing batches with ID Austria or the German identity card, be sure to select the sproof QES (which uses the provider ID Austria or German identity card in the background) and not directly choose ID Austria or the German identity card as a separate provider.
Since the configuration of standard roles cannot be changed, the batch signature with ID Austria or the German identity card is not possible for plan admins and plan members with sproof standard roles. In these cases, documents with these specific providers must be signed individually.
📑 Step-by-step guide
Place documents on the batch / remove from the batch
To place a document to be signed on the batch, proceed as follows:
-
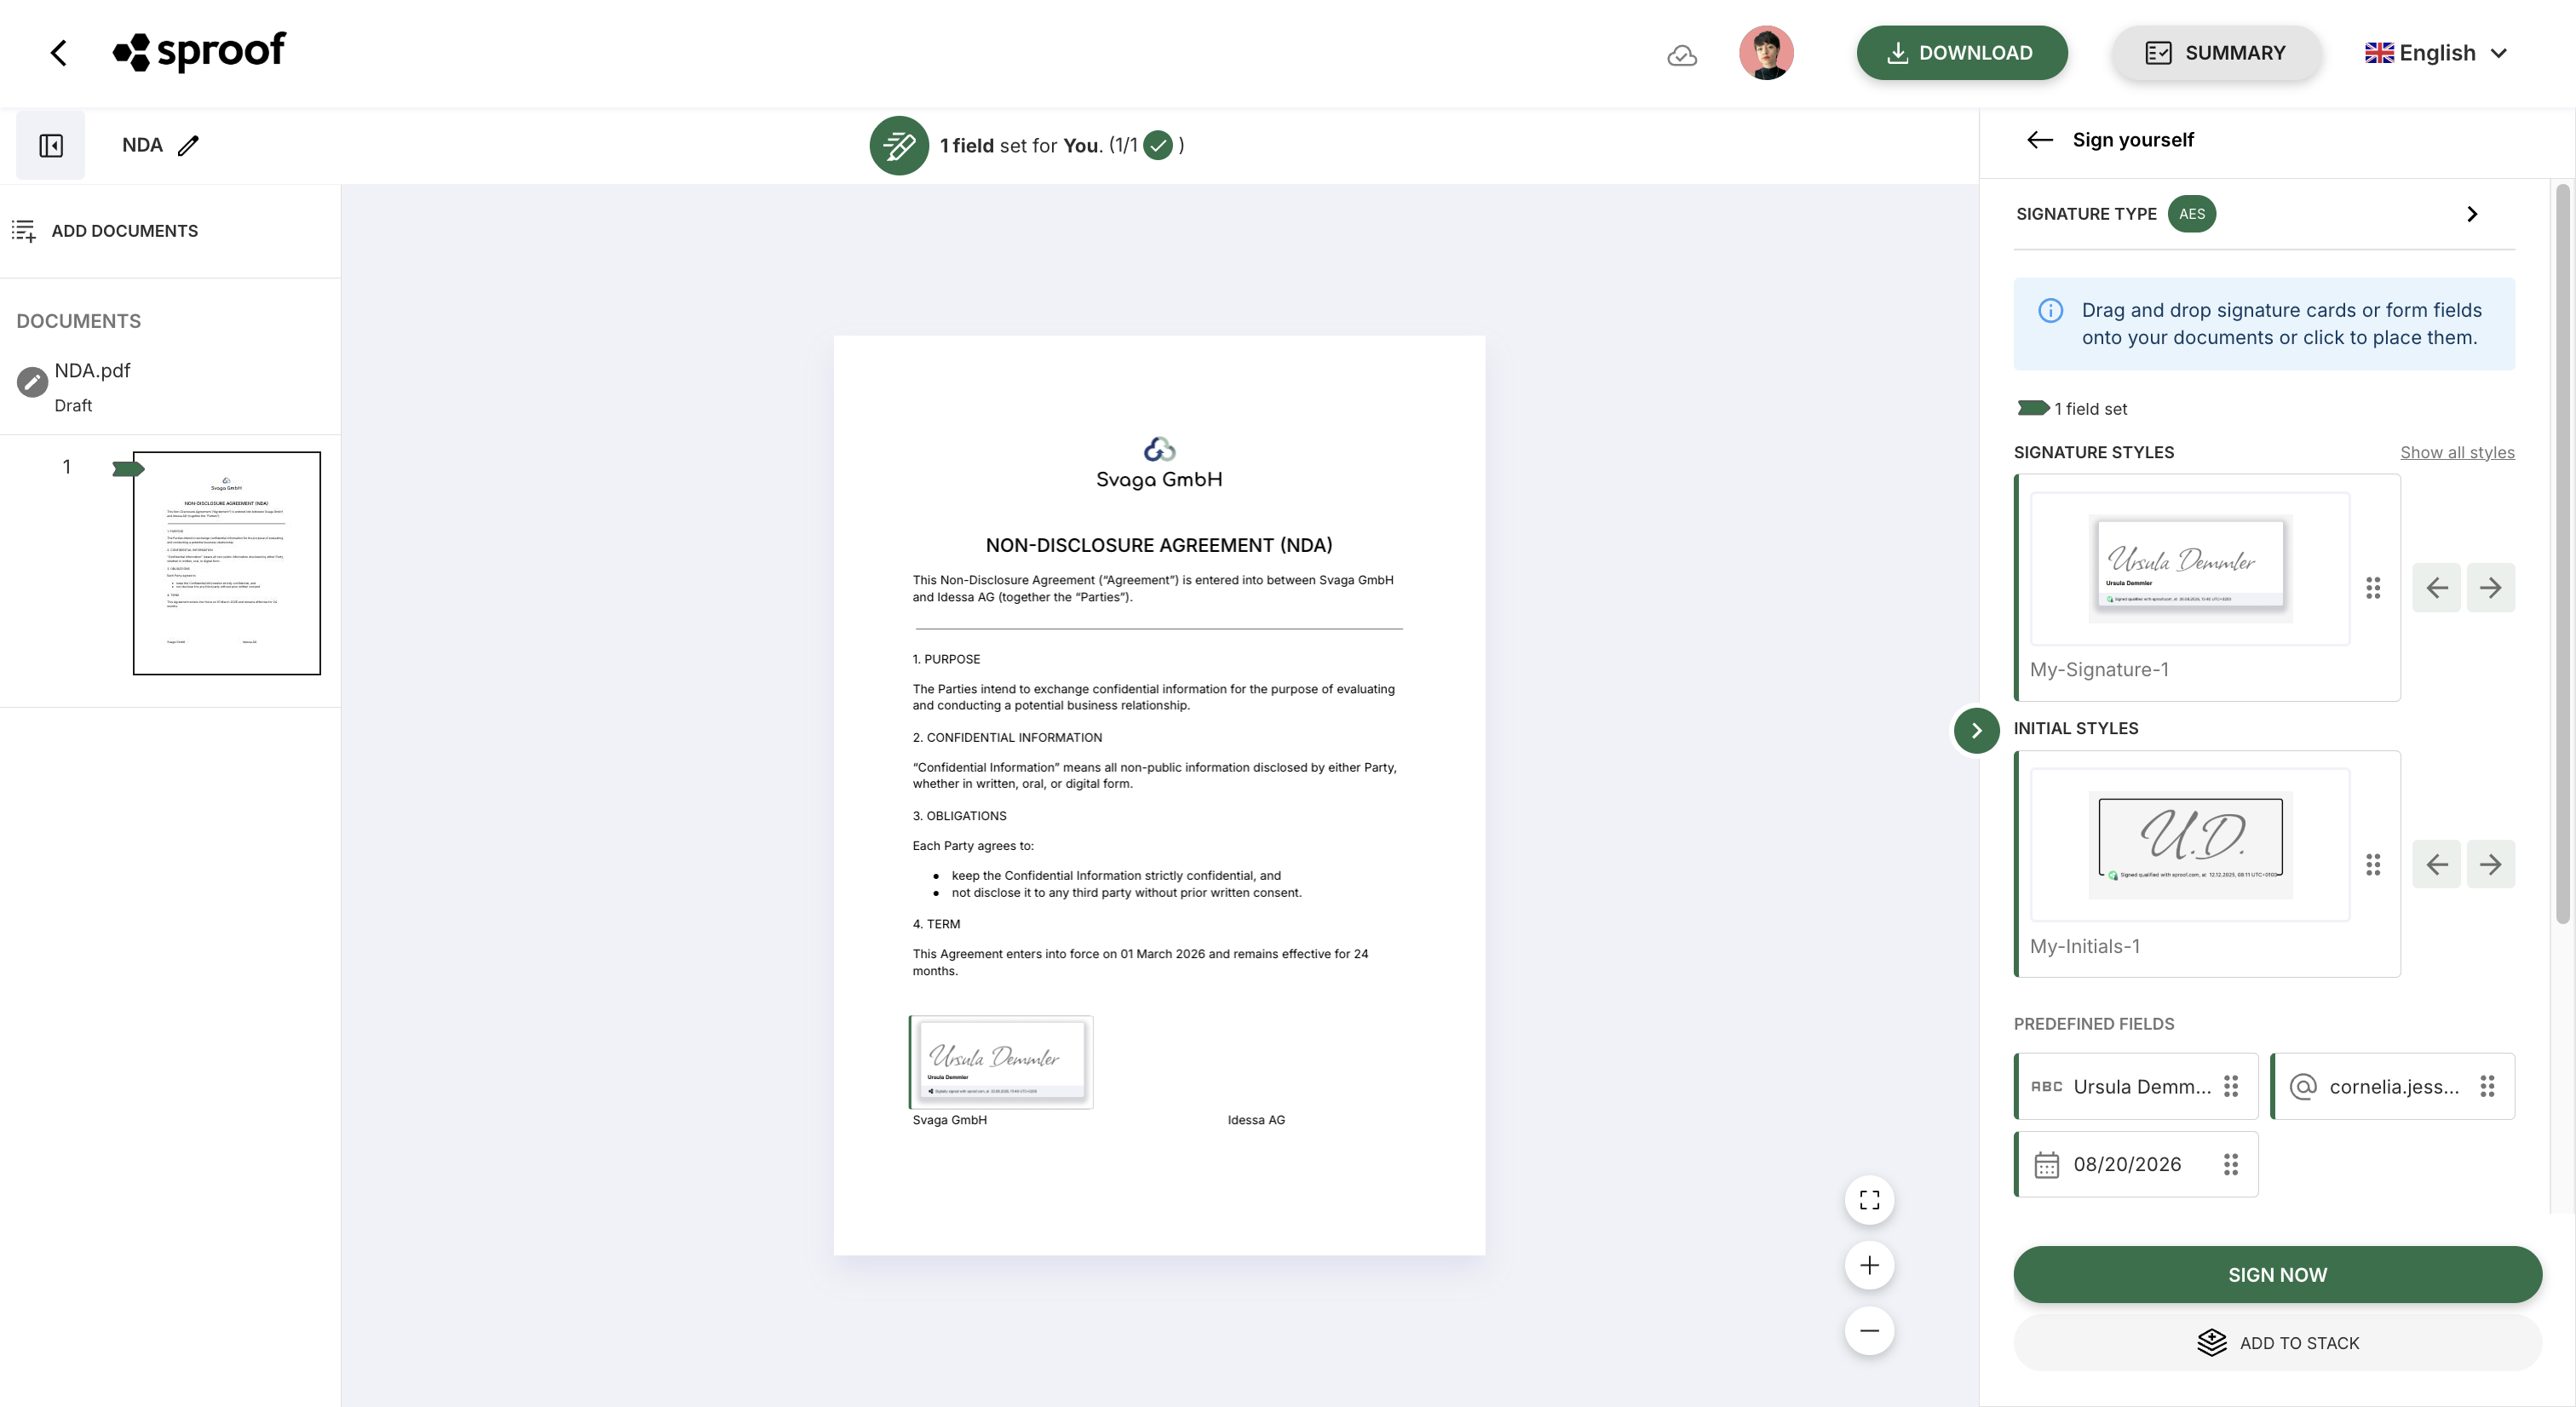
Open a document and click “Sign yourself”. Select the Advanced Signature (FES) or the sproof Qualified Signature (QES) as the signature standard and place at least one signature field on the document. If it is an invitation, the sender may already have set the standard and the signature fields.
-
You can now sign the document directly at the bottom right or place it on the batch by clicking the “Add to batch” button.
-
You will be automatically redirected to the signature batch in the dashboard.
-
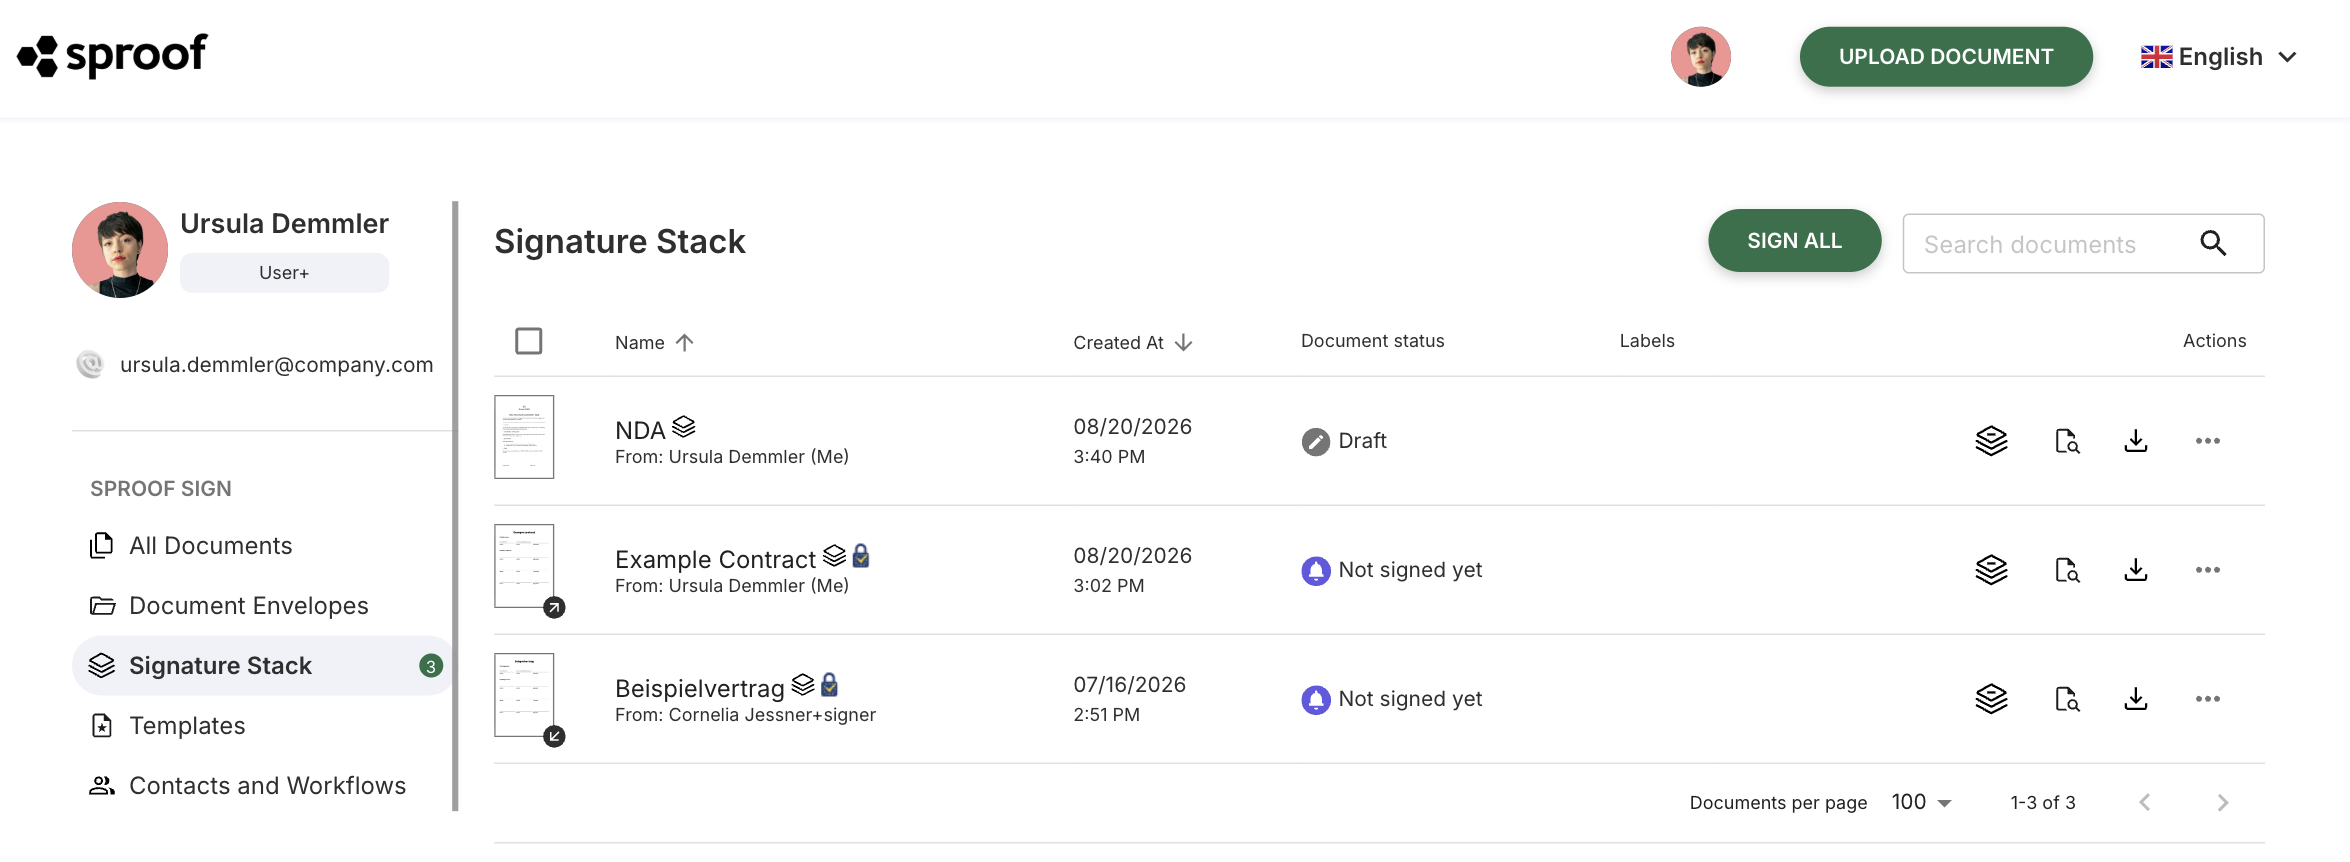
There you see all documents that are on the batch. The batch icon next to the document name means that this document is on the batch. The eIDAS symbol next to it means that a document will be signed qualified.
You can also place a document on the batch from the dashboard:
-
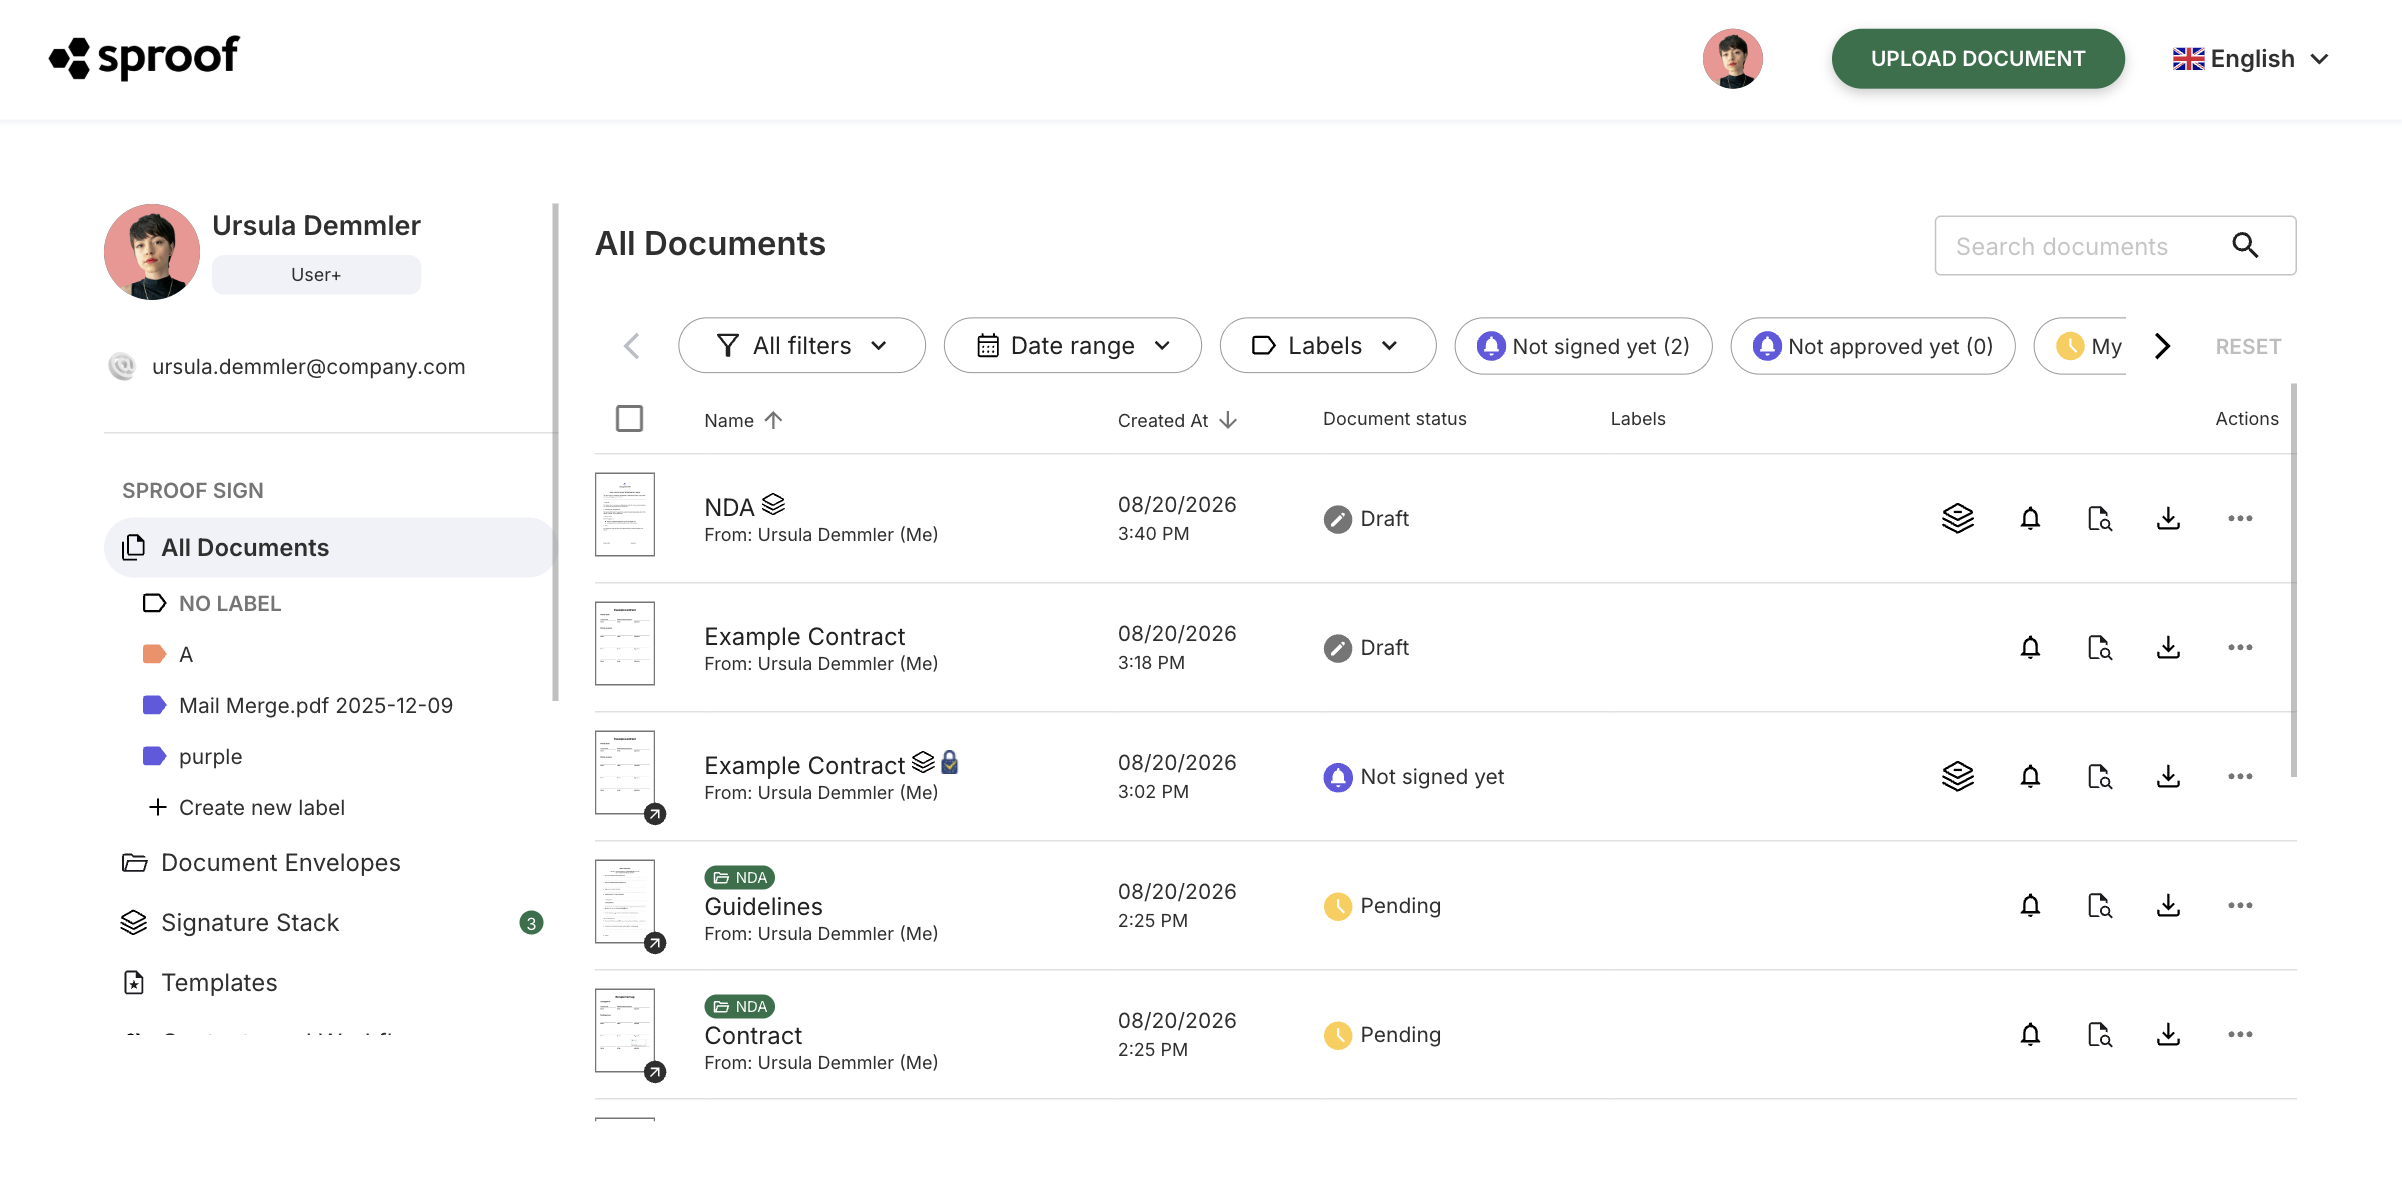
Click on “All documents” in the dashboard.
-
Optionally use the “Ready for batch signature” filter to filter your document list for documents suitable for the batch.
-
If a document is suitable for the batch, a batch icon with a plus will be shown in the actions. Click the icon to place the document on the batch.
-
If a document is already on the batch, you can recognize this by the batch icon next to the document name.
To remove a document from the batch, proceed as follows:
-
Click the batch icon with the minus in the document list to remove the document from the batch.
-
Alternatively, you can open it in the editor and click the “Remove from batch” button in the “Sign yourself” tab.

Sign documents on the batch
To sign all documents on the batch at once, proceed as follows:
-
Click the menu item “Signature batch” on the left in the dashboard.
-
You will see a list of all documents on the batch. Documents that show a blue lock will be signed qualified. Documents without a lock will be signed advanced.
-
Check once more that the correct documents are on the batch and then click the “Sign batch” button at the top right.
-
If all documents on the batch are signed advanced, no further action is required from you. All documents have been successfully signed.
-
As soon as at least one document on the batch must be signed qualified, you will be prompted in a dialog to complete the process on your mobile phone. Confirm the authentication request in the respective app (Mobile ID App, ID Austria App) with your fingerprint or Face ID.
-
After successful signing the batch is empty again and can be filled again. The successfully signed documents will be changed to “signed” in the dashboard or your signature progress will be changed to “signed”.
Important: The QES batch signature works exclusively with the Advanced Signature (FES) and the Qualified Signature (QES) from sproof Sign. Documents that must be signed with other QES providers cannot be placed on the batch and must be signed individually.
Exception: Members with an appropriate role can sign batches via ID Austria or German identity card.