

💡 At a Glance
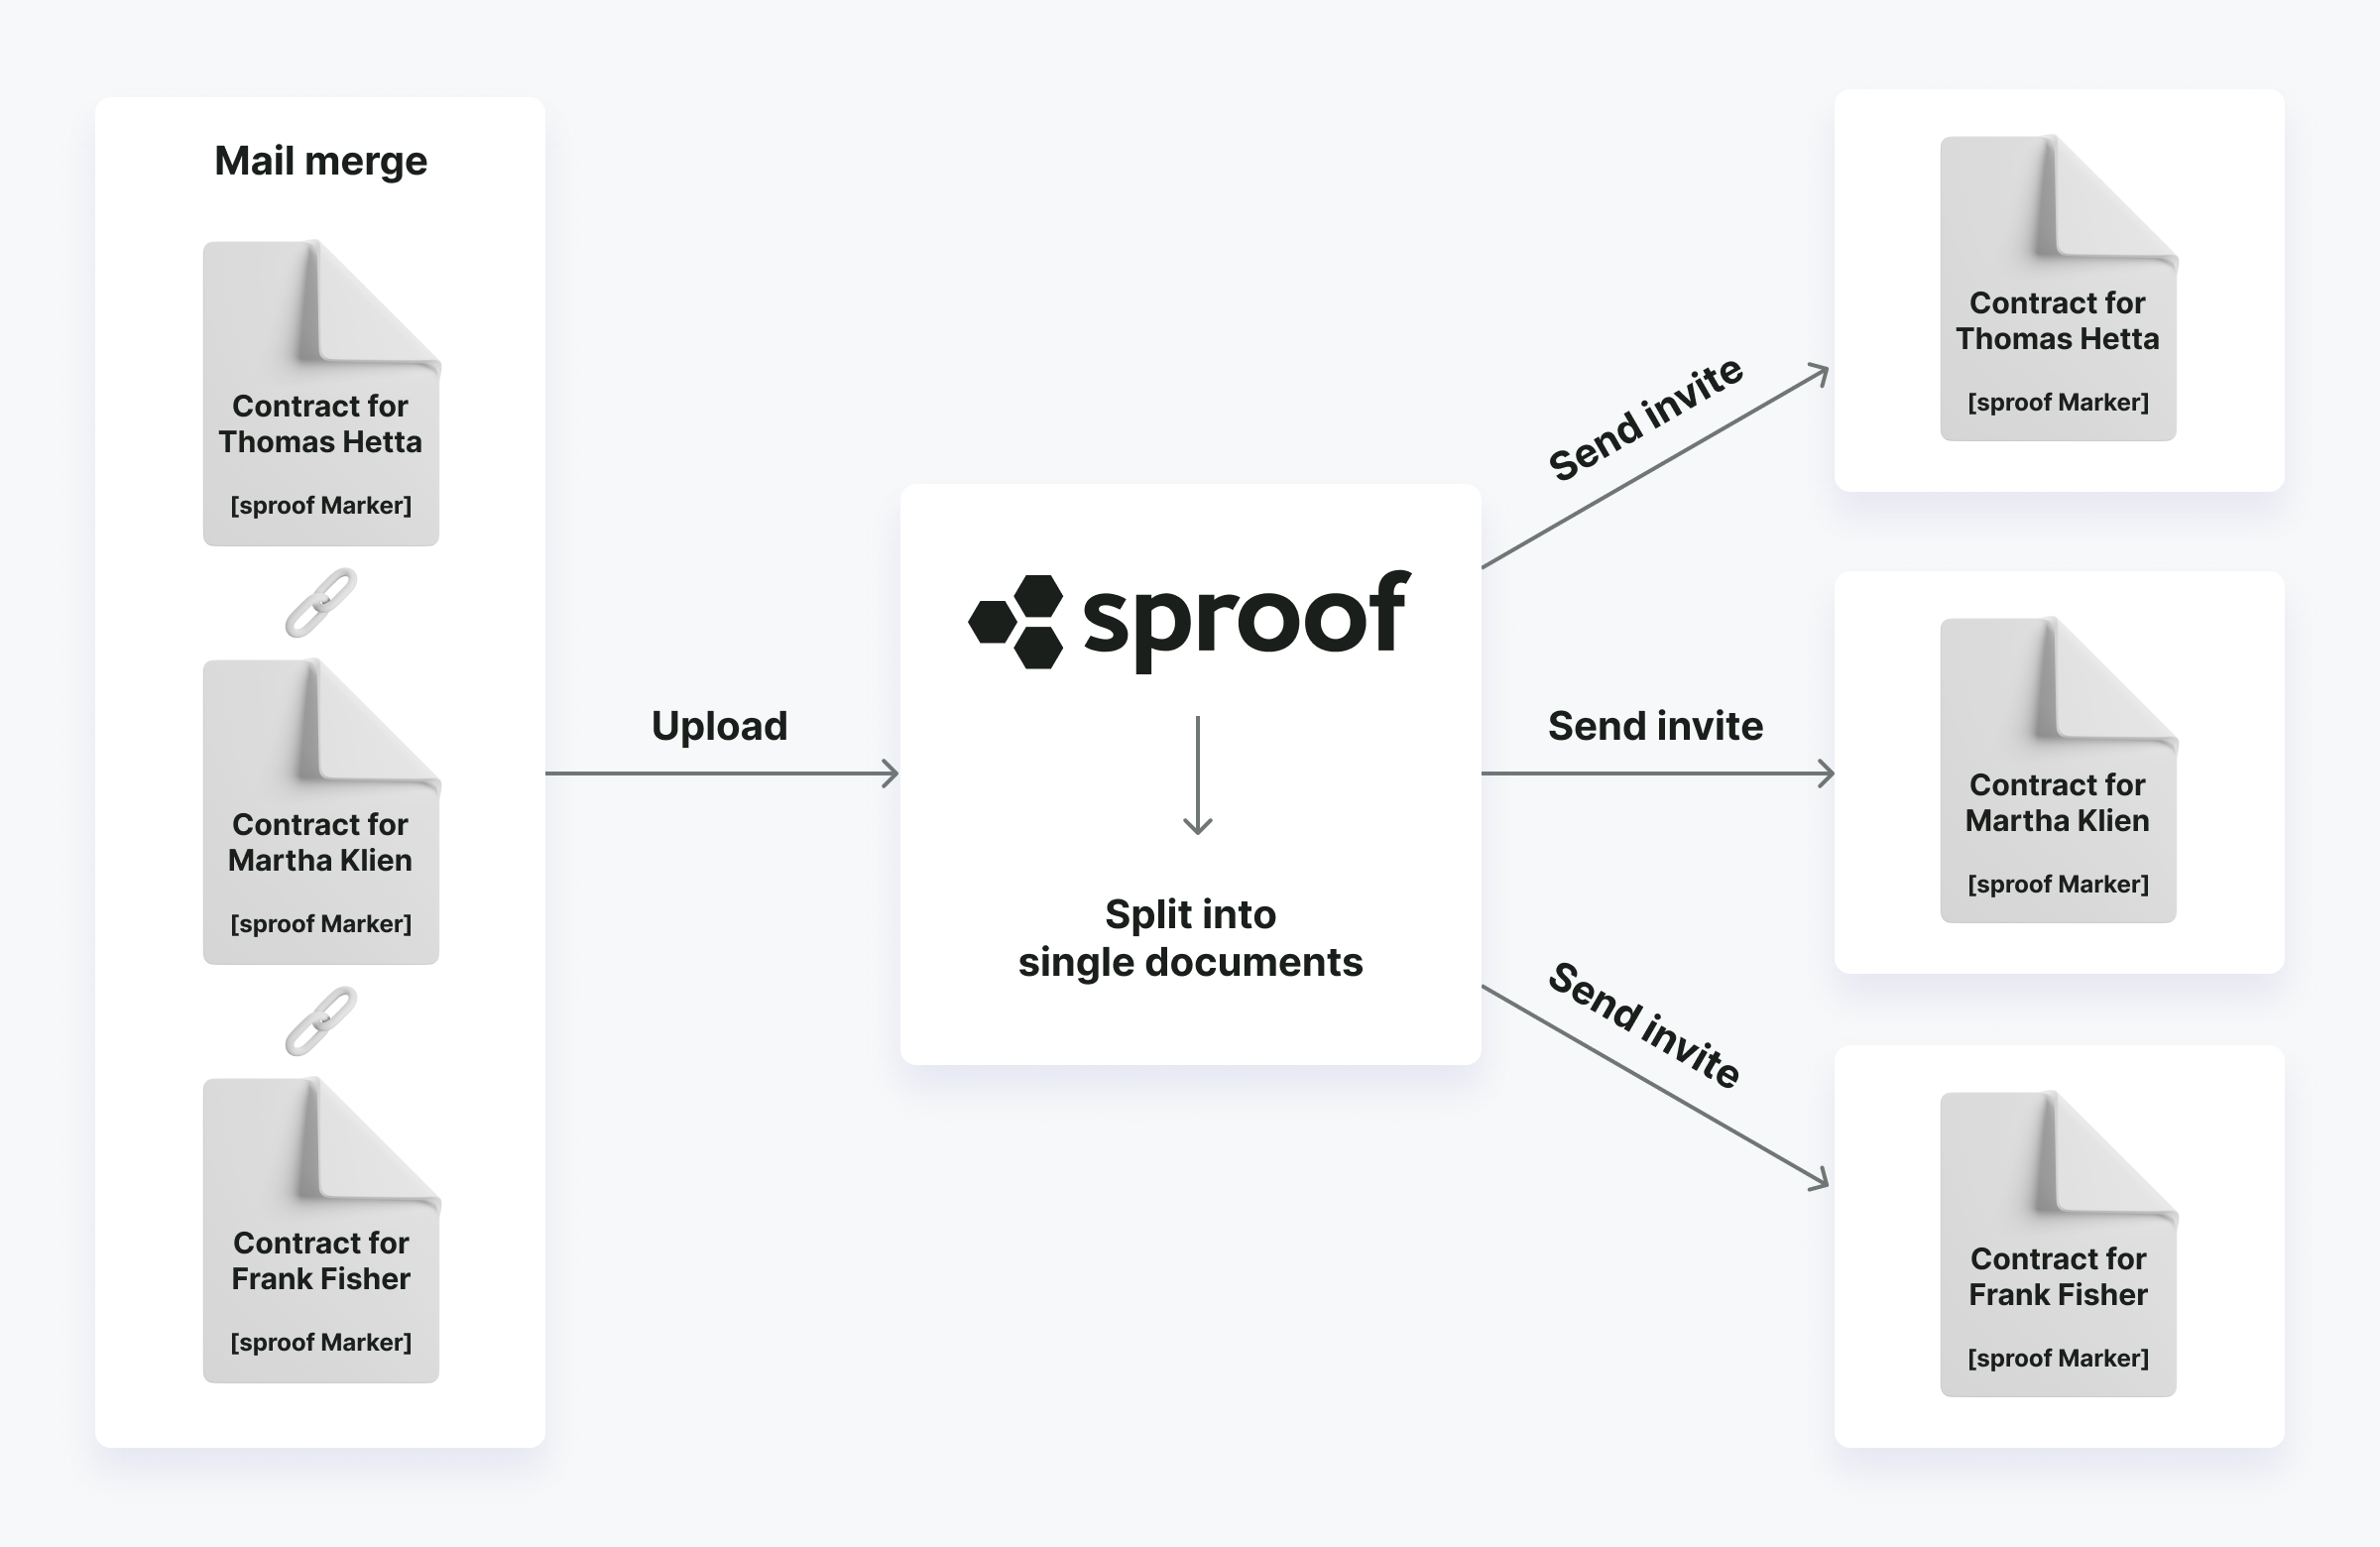
A mail merge letter is a document that is sent in large quantities to different recipients, where the main part of the text remains the same. Only certain details, such as the recipient's name or address, are replaced by individual data from a database.
Mail merge letters can be created with various tools, for example with Microsoft Word. The mail merge document can then be uploaded to sproof Sign via the UI or API and sent to the stored recipients for signature.
The core functions for mail merge letters in sproof Sign:
-
Upload mail merge document
-
Mail merge document and stored recipients are recognized by sproof Sign
-
Mail merge document is split into individual documents
-
Each recipient receives a separate document with a request to sign it
-
Signed documents are automatically returned to the sender
Important: Uploading and sending mail merge letters in sproof Sign does not replace a full-featured mail merge function for creating mail merge documents, such as in Microsoft Word.
📑 Step-by-step Guide
1. Create mail merge document
-
Start by creating your mail merge document with a suitable tool. In this tutorial we use Microsoft Word. Instructions for this can be found online.
Alternative: Google Docs (additional info)
Google Docs does not have a native "mail merge" function in the classic sense.
-
Procedure: You need to install a plugin via Extensions > Add-ons > Get add-ons.
-
Popular plugins: Commonly used ones are Autocrat or Mail Merge for Google Docs. These usually link your Doc with a Google Sheet as the data source.
-
So that sproof can later read the contacts/signature positions and split the mail merge document at the correct places, you must set the following markers when creating the mail merge template:
-
Marker for signature position: To define a signature position for a person, use the format
{sproof{FirstName,LastName,EmailAddress,Order}sproof}. Always provide first name, last name, email address and signature order. Place this marker at every position where the signature should later be placed. It is important that you use placeholders instead of real contact data. The placeholders will later be replaced by contact data from your list, for example:{sproof{Max,Mustermann,max@beispiel.com,1}sproof} -
Marker at the end of the template: So that sproof can later recognize the points where the mail merge document should be split, a marker at the end of the template is necessary. If your template is, for example, three pages long, insert the marker at the end of the last page:
{sproof{end}sproof}
-
Tips:
-
If you have placed all markers correctly, change the text color to white so that they do not appear on the document later, but sproof can still read them.
-
By default the signature is inserted at the placeholder position. Optionally, you can provide a line of underscores before the placeholder to place the signature there.
→ Learn more about signature and form field placeholders in the module Prepare forms in the last chapter.
2. Upload and send mail merge document in sproof Sign
-
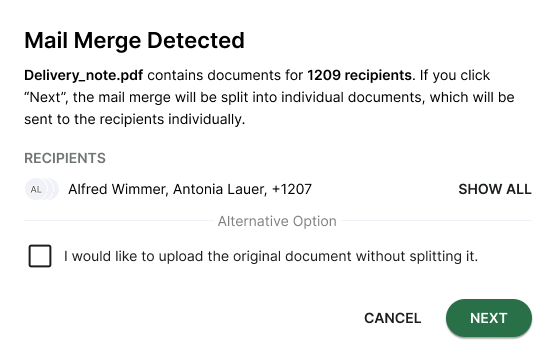
Upload the exported PDF to sproof Sign or via the API. sproof Sign will automatically recognize your document as a mail merge and open a dialog window.
-
Click next to the list of recipients on “Show all” to display the full list of recipients. Incorrect entries in your contact list will be marked in red. Correct the error if necessary and upload the document again.
-
By default sproof Sign splits the mail merge document into individual documents which are sent to the respective recipients. Alternatively, you can open the mail merge document without splitting it by selecting the checkbox. Click “Next” to proceed to the next step
Option 1: Split mail merge document into individual documents and send (standard)
After sproof Sign has split your mail merge document into individual documents, you can set optional settings for your invitation in the next step:
-
Choose a signature type for the document.
-
Set an automatic reminder date and the frequency of reminders.
-
Set a due date for the document so that it can no longer be signed after that time.
-
Write a personal message to be sent with the invitation email. You can also choose from previous messages.
-
Open the “More settings” tab for additional options to configure your invitation.
-
Click “Send invitations” to send each recipient an individual document to sign.
Option 2: Do not split mail merge document into individual documents and upload
If you selected the checkbox when uploading the mail merge document, it will be opened in sproof Sign as a continuous document. Stored recipients remain saved. You can now continue to edit the document or send it directly to the stored contacts:
-
Continue editing: The mail merge document is opened as a whole. You now have the option to sign the document yourself, edit form fields or adjust the recipients. You can no longer split the document into individual documents. If you send it, all recipients will receive the entire document.
-
Invite all: Send the complete mail merge document to the stored recipients with one click. All contacts receive the entire document.
3. Track signature progress in the dashboard
After you have sent the mail merge document it will be stored in your dashboard as individual documents (for Option 1) or as the entire document (for Option 2). Now it's the recipients' turn to sign the document(s). Sit back and keep an eye on the progress.