

Exclusive preview: Discover the features of the new editor now – available from October 22, 2026.
💡 At a glance
A workflow in sproof Sign is the reusable template for your signature and approval processes.
There you set fixed settings — like documents, recipients, roles, signature sequences and e-signature standards — once so you can reuse them at any time.
Prerequisite: Applying a workflow requires that you are familiar with sending signature requests. The actual configuration of workflows is covered in the module Create and manage workflows.
📑 Step-by-step guide
1. Start a workflow
There are several methods to start a workflow:
-
From the dashboard
-
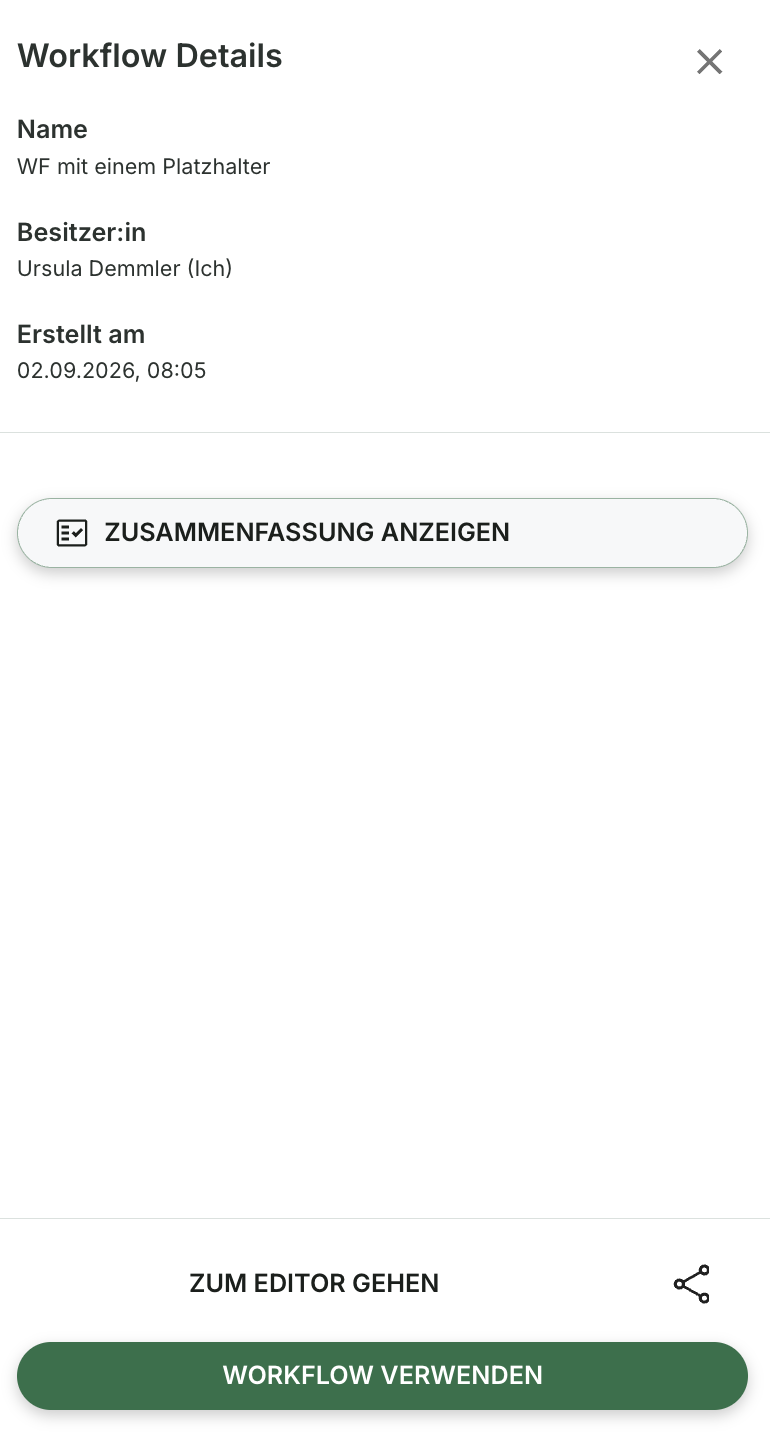
Option A: In the left sidebar select “Workflows & Templates” > Then click the row of the desired workflow so the detail view opens on the right > Press the “Use workflow” button at the bottom right.
-
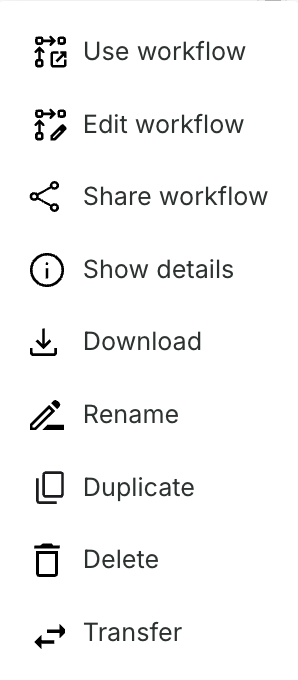
Option B: Open the three‑dot menu in the row of the desired workflow > Choose the option “Use workflow”.
-
-
In the workflow editor
-
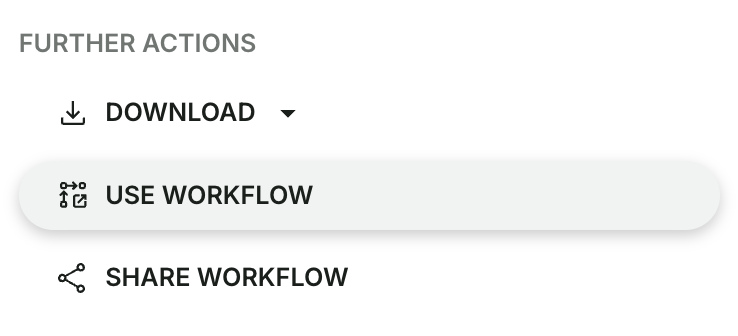
After you have created or edited a workflow, select “Use workflow” in the right sidebar.
-
2. Assign a name (only for document bundles)
After starting a workflow that includes multiple documents, a dialog box opens where you assign a name for the document bundle. If only one document is stored in the workflow, the name is automatically taken from the workflow and can be adjusted later if needed.
After that, the further flow depends on the structure of the workflow.
-
Workflow with predefined documents or bundles: If the workflow already contains documents and no placeholders, the documents are automatically loaded into the editor. You can proceed directly with configuring the recipients.
-
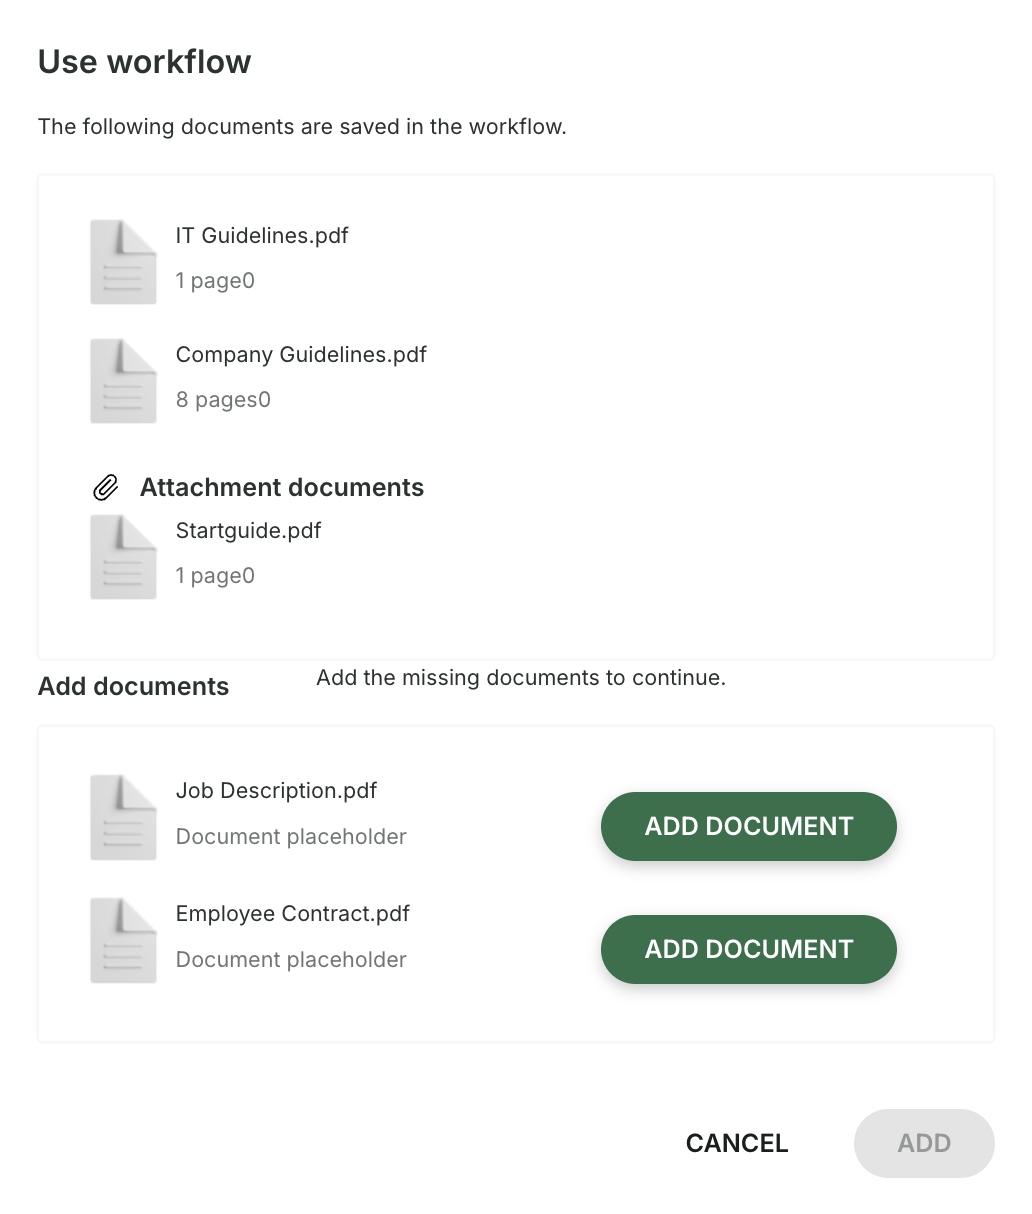
Workflow with document placeholders: Some workflows standardize the process while the specific document varies per case, for example with individual contracts. Choose such a workflow and upload the required document. After the upload, saved settings like recipients and fields are applied automatically.
2. Define recipients and replace placeholders
Once the document or workflow is loaded, finalize the recipient list in the Recipients tab.
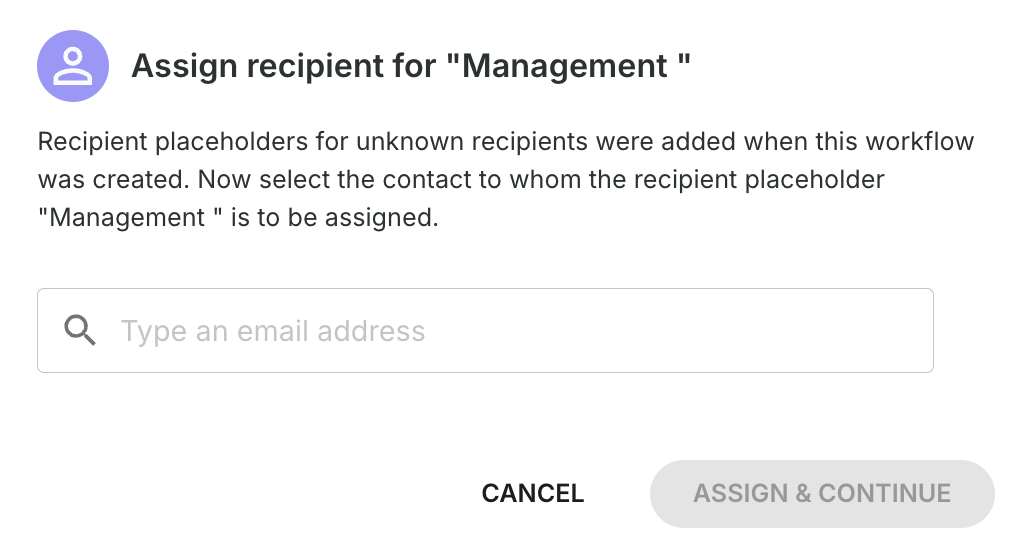
If your workflow uses person placeholders, assign specific people to them now. Placeholders represent roles in the process that can be filled anew each time the workflow is used, for example “new employee”.
-
Click the Recipients tab.
-
Replace the person placeholders with specific recipients.
-
Confirm the assignment. All settings saved for the placeholder, such as role and signature fields, are automatically transferred to the selected person.
Important: Replacing a person placeholder preserves the settings defined in the workflow. You do not need to recreate them.
3. Configure the matrix
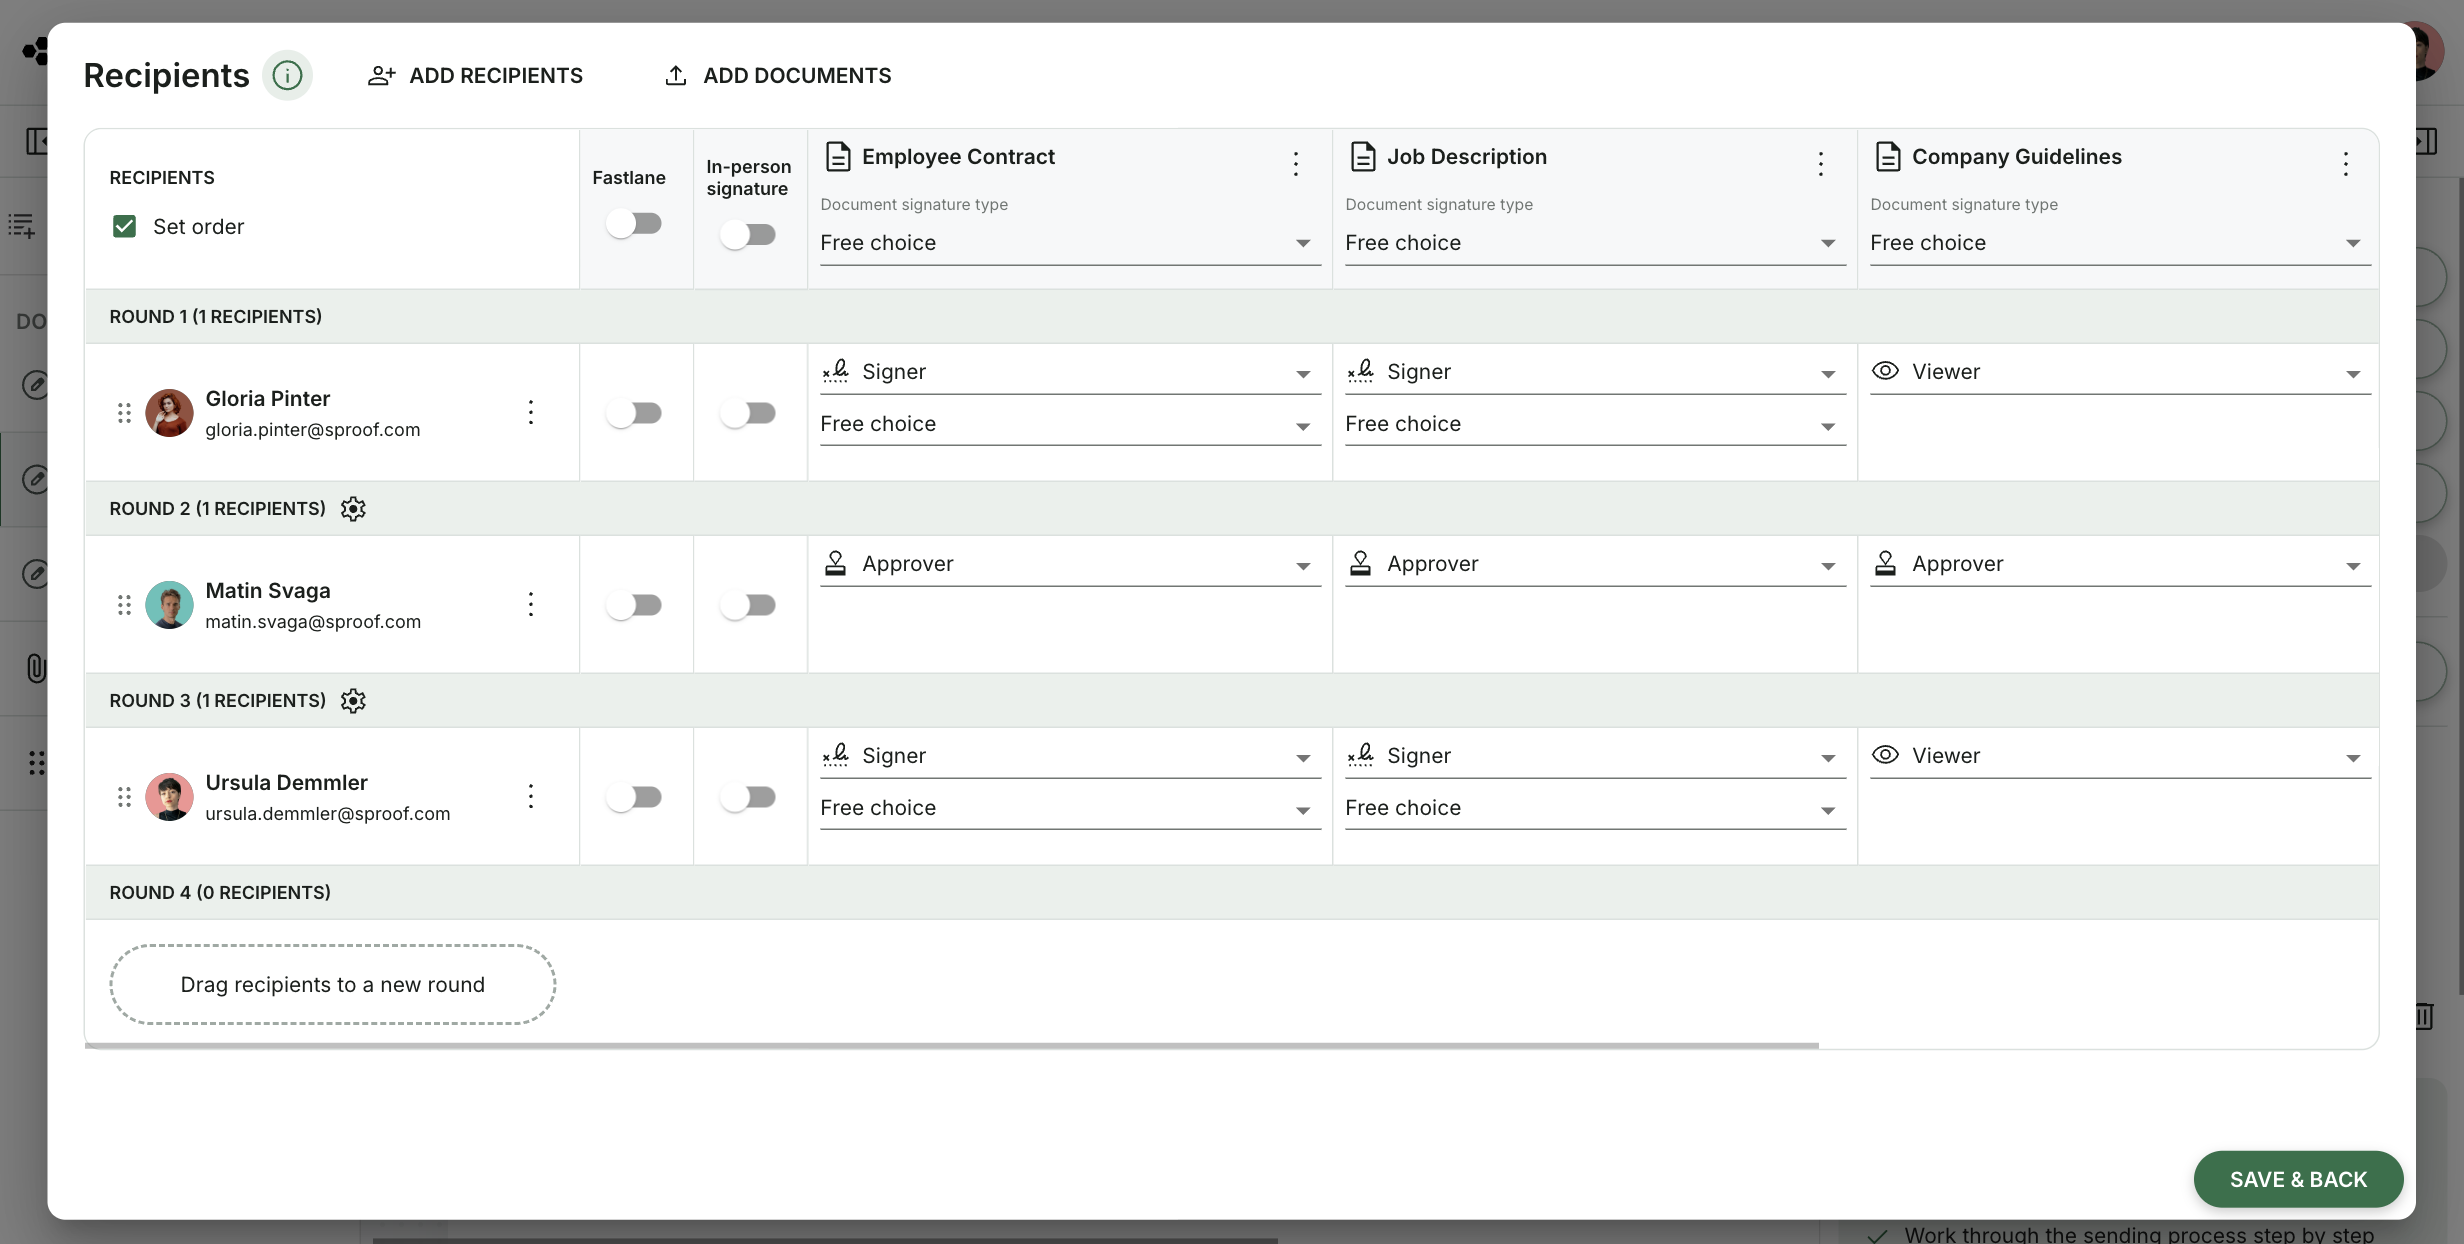
After defining the recipients, you control the details of the process in the matrix. Here you adjust the flow per person and per document.
-
Change the order of invited people
-
Set roles per recipient and document, for example Signer, Approver or Viewer
-
Hide documents for individual people
-
Define individual e-signature standards per recipient and document
-
Edit recipient data or delete the recipient via the 3‑dot icon
-
Use the settings icon next to a round to specify that only a certain number of people from that round need to sign
-
Manage documents directly in the matrix: add, delete, rename or convert to an attachment
-
As a Fastlane user, activate Fastlane per recipient
-
As an on‑site signature user, activate on‑site signature per recipient
When all settings in the matrix are correct, click Save & Back.
4. Prepare the document
Switch to the Prepare document tab. There you place the required signature and form fields.
-
Place signature and initial fields: Place at least one signature or initial field for each signer. Both field types are considered equivalent signatures.
-
Select recipient: The Next recipient button guides you sequentially through all involved people to place signature positions and form fields. Alternatively, use the dropdown menu to switch directly between people.
Note: Size and position of signature placeholders and form fields can be adjusted. Form fields offer additional specific settings. In the thumbnail view on the left you can see page by page for which recipients fields have already been placed. Color markings help with allocation.
Learn more about form fields in the module “Prepare forms”.
Once recipients and signature positions are defined, you can send the invitation. The following steps are optional.
5. Optional settings before sending
Email settings
In the Email settings tab you customize communication with the recipients.
-
Subject: Define a clear, meaningful subject.
-
General text: Provide a uniform message for all recipients.
-
Individual message: Optionally add a personal message visible only to a specific person.
Reminders, deadlines and other options
-
Set deadlines: Define a reminder date as the starting point for automatic reminders and/or a due date as the end point of the signing opportunity.
-
Additional options: For example, allow forwarding of the document or set the invitation language.
-
Review & send: Finally click the green button to start sending.
6. Review summary and send invitation
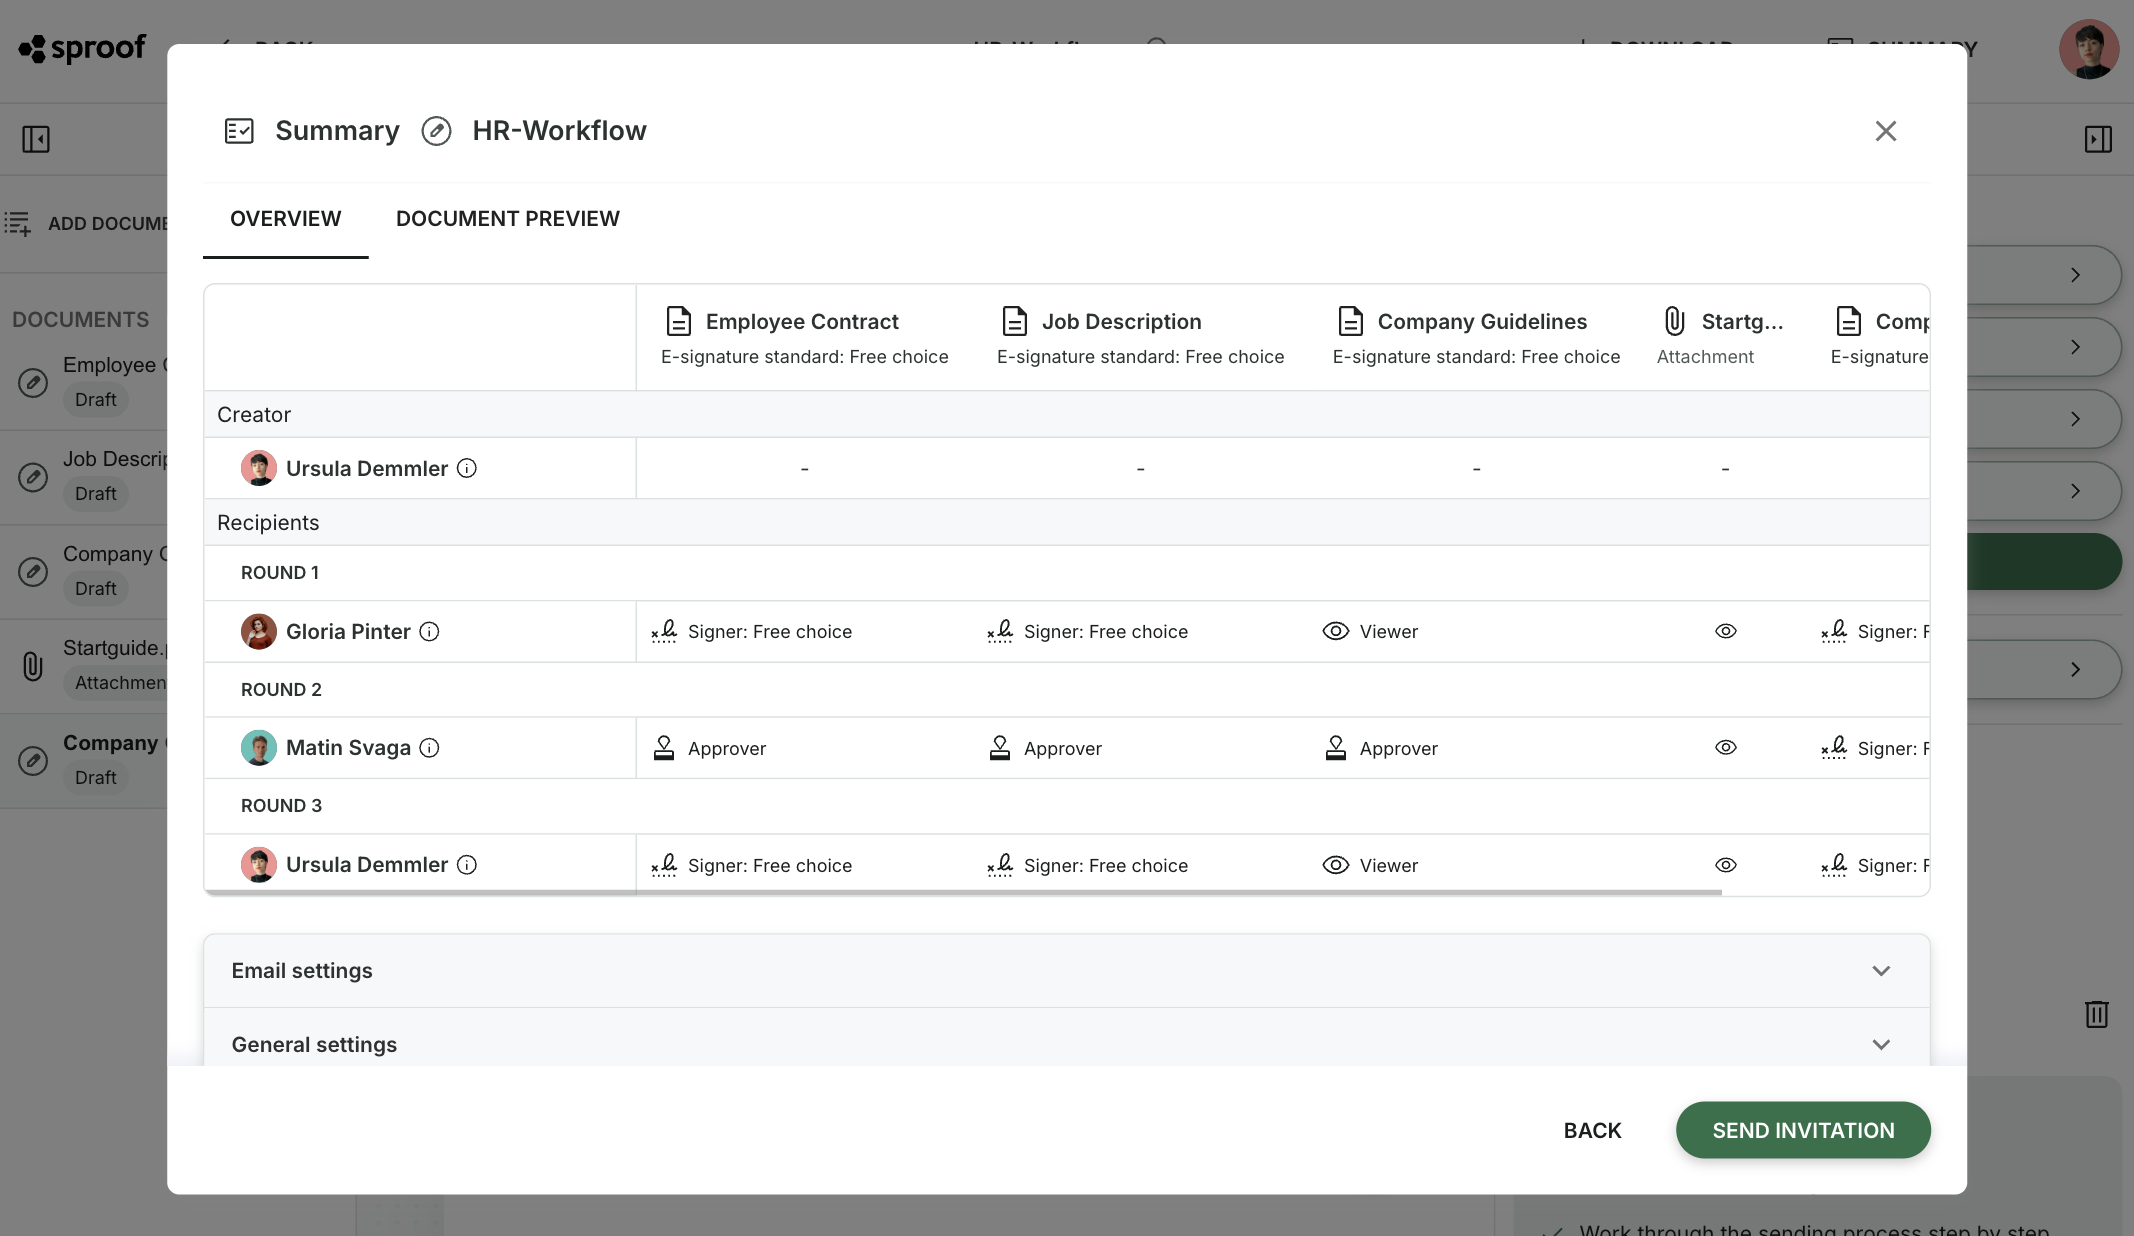
When you click Review & Send, a summary of your configuration opens.
-
Recipient details: All recipients and documents appear in a table, including roles, document visibility and e-signature standards.
-
Settings: You see the chosen email settings and sending options.
-
Document preview: In the second tab you find the preview of the documents.
The summary is accessible throughout the sending process via the Summary button at the top of the interface.
7. Track progress
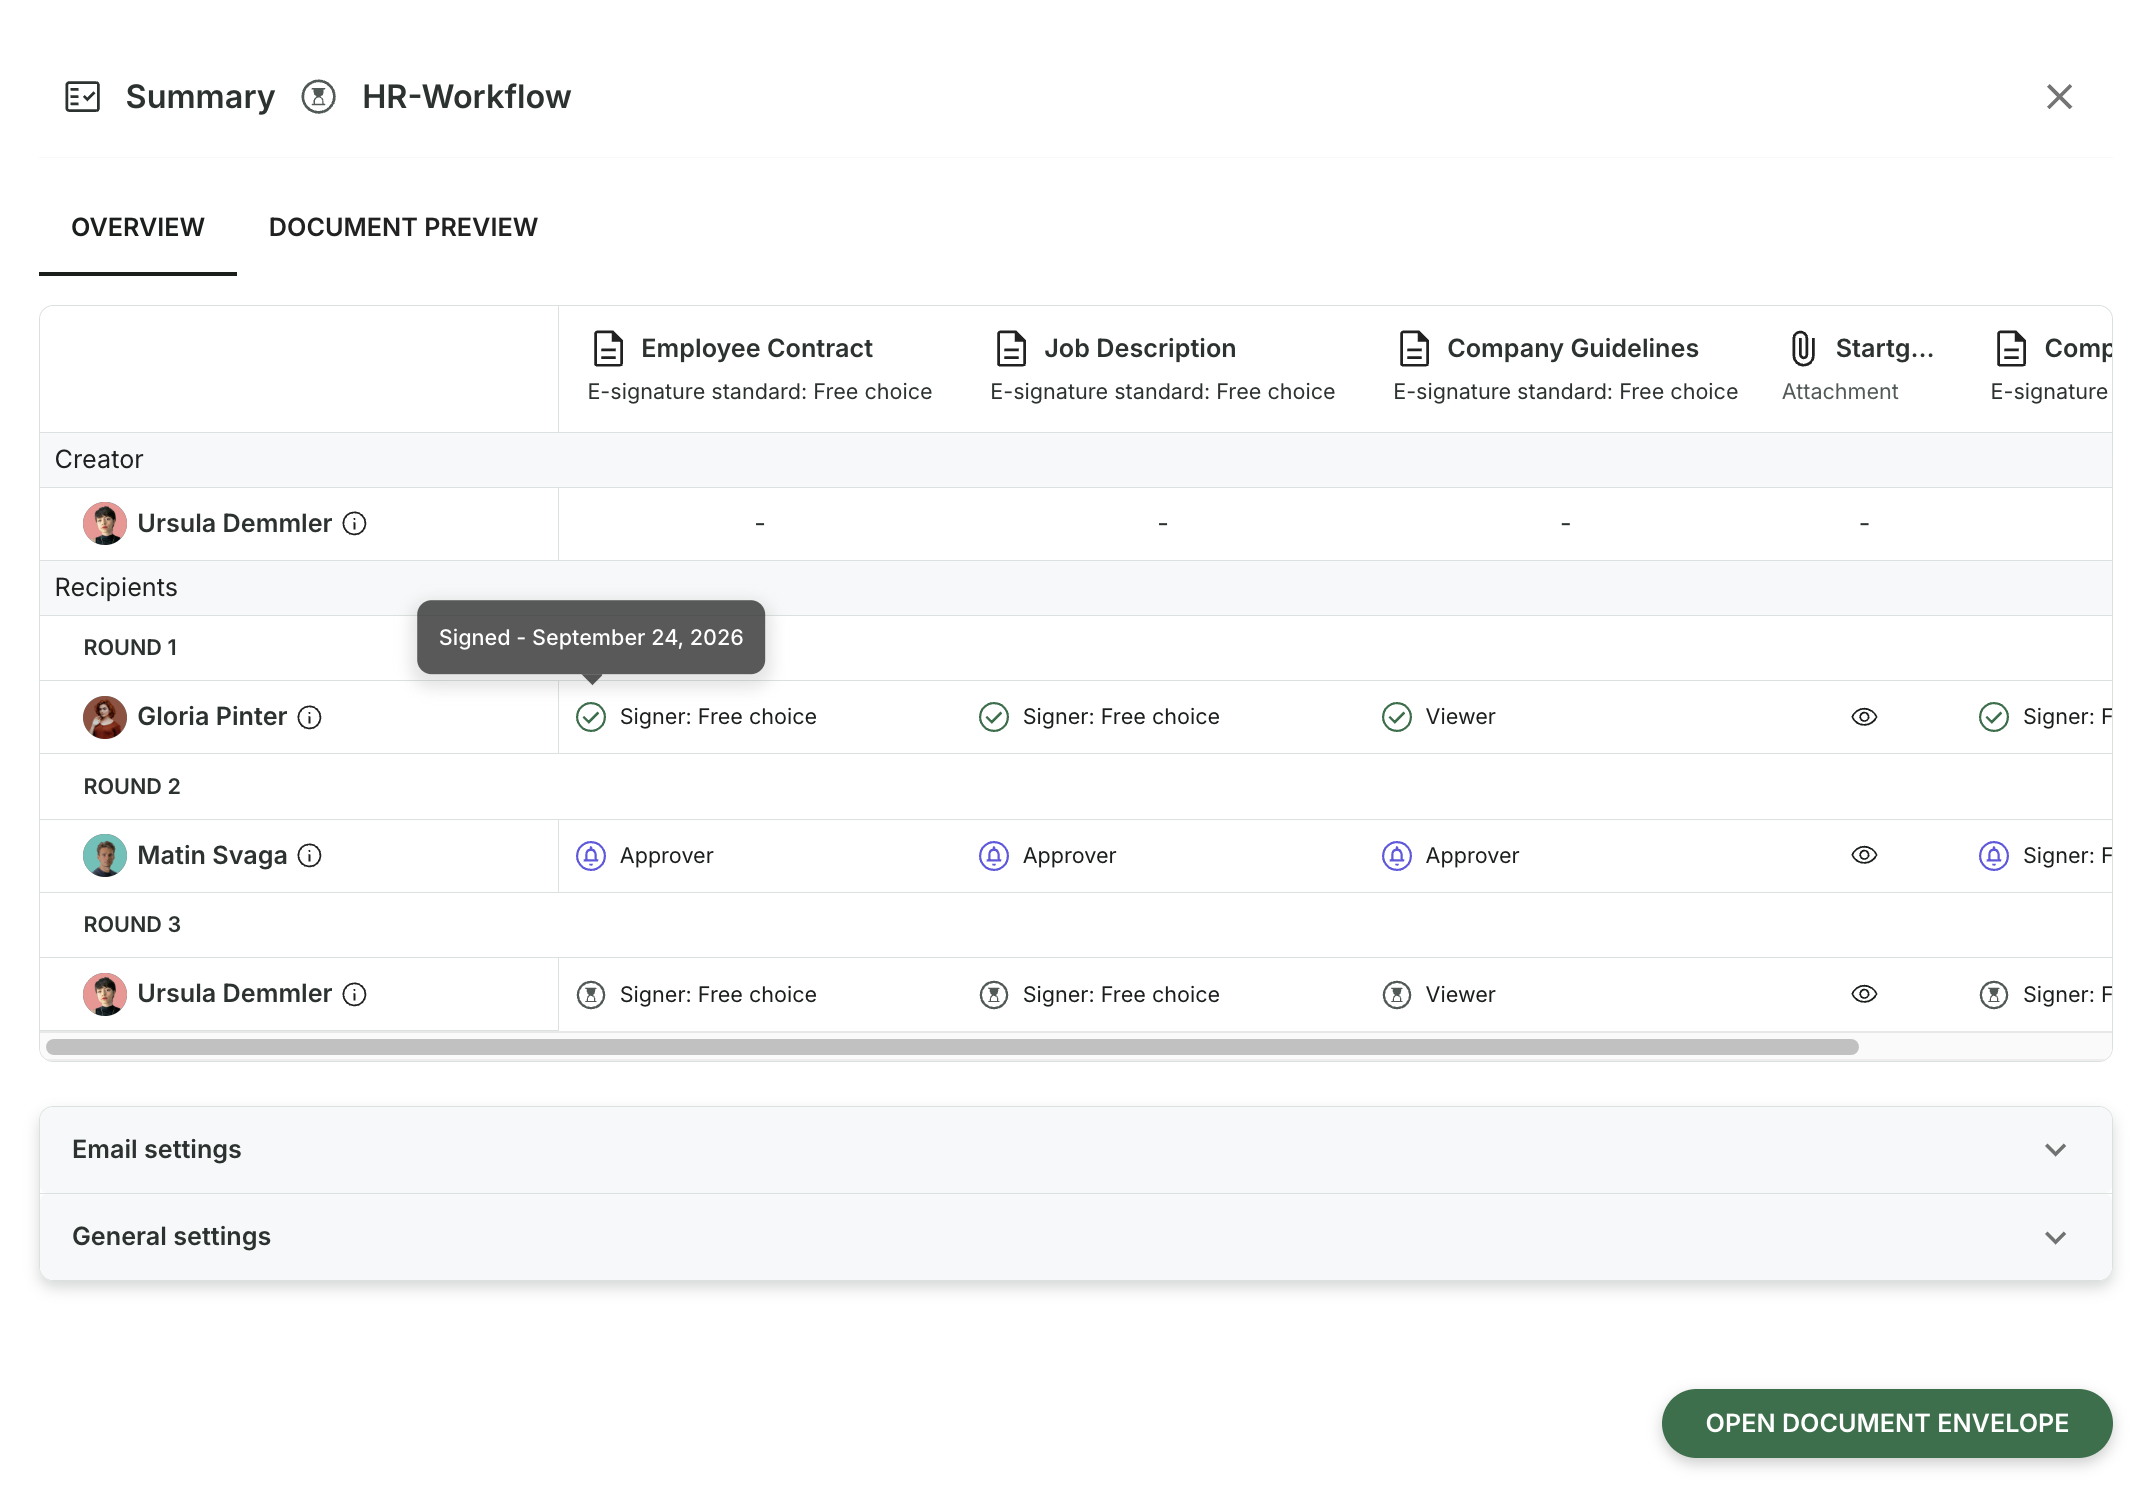
After sending, monitor the status of the signature process in the dashboard. Alternatively, open the summary matrix via the document status or the document details.
There you can see the current processing status per recipient and per document and immediately recognize at which point the process is located.
8. Manage already sent signature requests
As long as a document or bundle has not been signed by all recipients, you can still edit and manage the signature request.
Add recipients and configure the matrix
You can add new recipients at any time, even after sending. Click “Add recipients”, select a person and then configure the matrix accordingly.
If rounds are activated, the new person is added to the first round. Drag the person to another round using drag & drop. The order of existing recipients cannot be changed. However, you can delete recipients using the 3‑dot icon next to their name and instead add a new recipient.
Signature position and form fields
You will then proceed to define the signature position. Place the signature position and, if applicable, additional form fields for the newly added person. If you click “Back” or “Cancel”, you will be asked whether you want to discard the changes. Complete the process step by step and then click “Update invitation”.
The following actions are possible as long as not all recipients have signed:
|
Action |
|---|
|
Activate or change reminder and due date |
|
Revise already placed fields for recipients |
|
Resend invitation (via the 3‑dot icon) |
|
Delete documents |
|
Sign yourself |
|
Write a message in the chat |
Once the document or bundle is complete, meaning all recipients have signed, only limited actions are possible:
|
Action |
|---|
|
Add more recipients |
|
View reminder and due dates |
|
View settings |
|
Sign yourself |
|
Write a message in the chat |