

💡 At a glance
Before you sign a document, you often also need to fill out form fields. You can do this in sproof Sign in two ways: directly on the document or in the so-called quick access – a simplified view of all form fields relevant to you on the document.
There are two field types: assigned fields can only be edited by you, general fields can be filled out by all signers – but only until the first signature. With the first signature, all entries become legally binding and can no longer be changed.
📑 Step-by-step guide
-
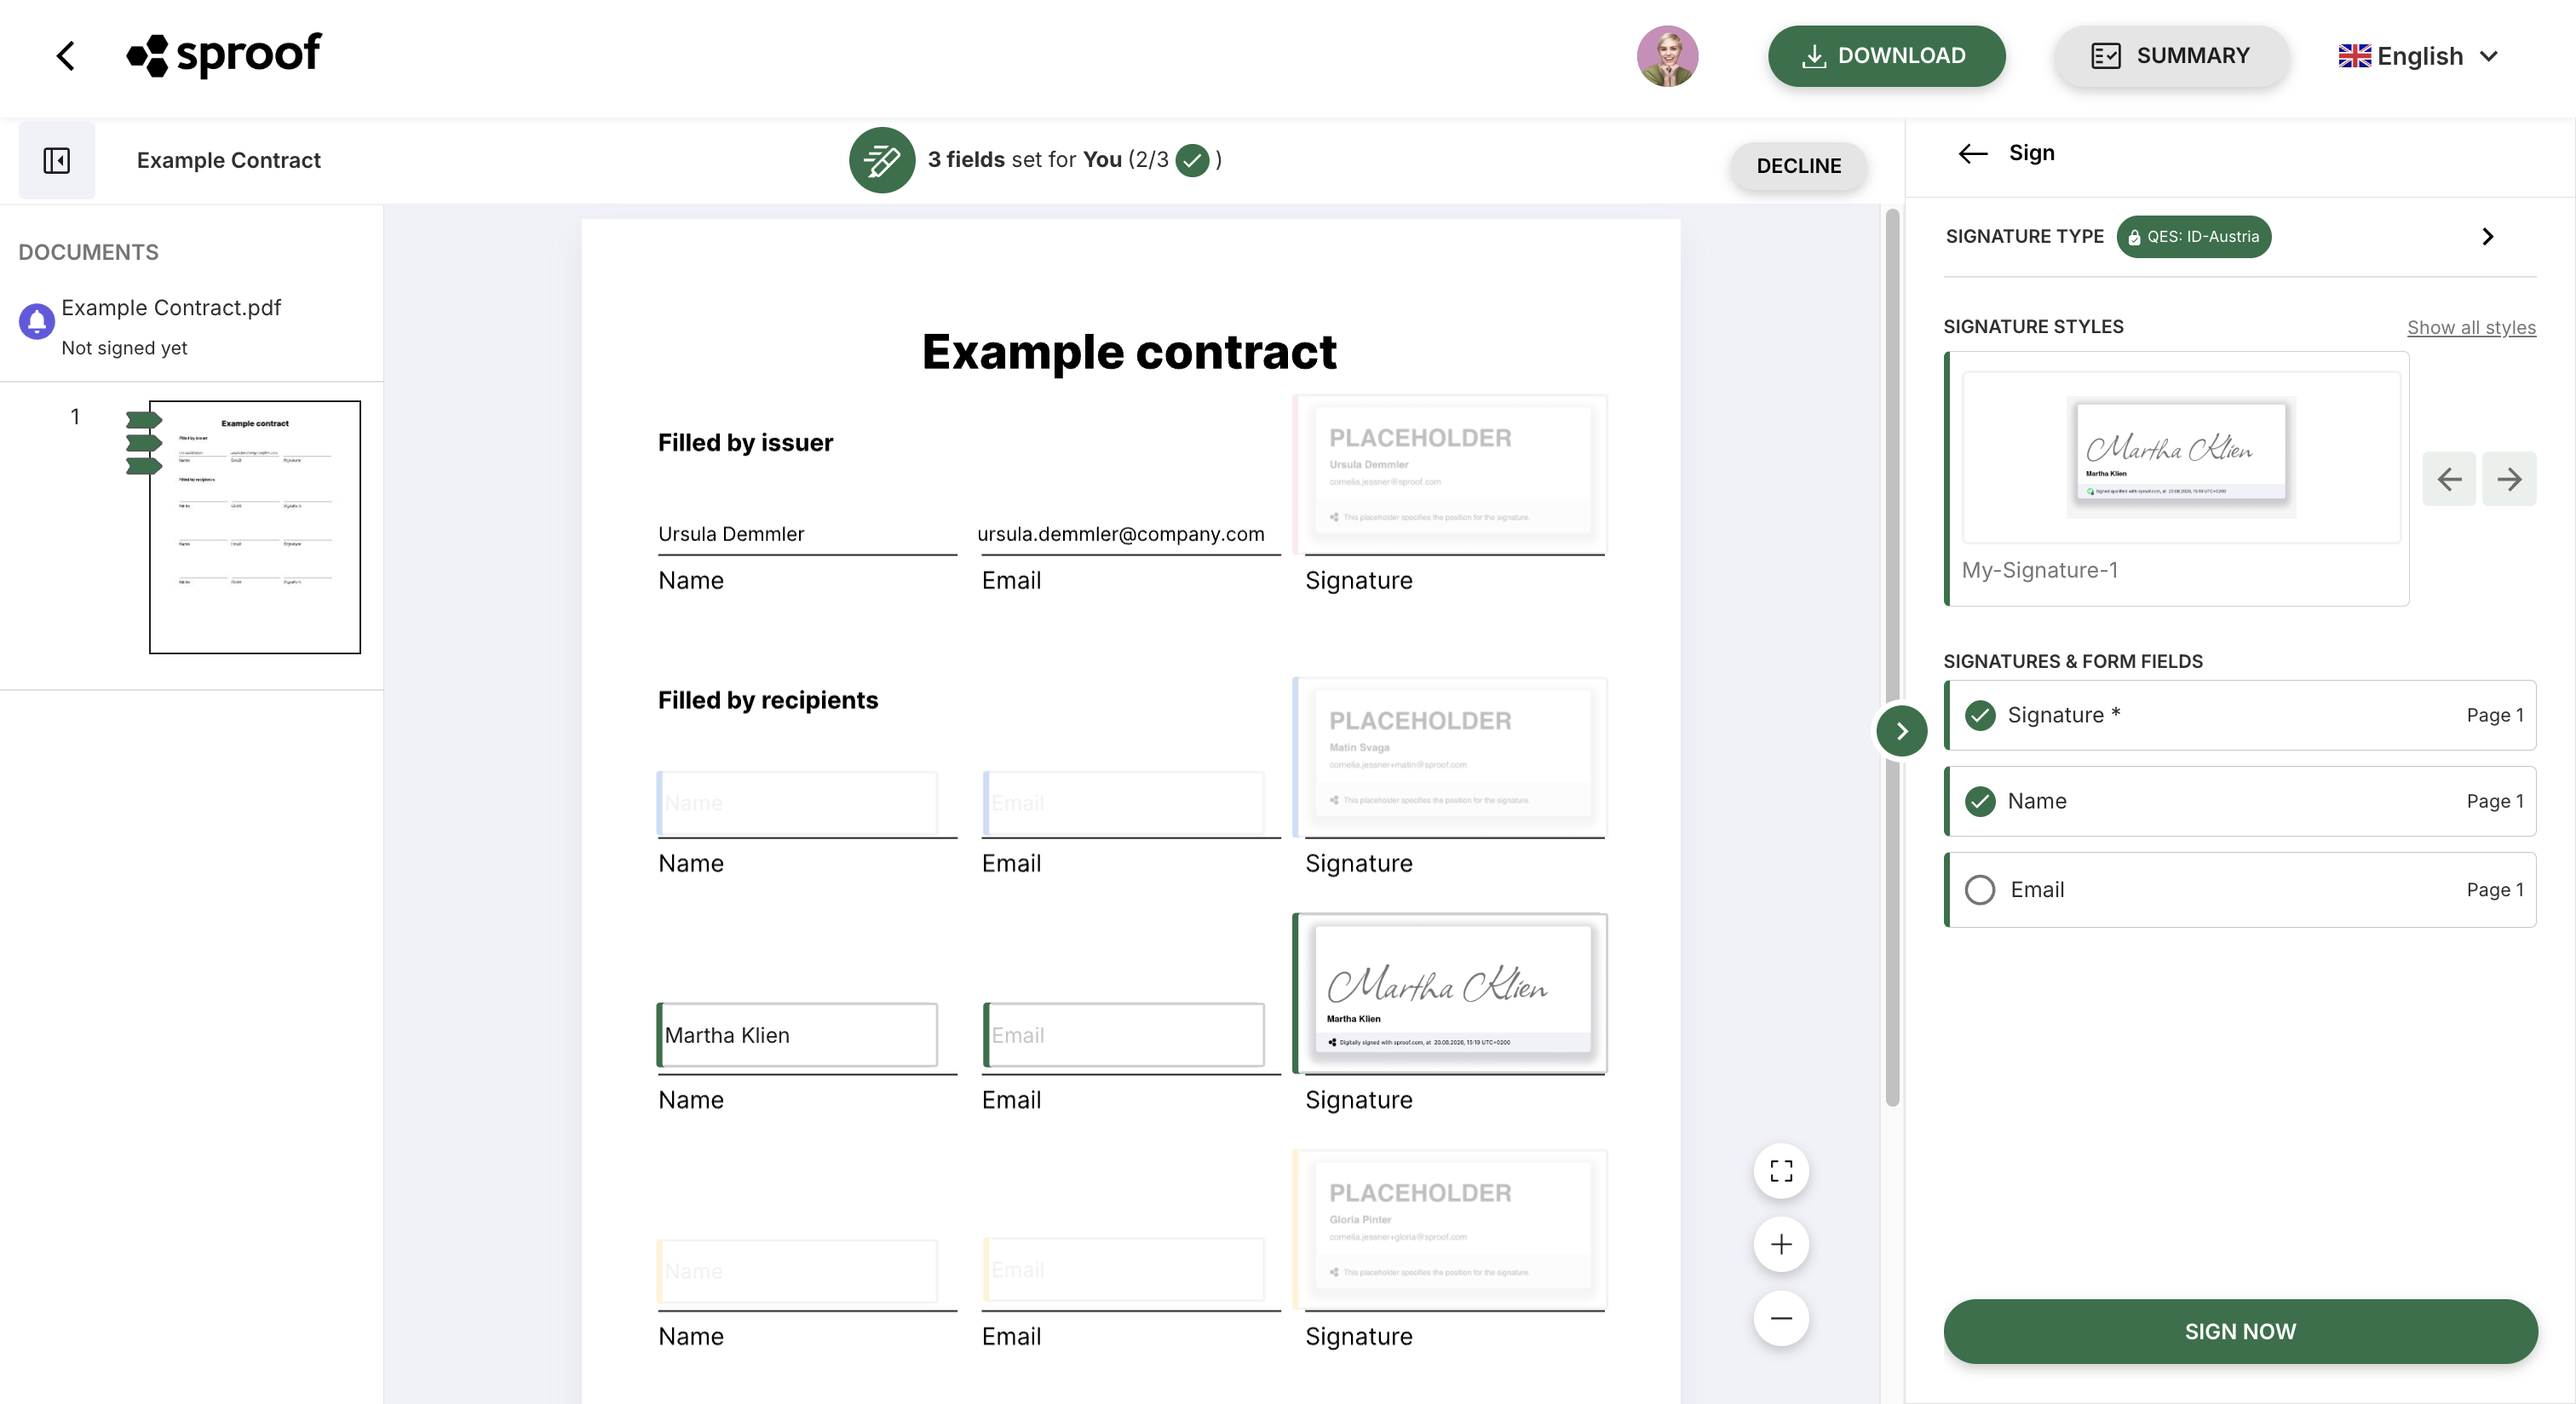
Open the document via the link in the invitation email or from your dashboard. You will land directly on the “Sign yourself” tab.
-
In the right sidebar under “Form fields” you will find a list of the form fields to be completed. General form fields are indicated by a gray color indicator. Required fields are marked with a '*' . Once you have filled in a field, the checkmark icon changes from (empty circle) to (filled circle with checkmark)..
-
How many fields have been defined for you is also shown in the bar above the document with the text “X fields set for you”. Using the left/right buttons you can navigate between the form fields.
-
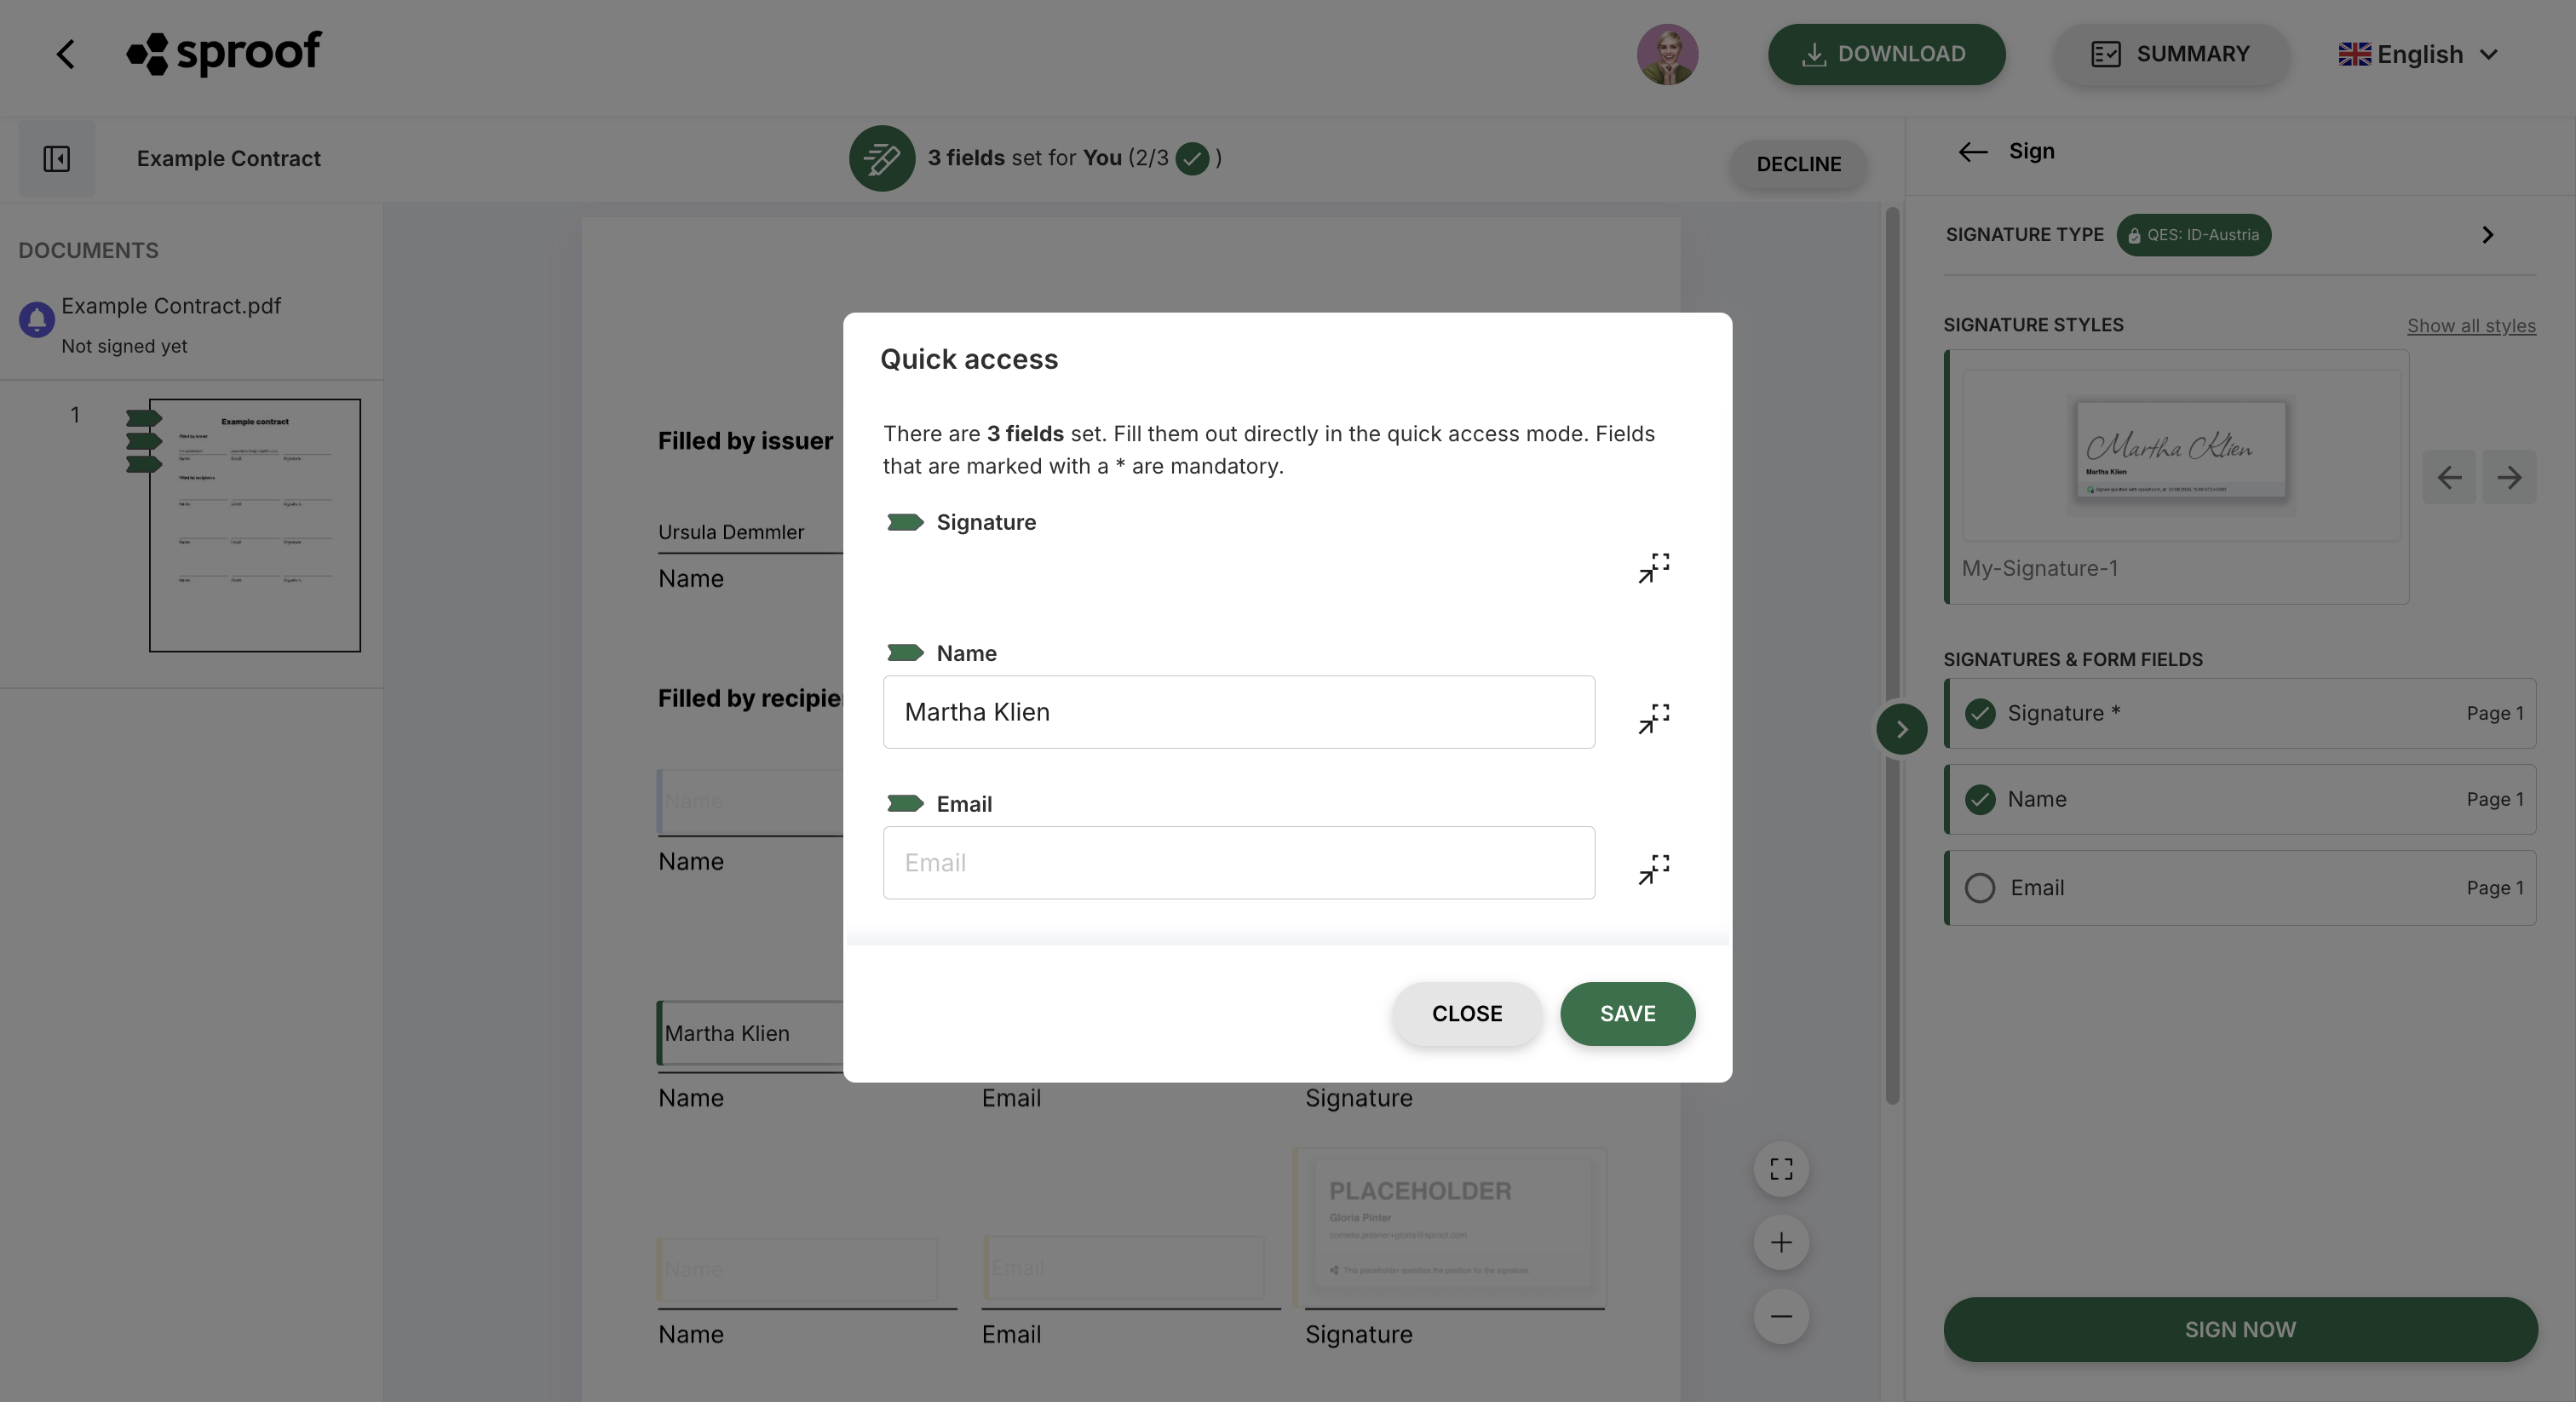
You can click a form field directly on the document and fill it in or use the quick access. To open the quick access, click the button with the pen. A window will open listing all form fields.
-
With a click on the icon with the arrow and the frame you can jump to a field on the document.
-
When you are finished, click “Save”.
Important: Signature positions do not need to be filled in but only checked (= viewed).
-
Finally, you can sign the document as usual. Instructions for signing can be found in the module “Sign yourself, Approve, View”.
Important: You can only fill out form fields before you sign a document. With the signature, the data from the form fields on the document is also recorded and can no longer be changed.