

Exclusive preview: Discover the features of the new editor now – available from October 22, 2026.
In this module you will learn how to create a signature request in sproof Sign, add recipients, prepare documents and send invitations. The new guided editor accompanies you step by step through the entire process – from the first file to the finished invitation.
This module focuses on the standard workflow for sending a signature request. If you want to learn more about e-signature standards, prepare forms, Signature Progress & Reminder Function, there are separate Academy modules for those topics.
💡 At a glance
Create a signature request for one or multiple people in just a few steps. You upload your document, define the involved recipients, set roles and – if necessary – e-signature standards, place signature fields in the document and then send the invitation.
The editor guides you through all necessary settings in a clear order. This way you always keep an overview and can review your request once more before sending.
📑 Step-by-step guide
1. Upload document
-
Open the upload area in the dashboard.
-
Upload your document via drag & drop or select one or more files from your device.
-
Click Start now to open the document in the editor.
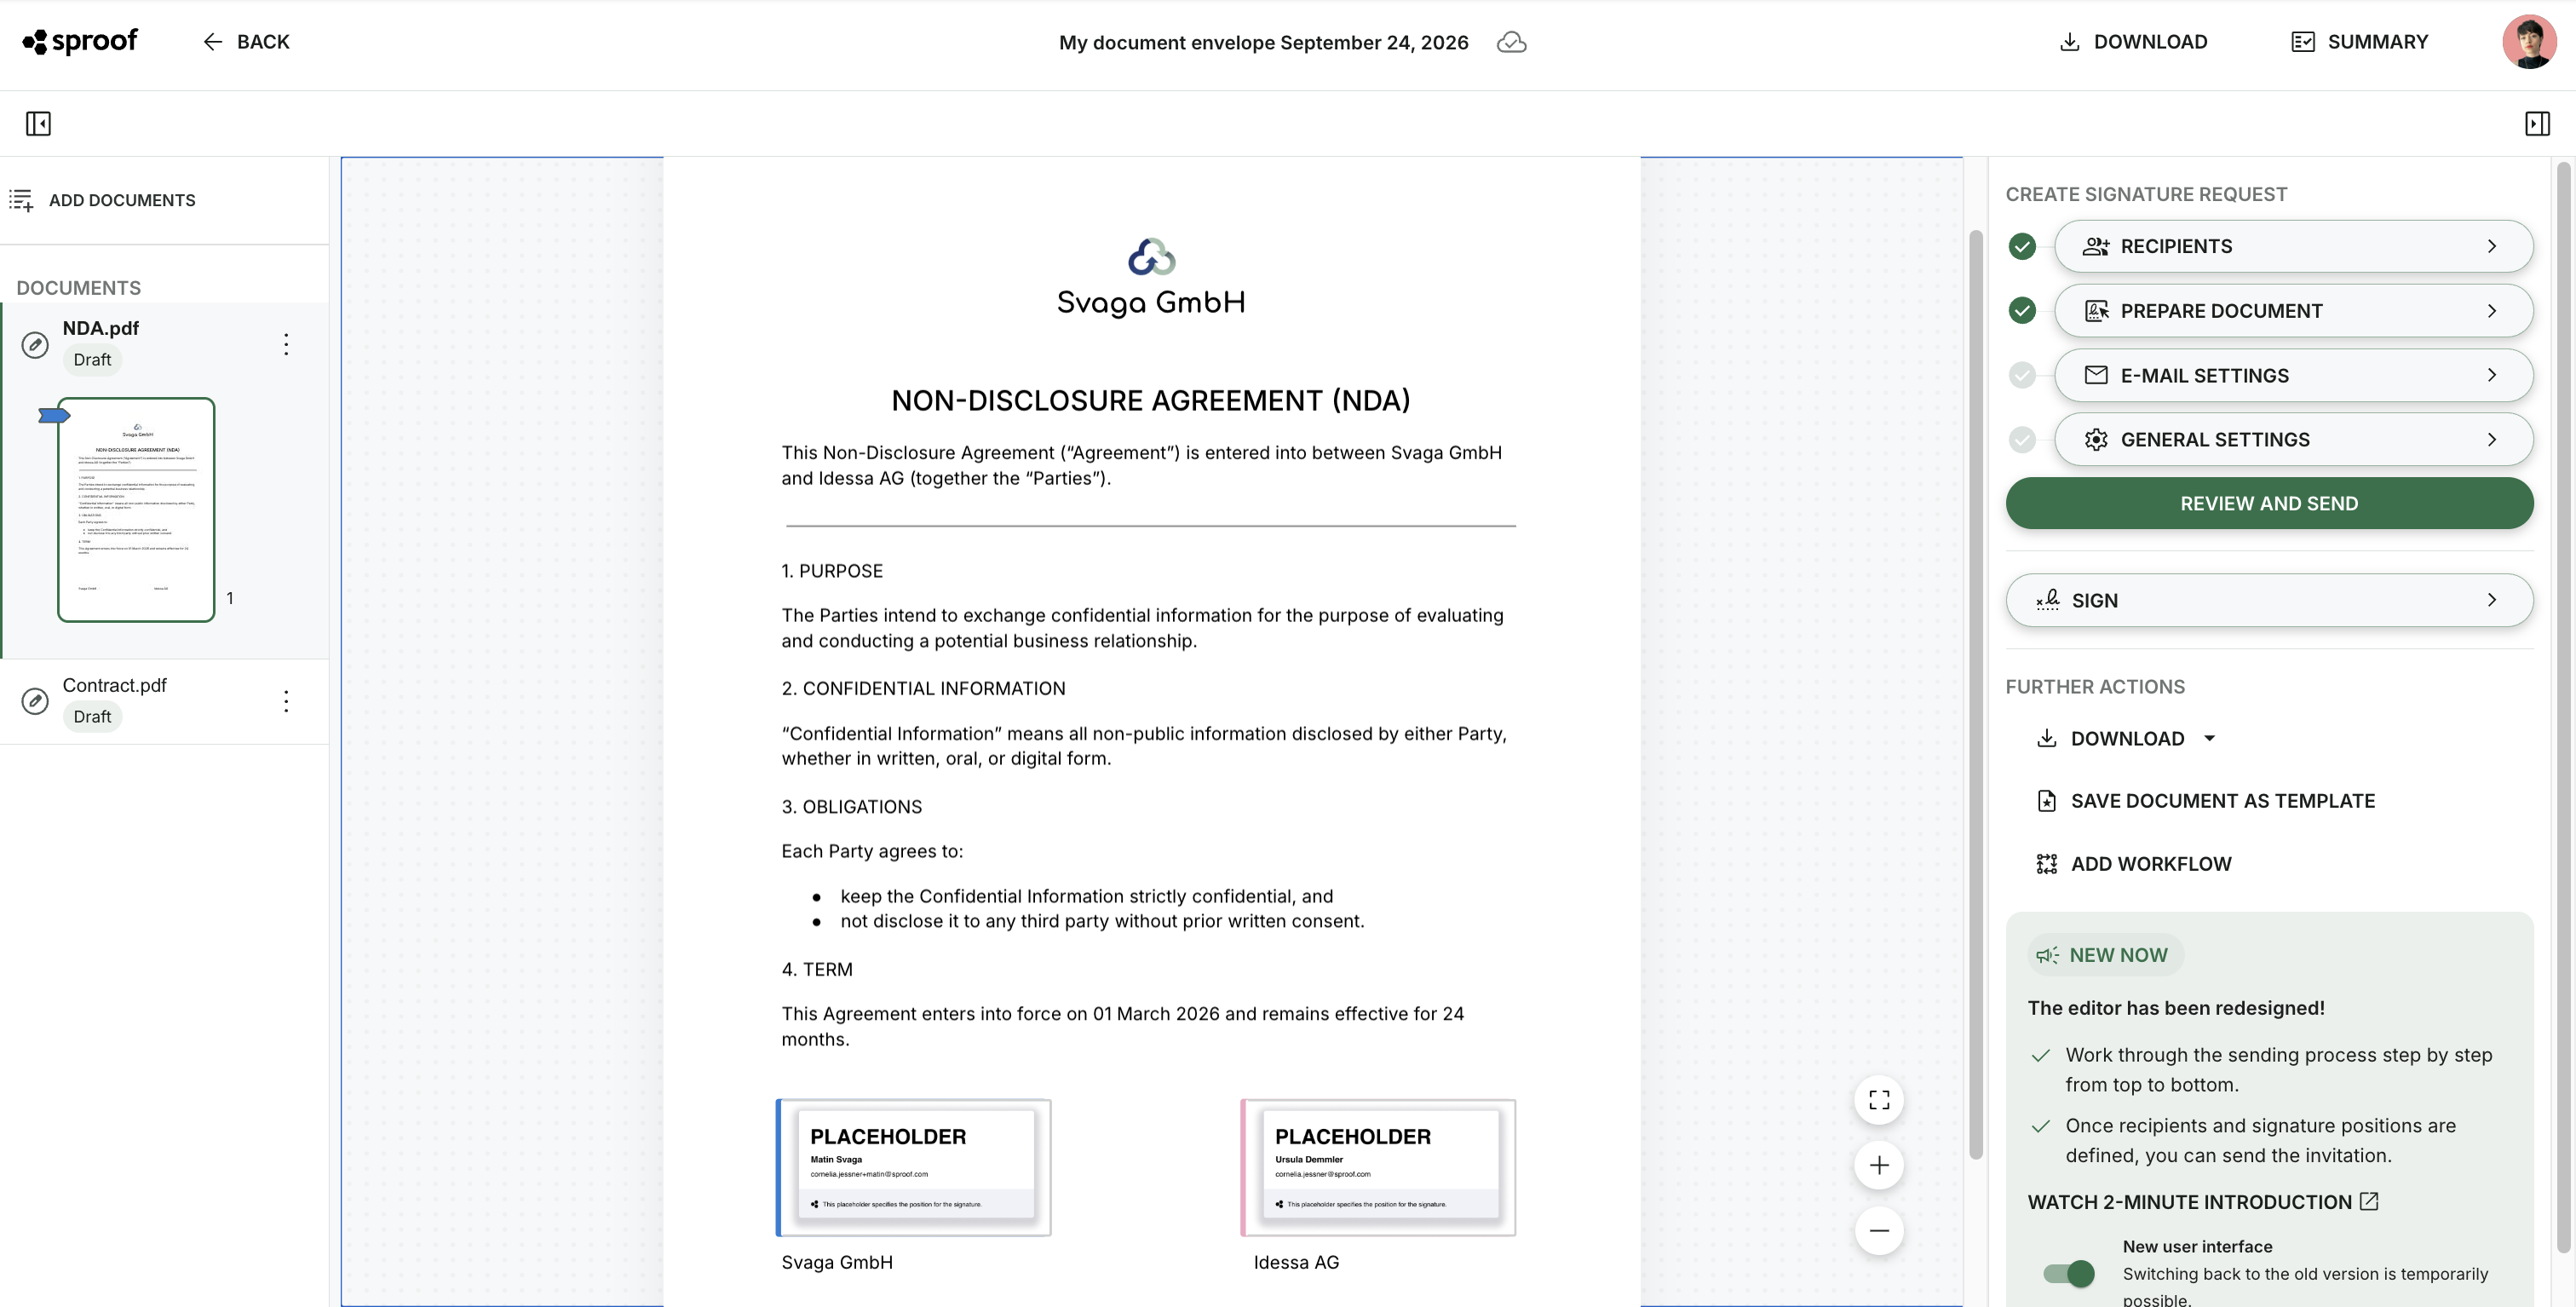
After the upload you will enter the editor. In the right sidebar you will see the Create signature request area. There you work step by step through all settings – from recipients to sending.
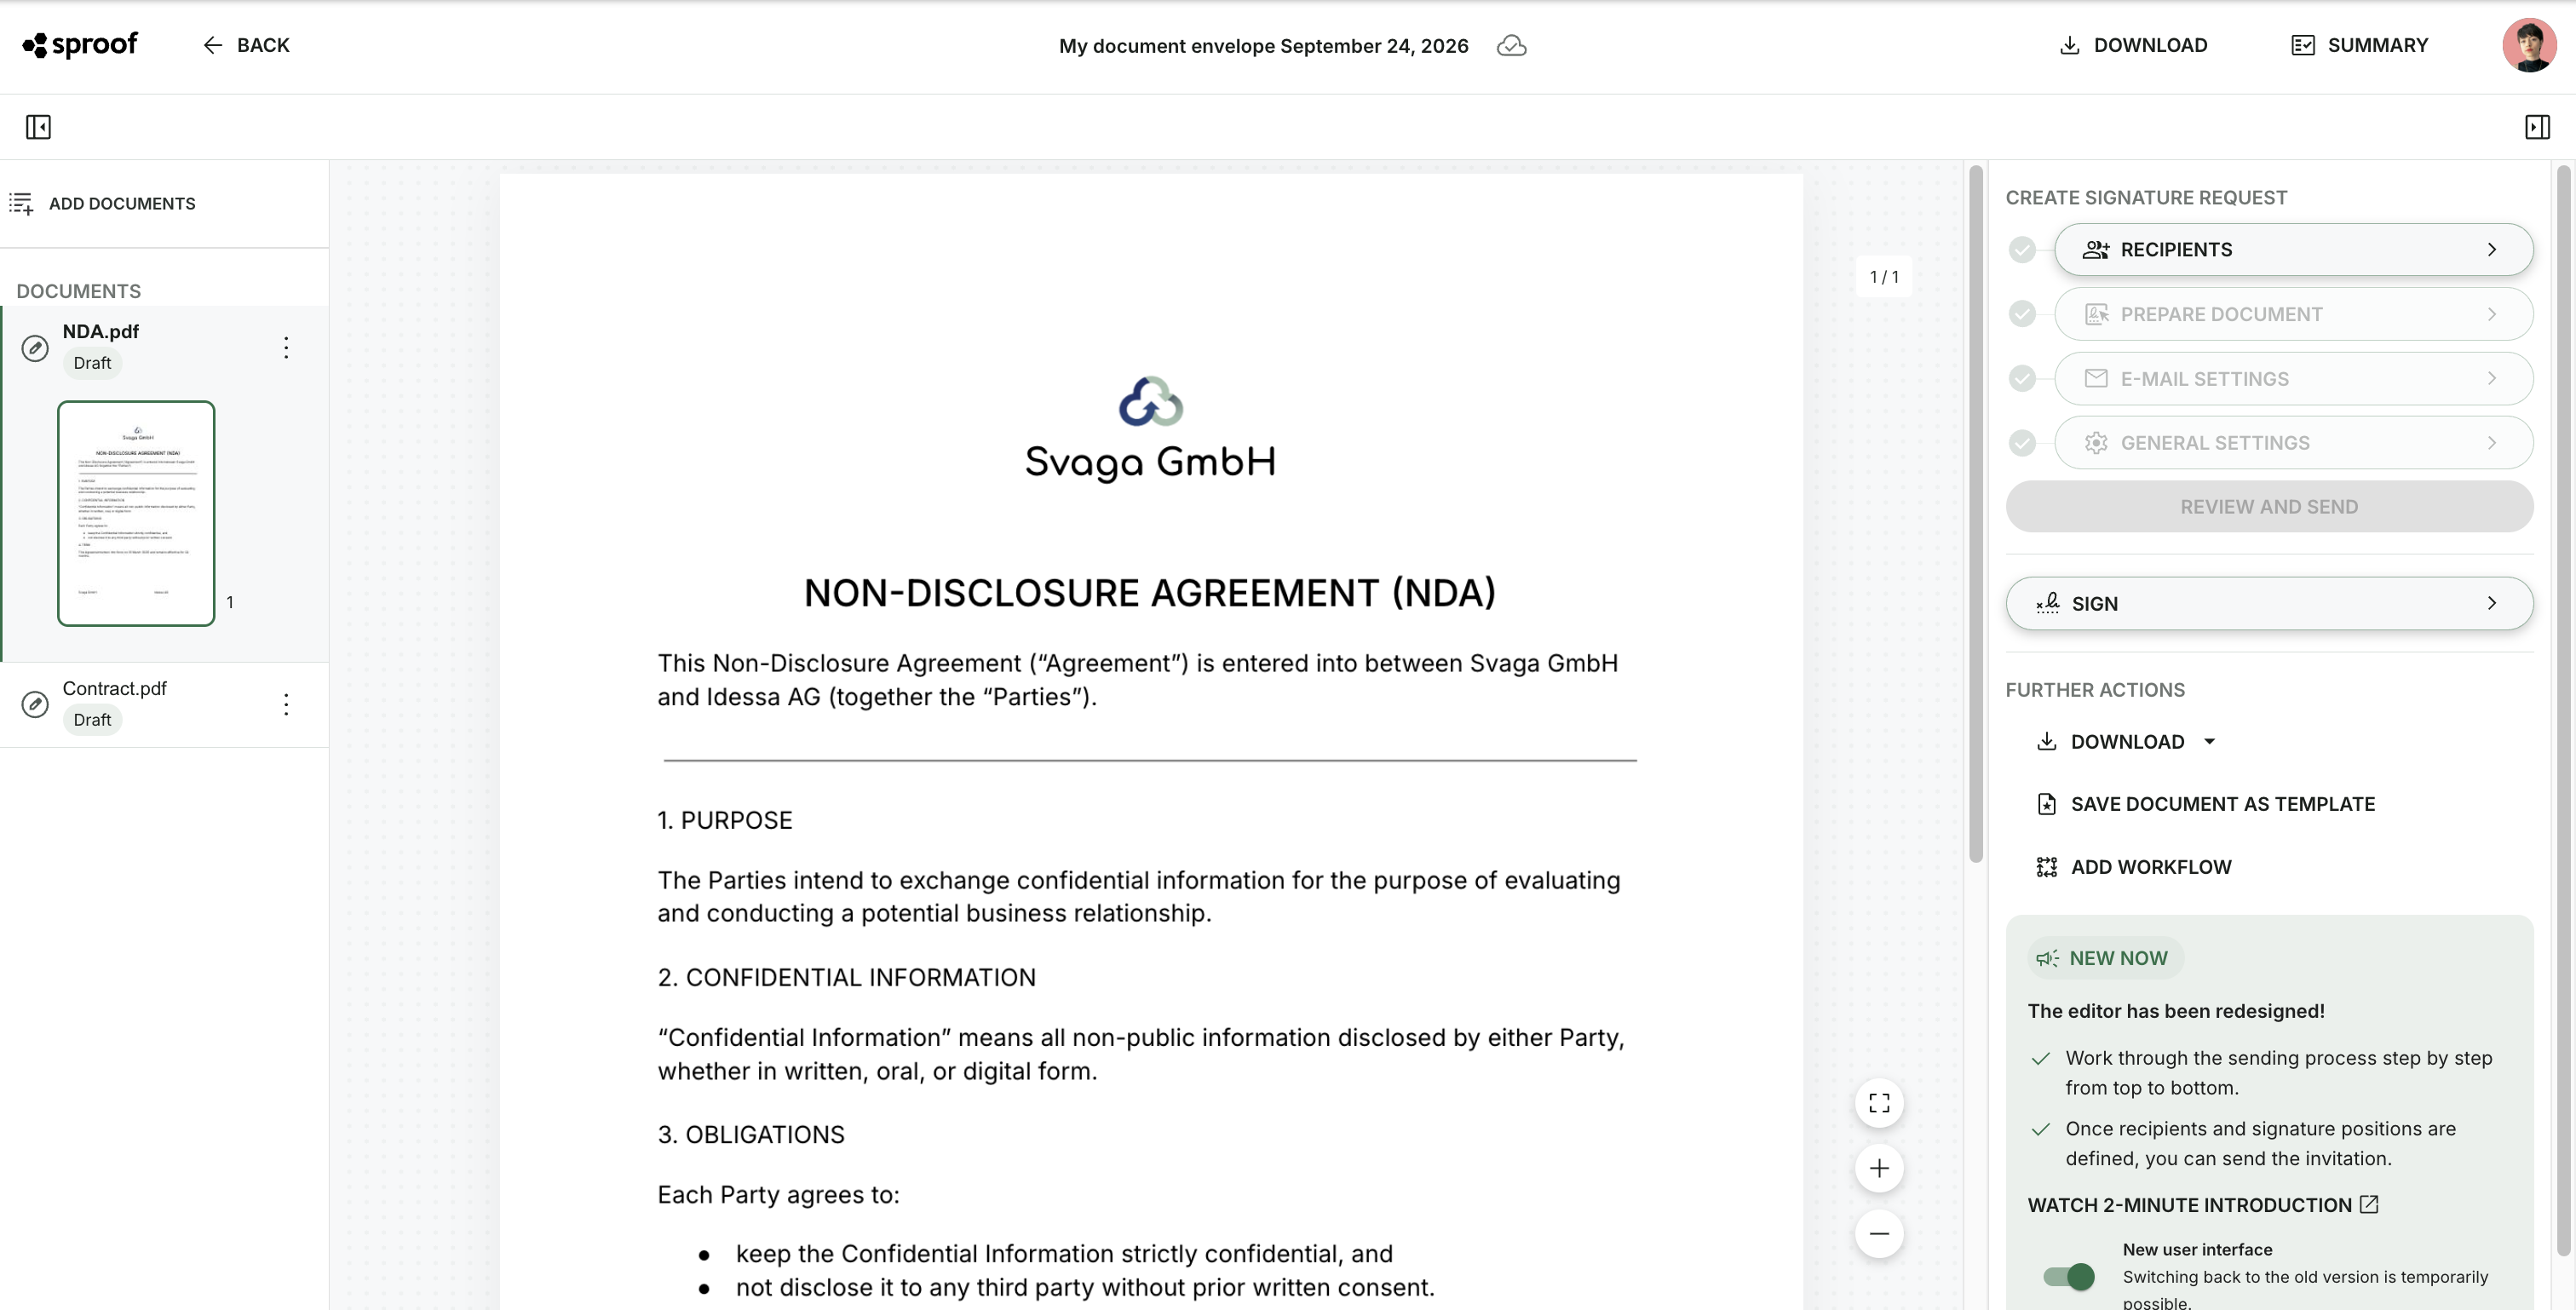
In the lower right of the right sidebar you can temporarily switch to the classic view. Please note that this option is only available for a limited time.
2. Add recipients
-
Select Recipients in the right side menu.
-
A window will open. Click there on Add recipients.
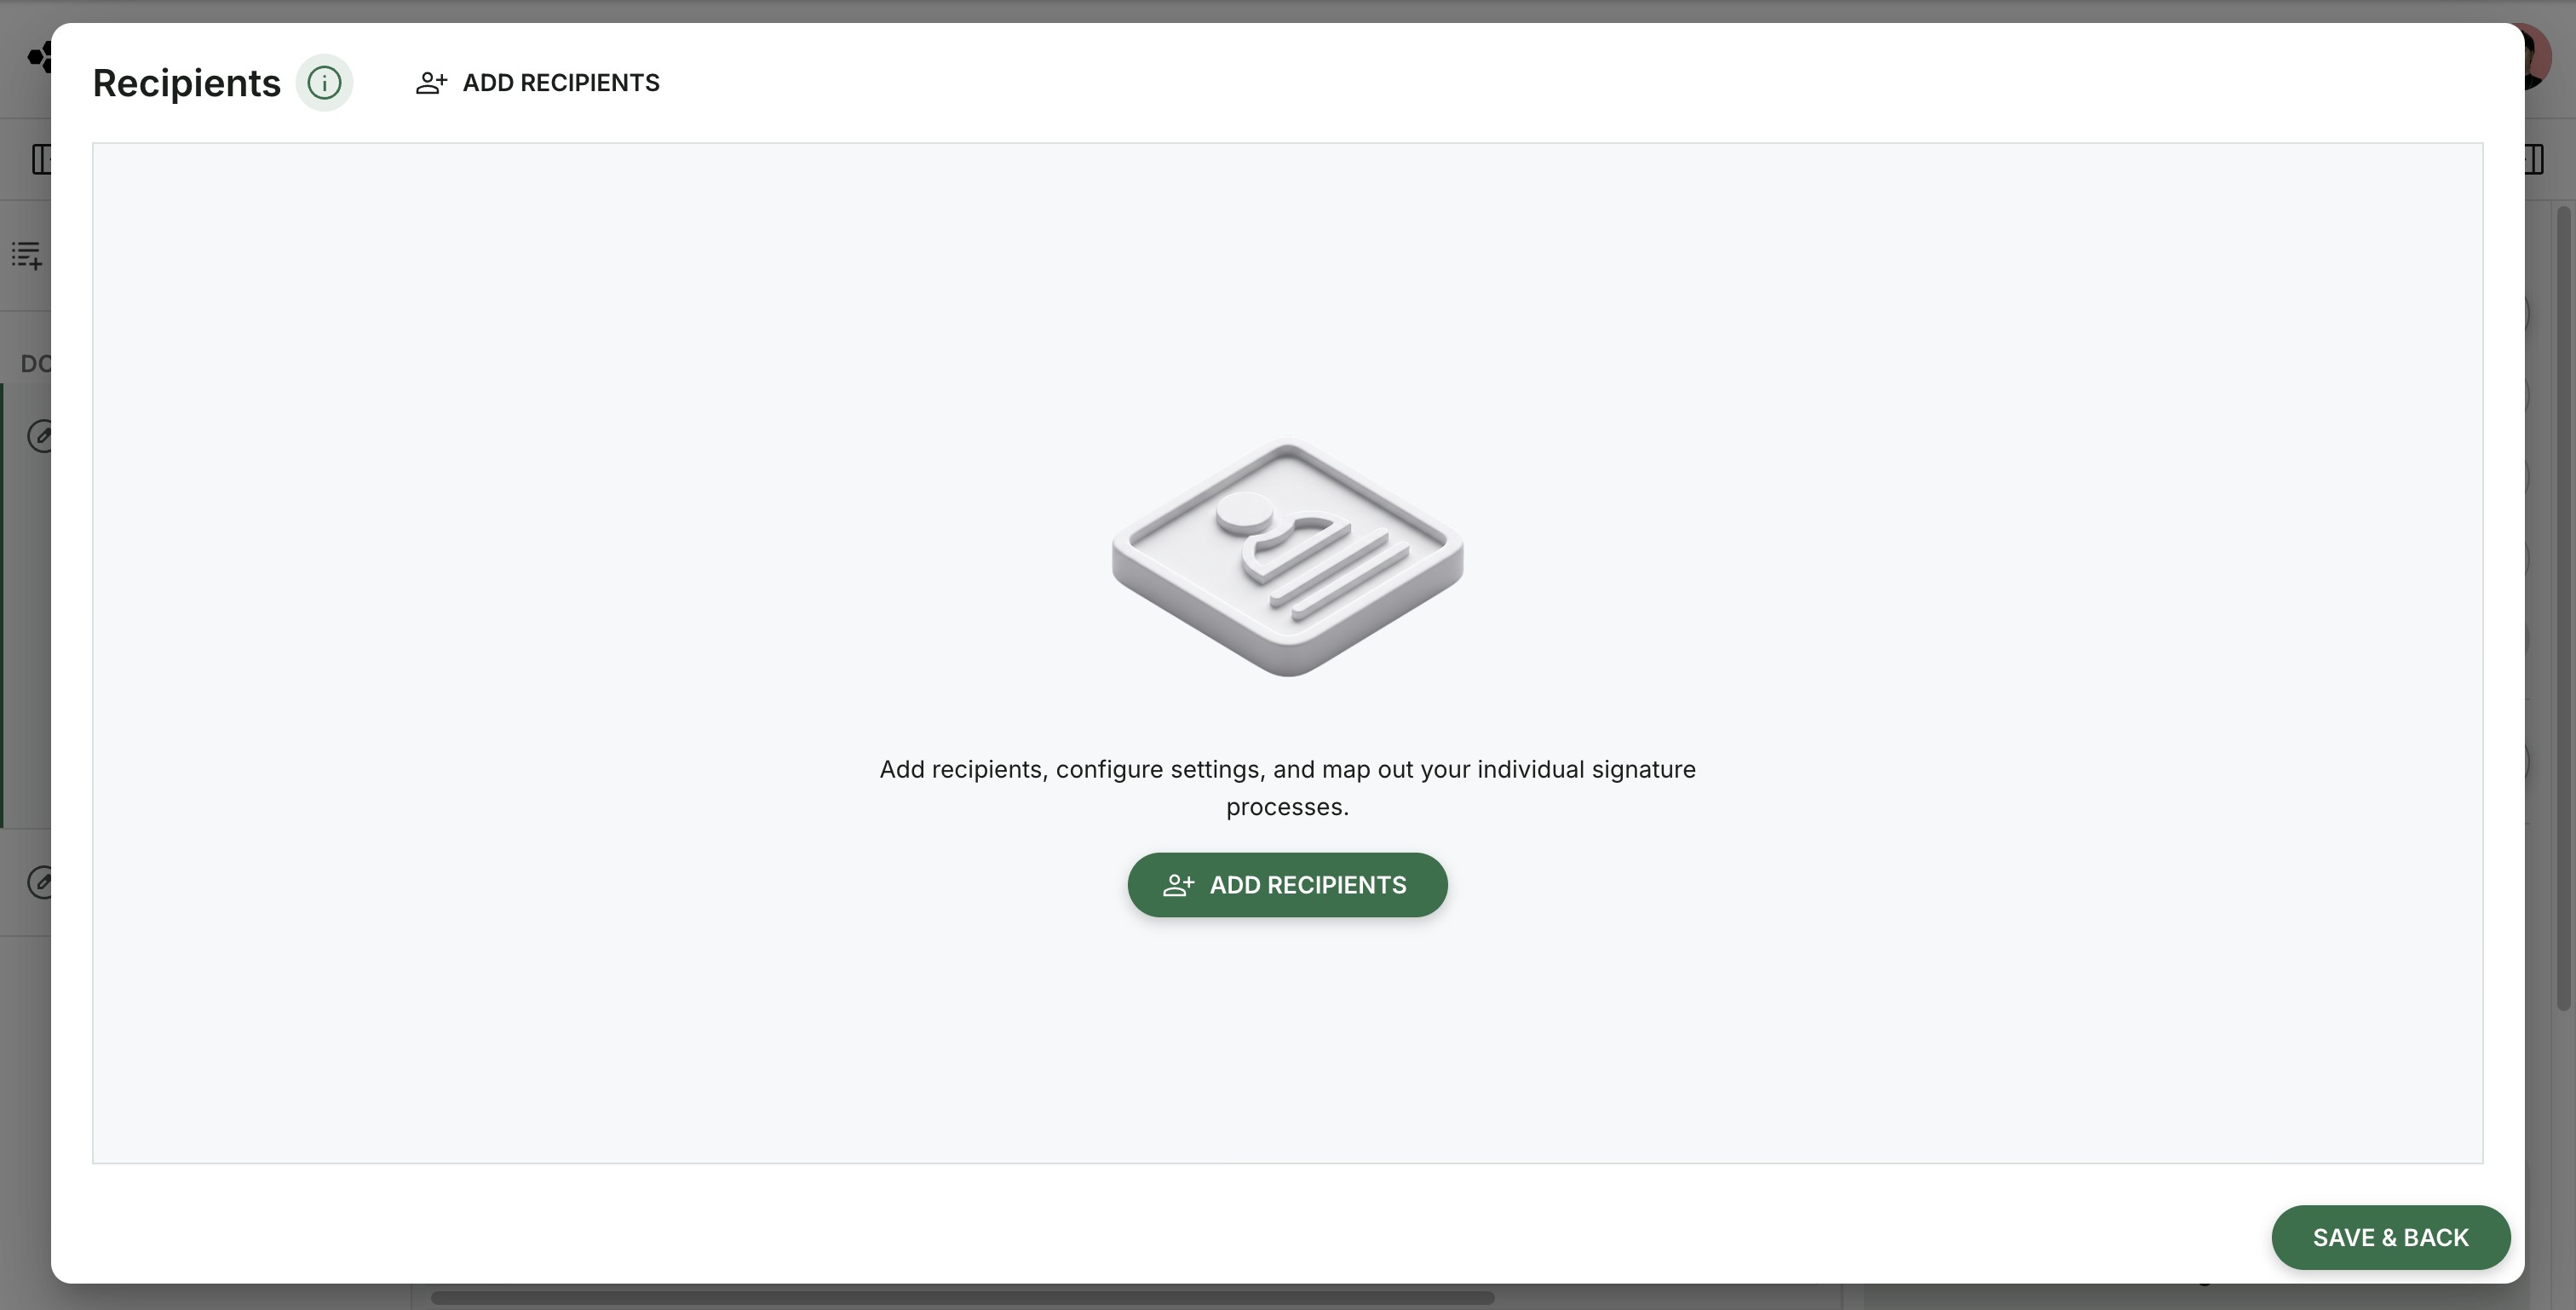
-
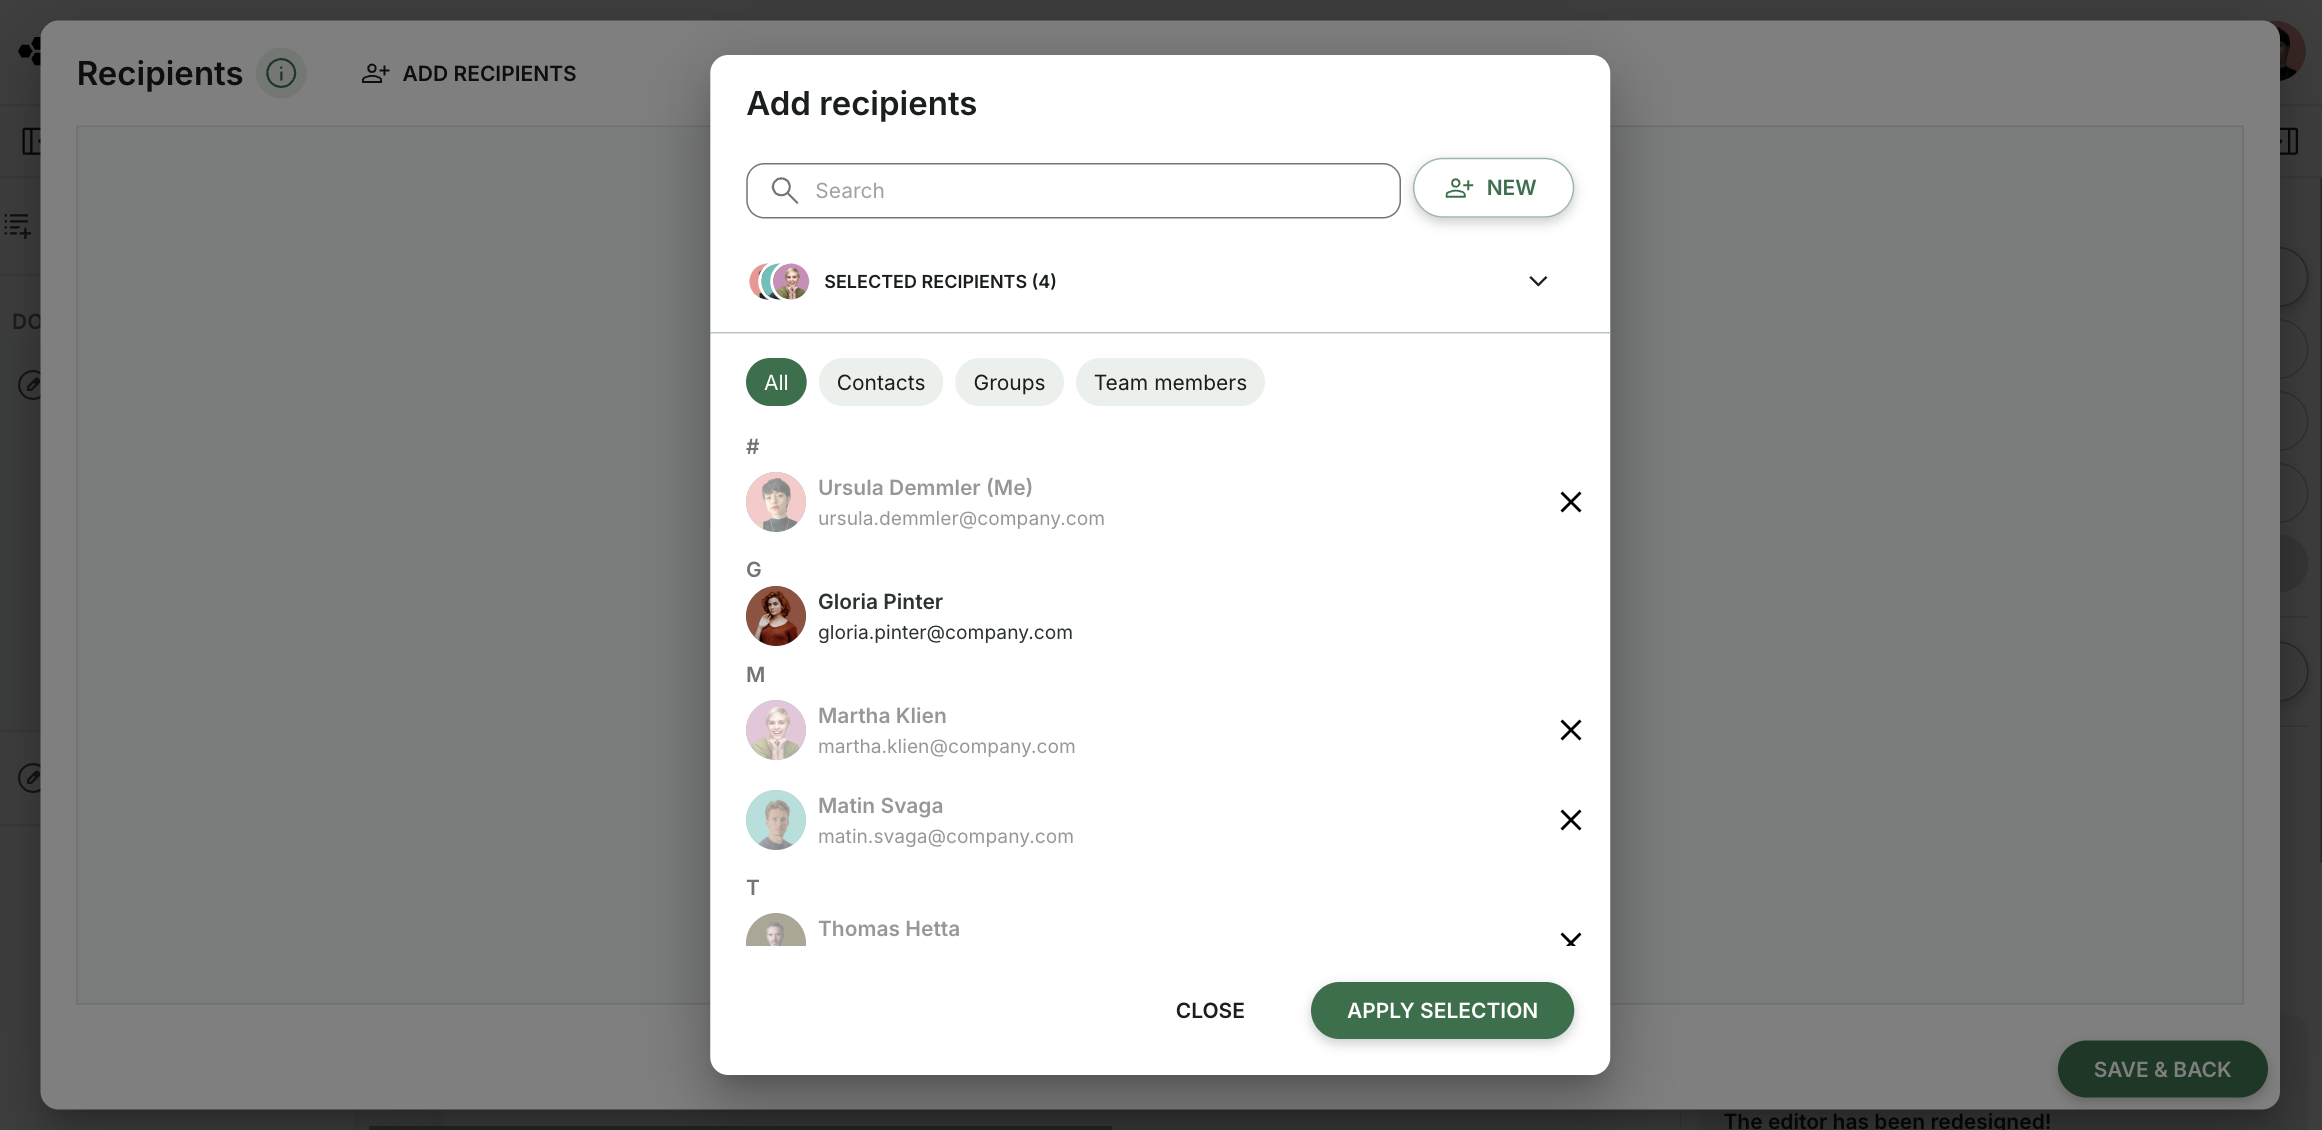
Select existing contacts or add new people.
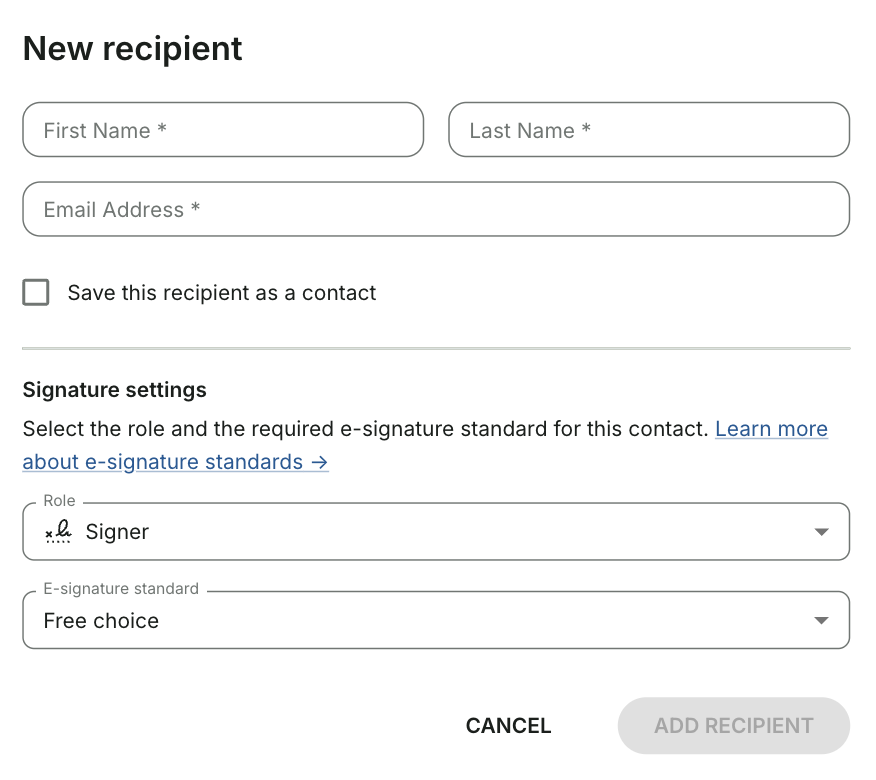
If you click New, you can create a new person directly. At the same time you set a role, an e-signature standard and optionally whether this person should be saved in your address book.
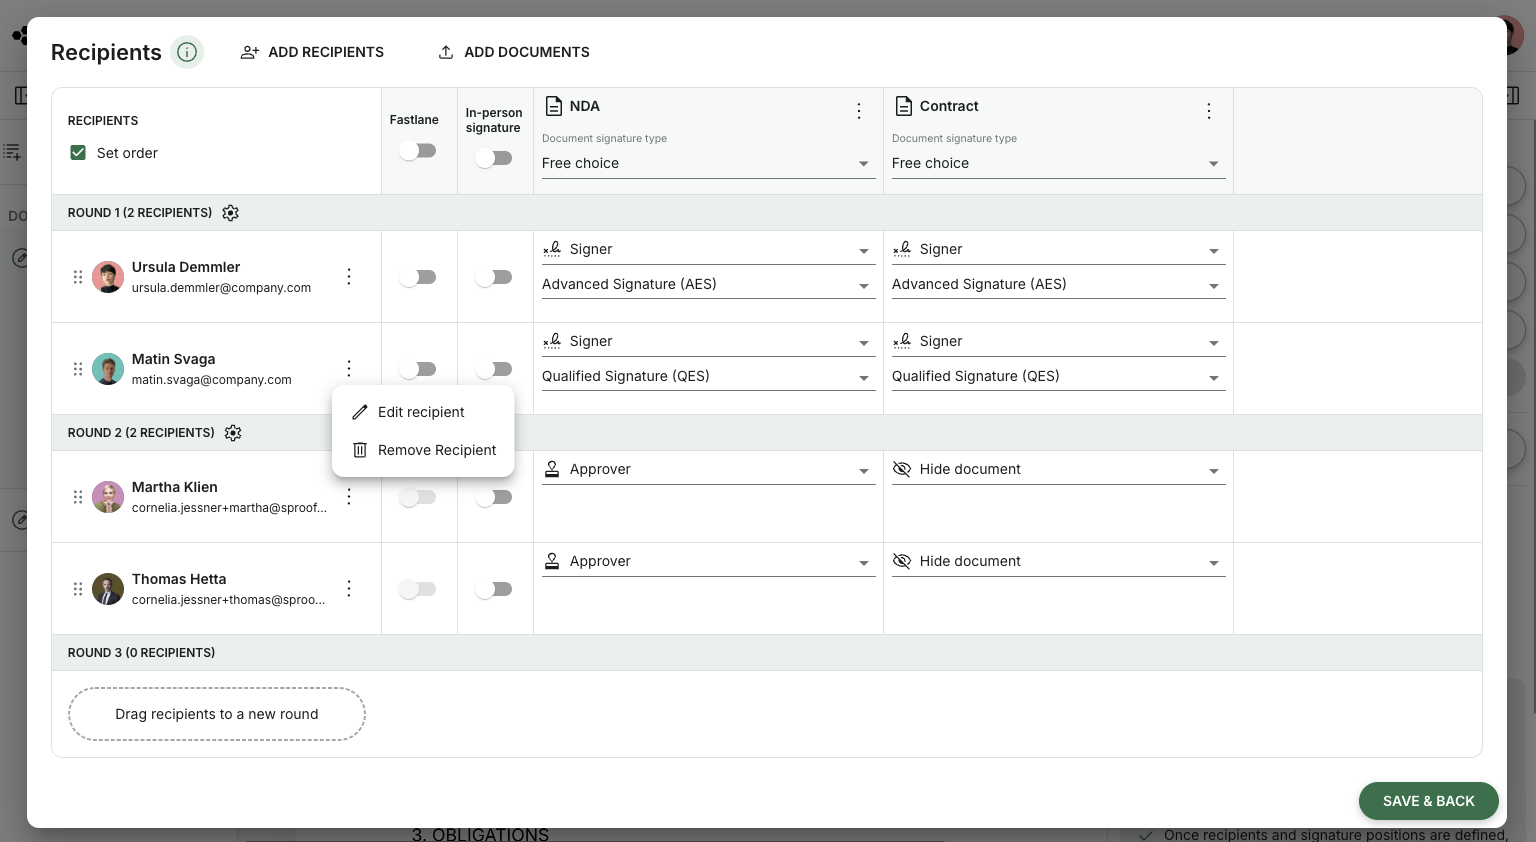
Recipients already added are listed at the top and can be expanded or edited there again.

After you have selected all desired people, click Apply selection. The recipients will then be displayed in a matrix.
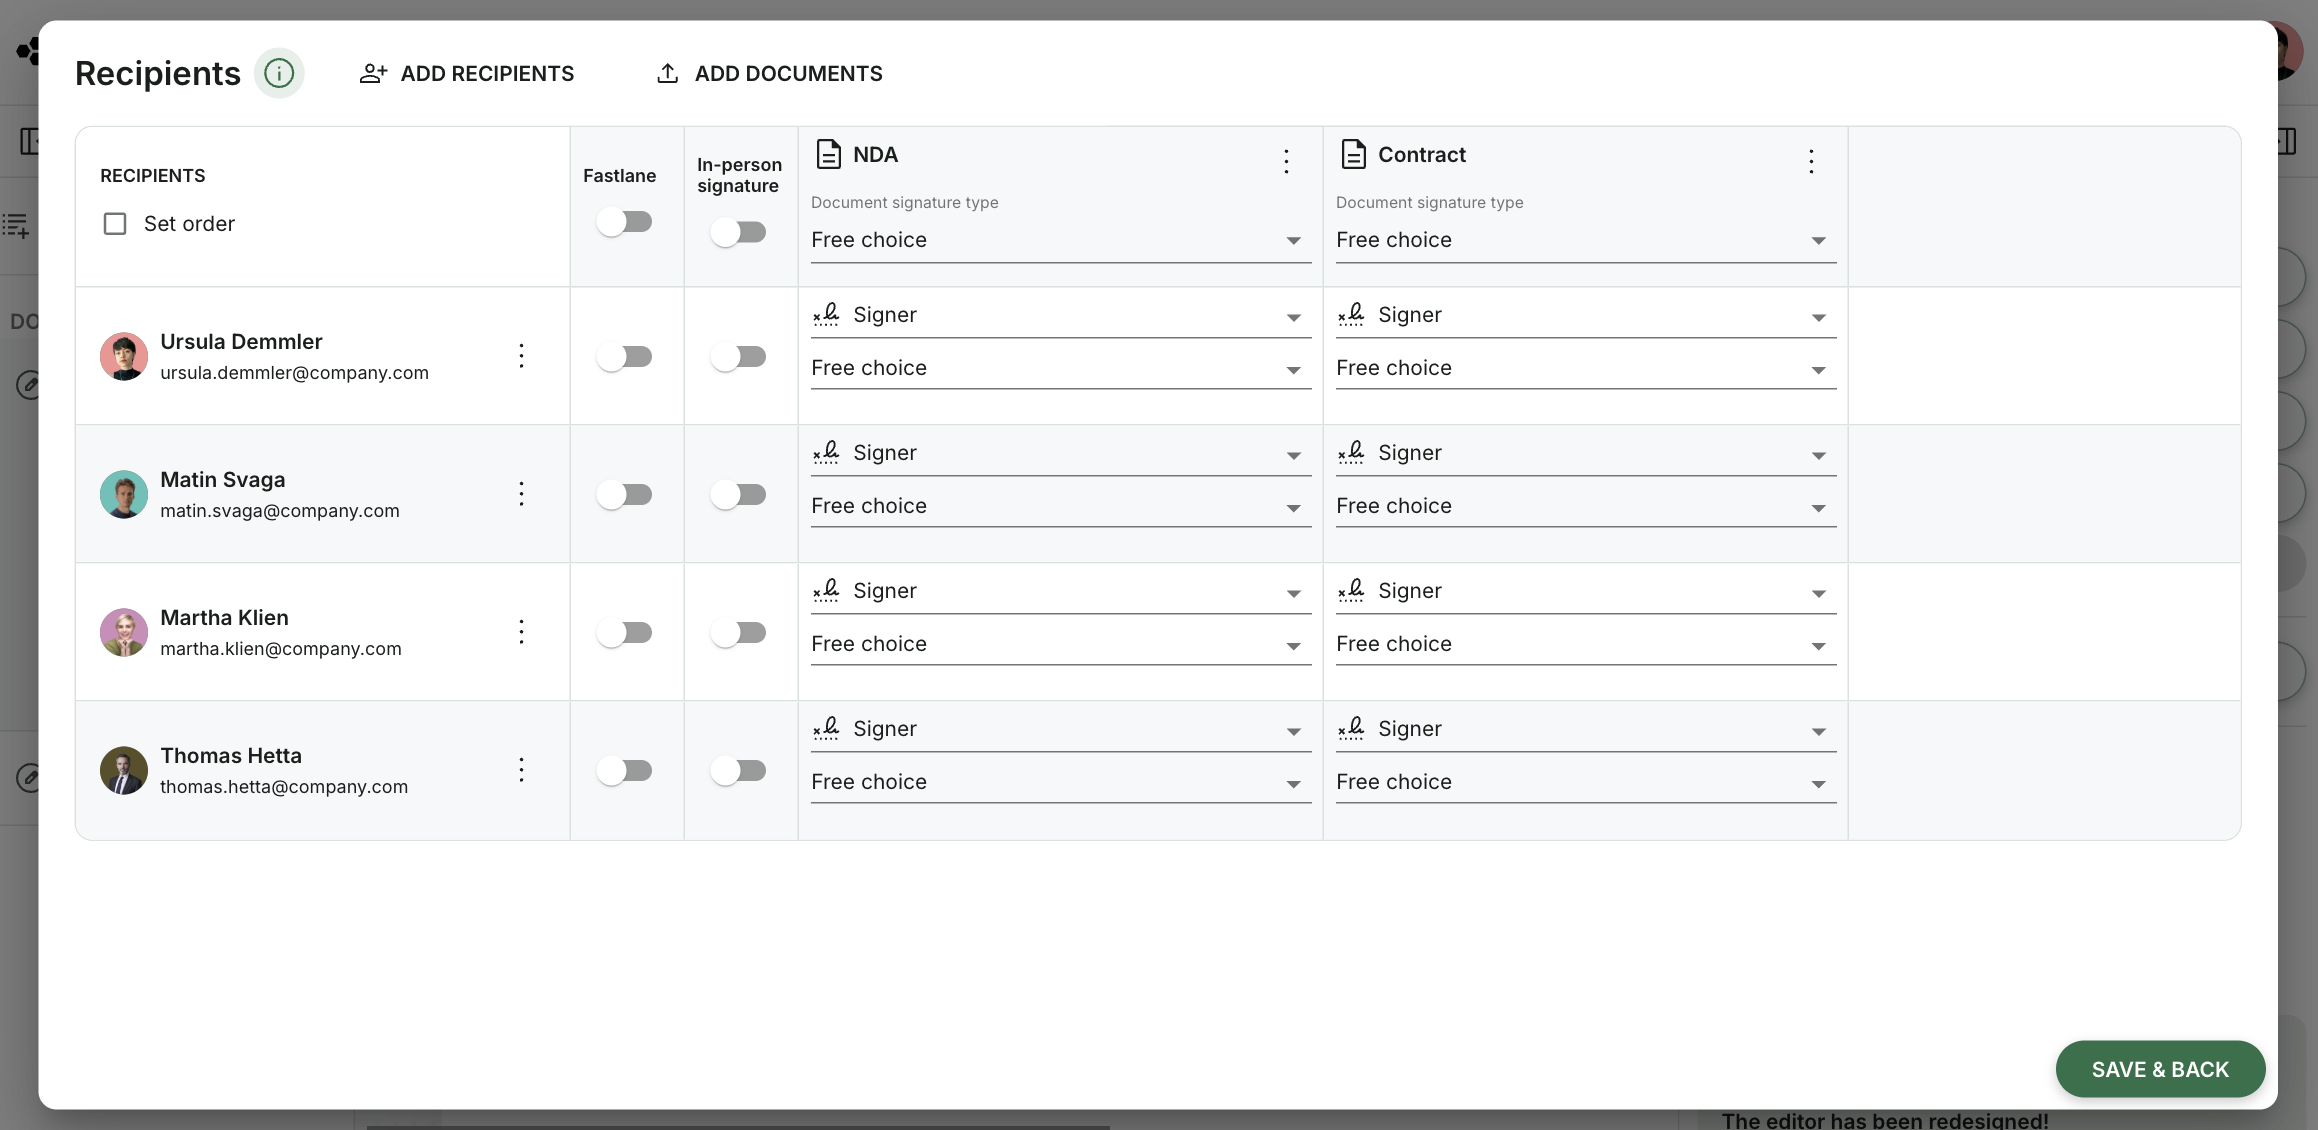
Set roles and e-signature standards
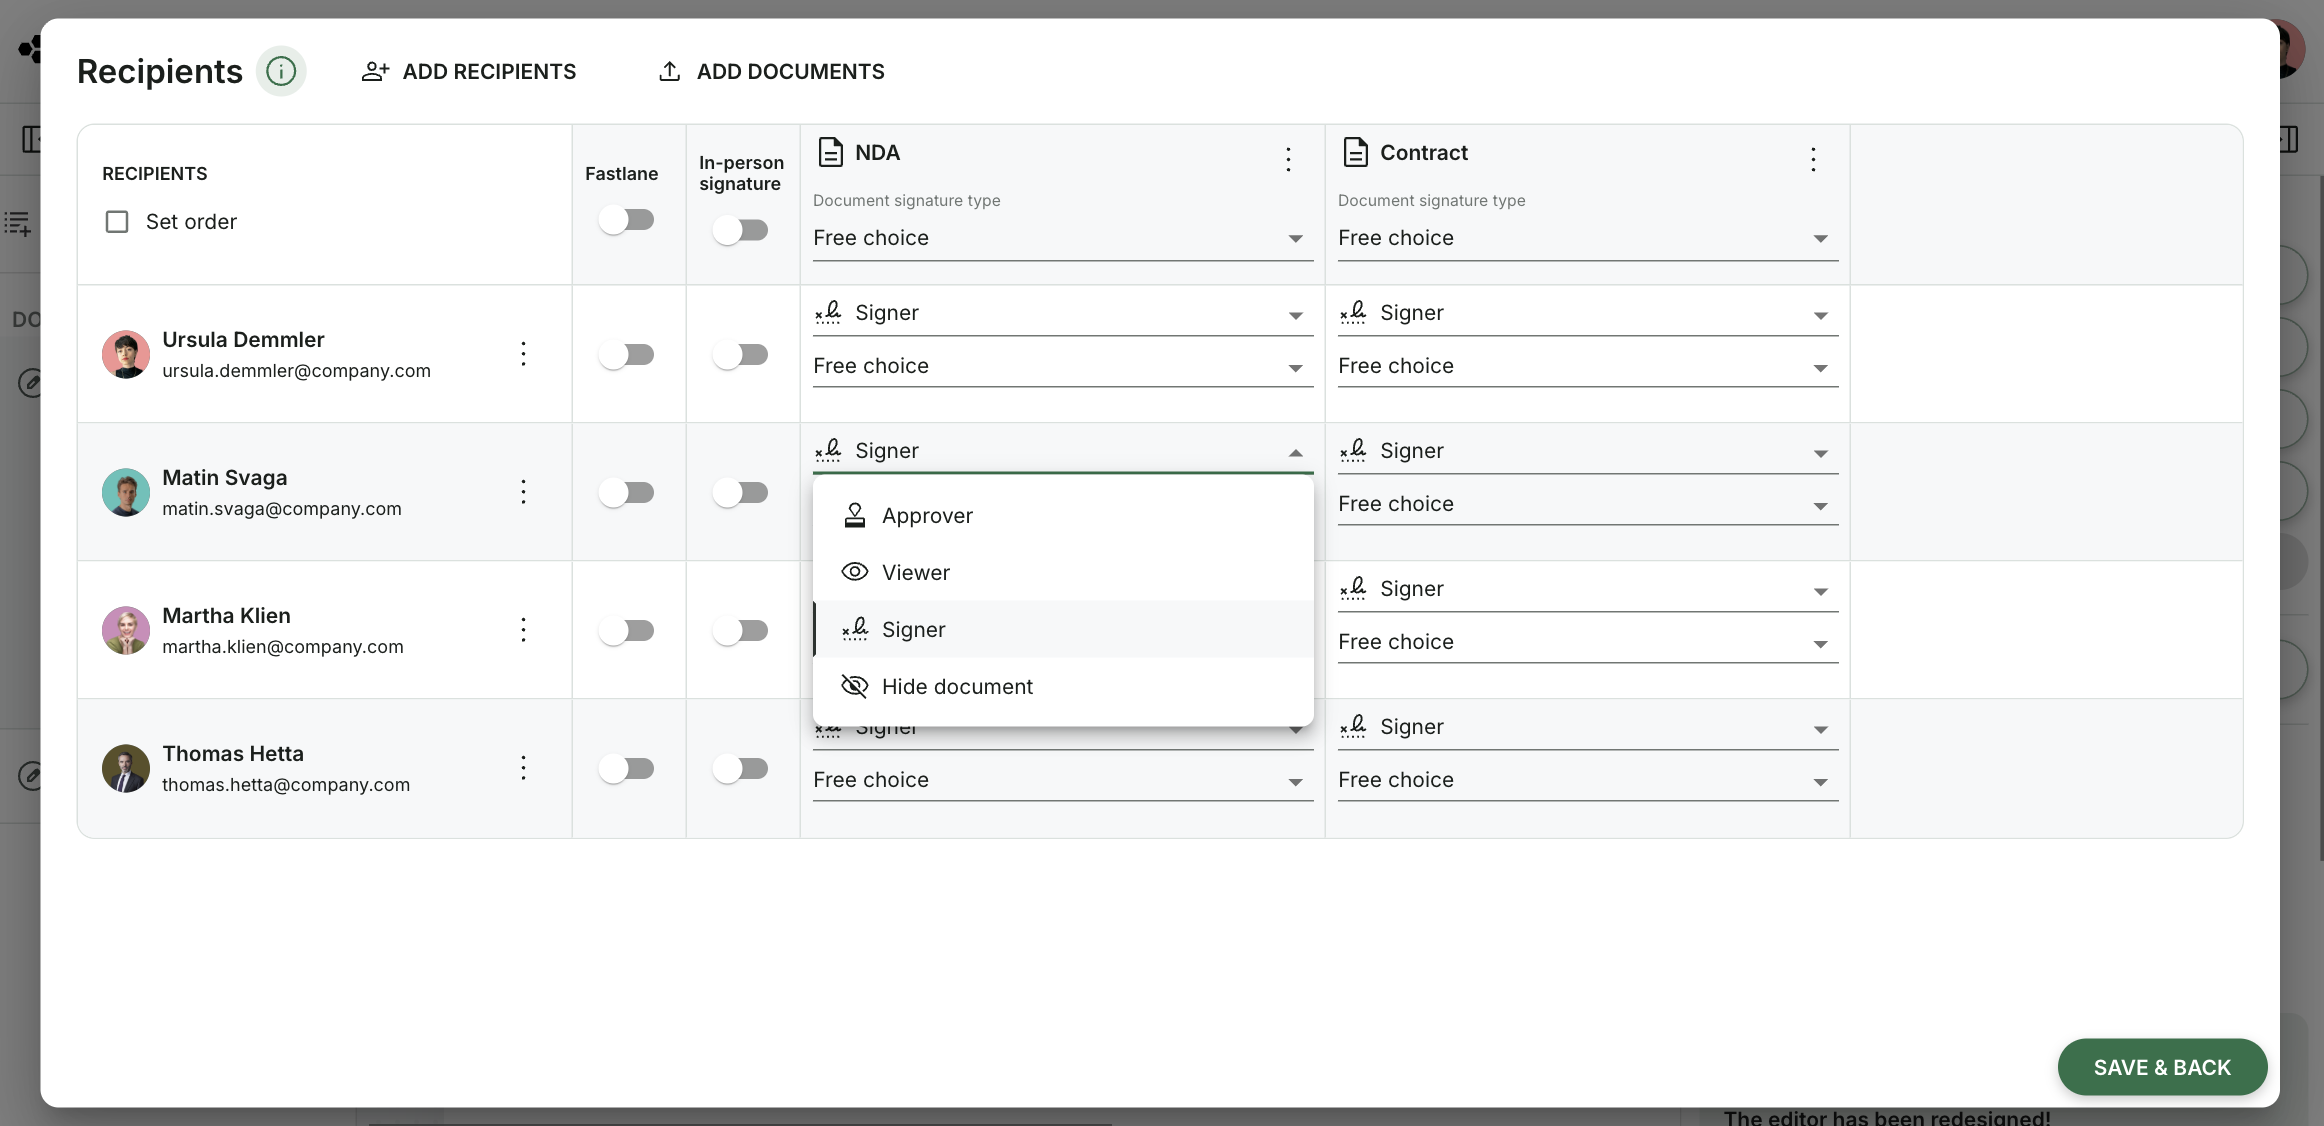
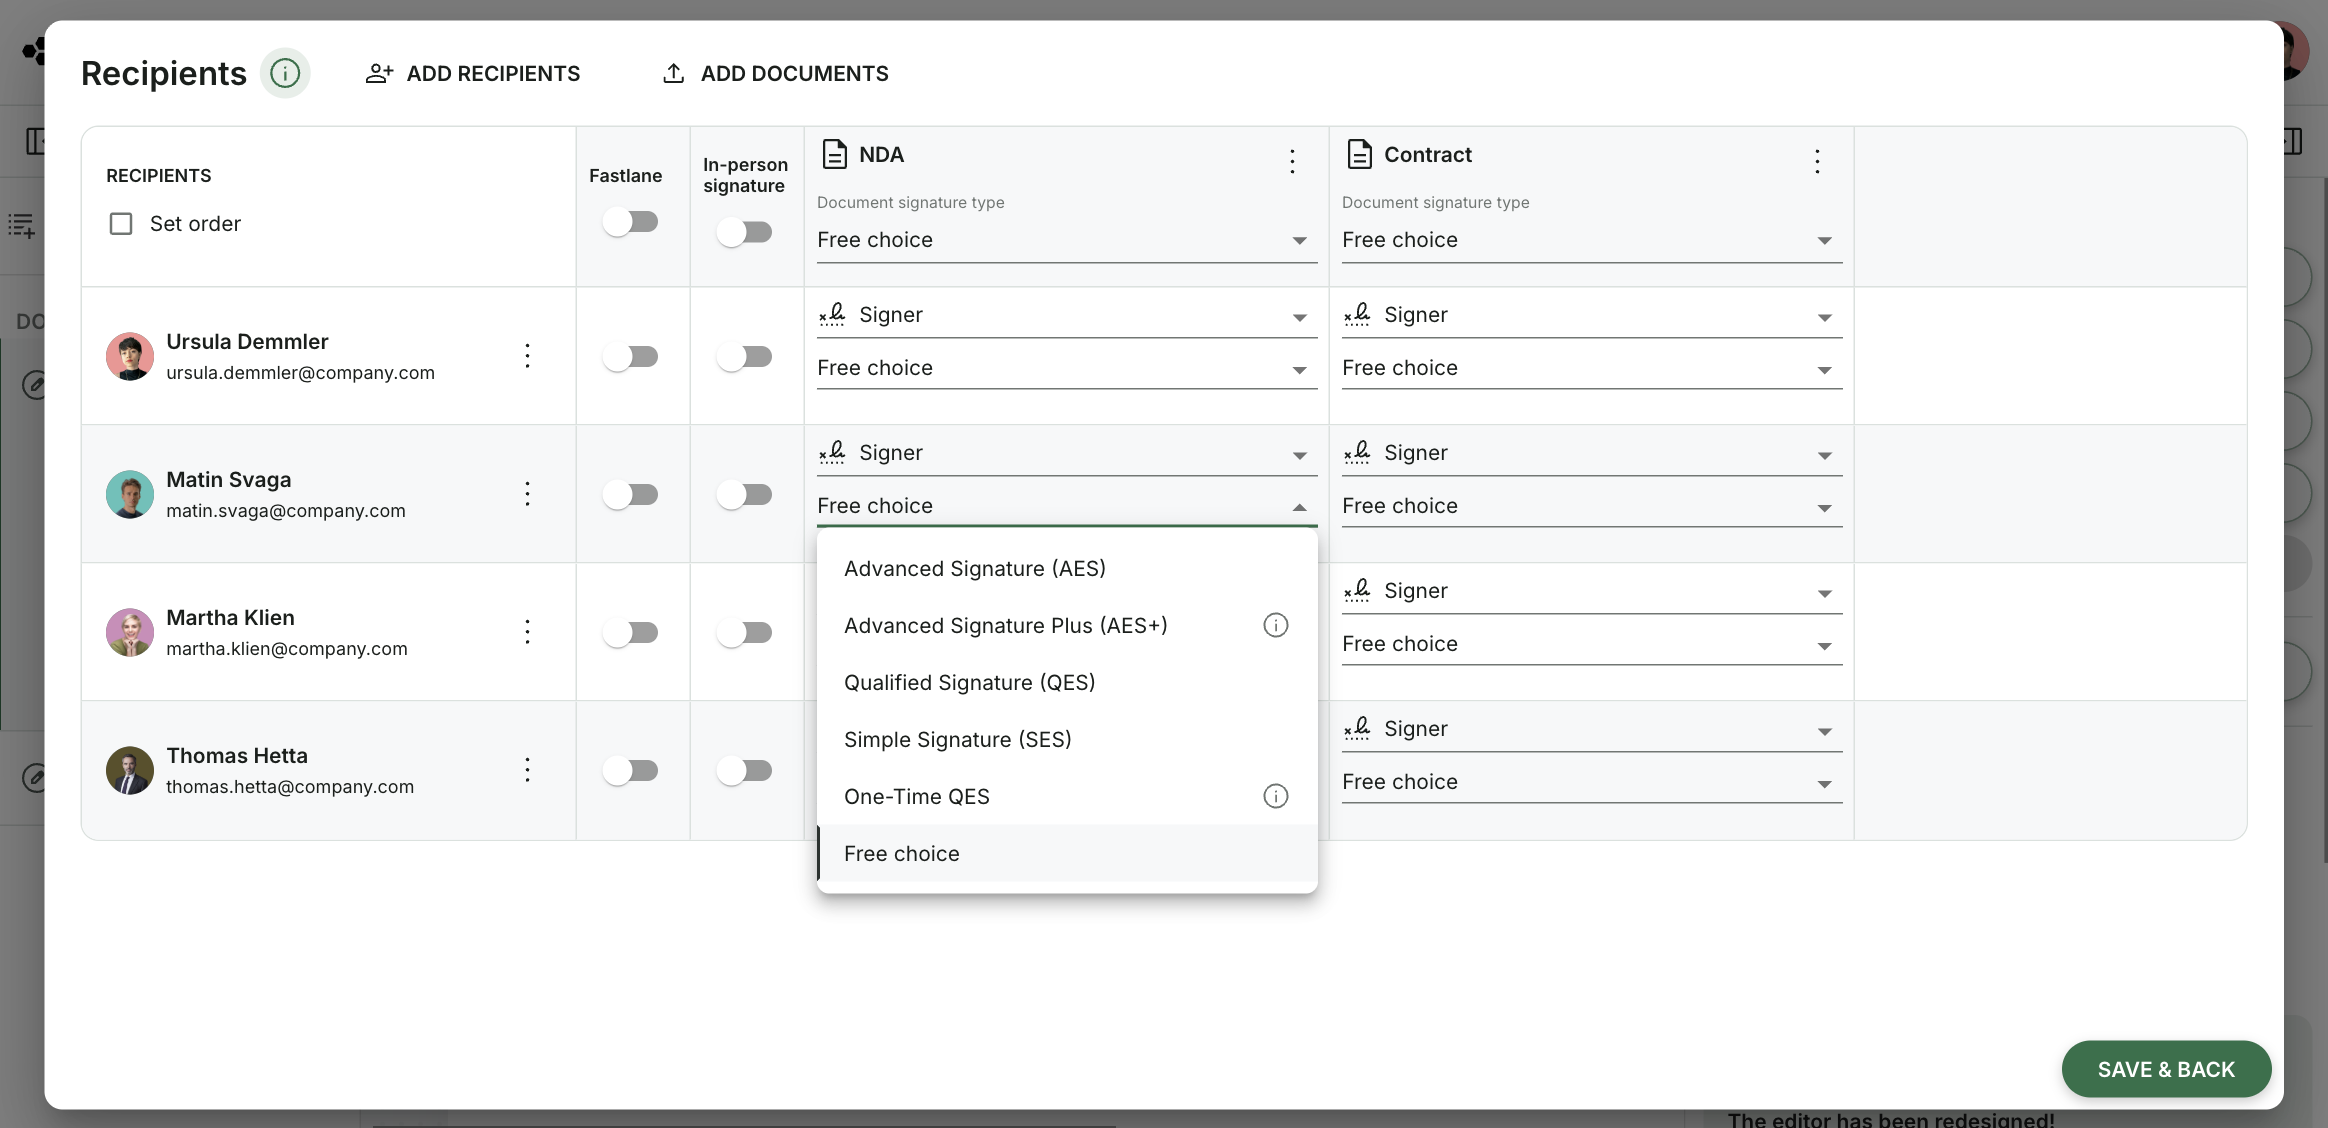
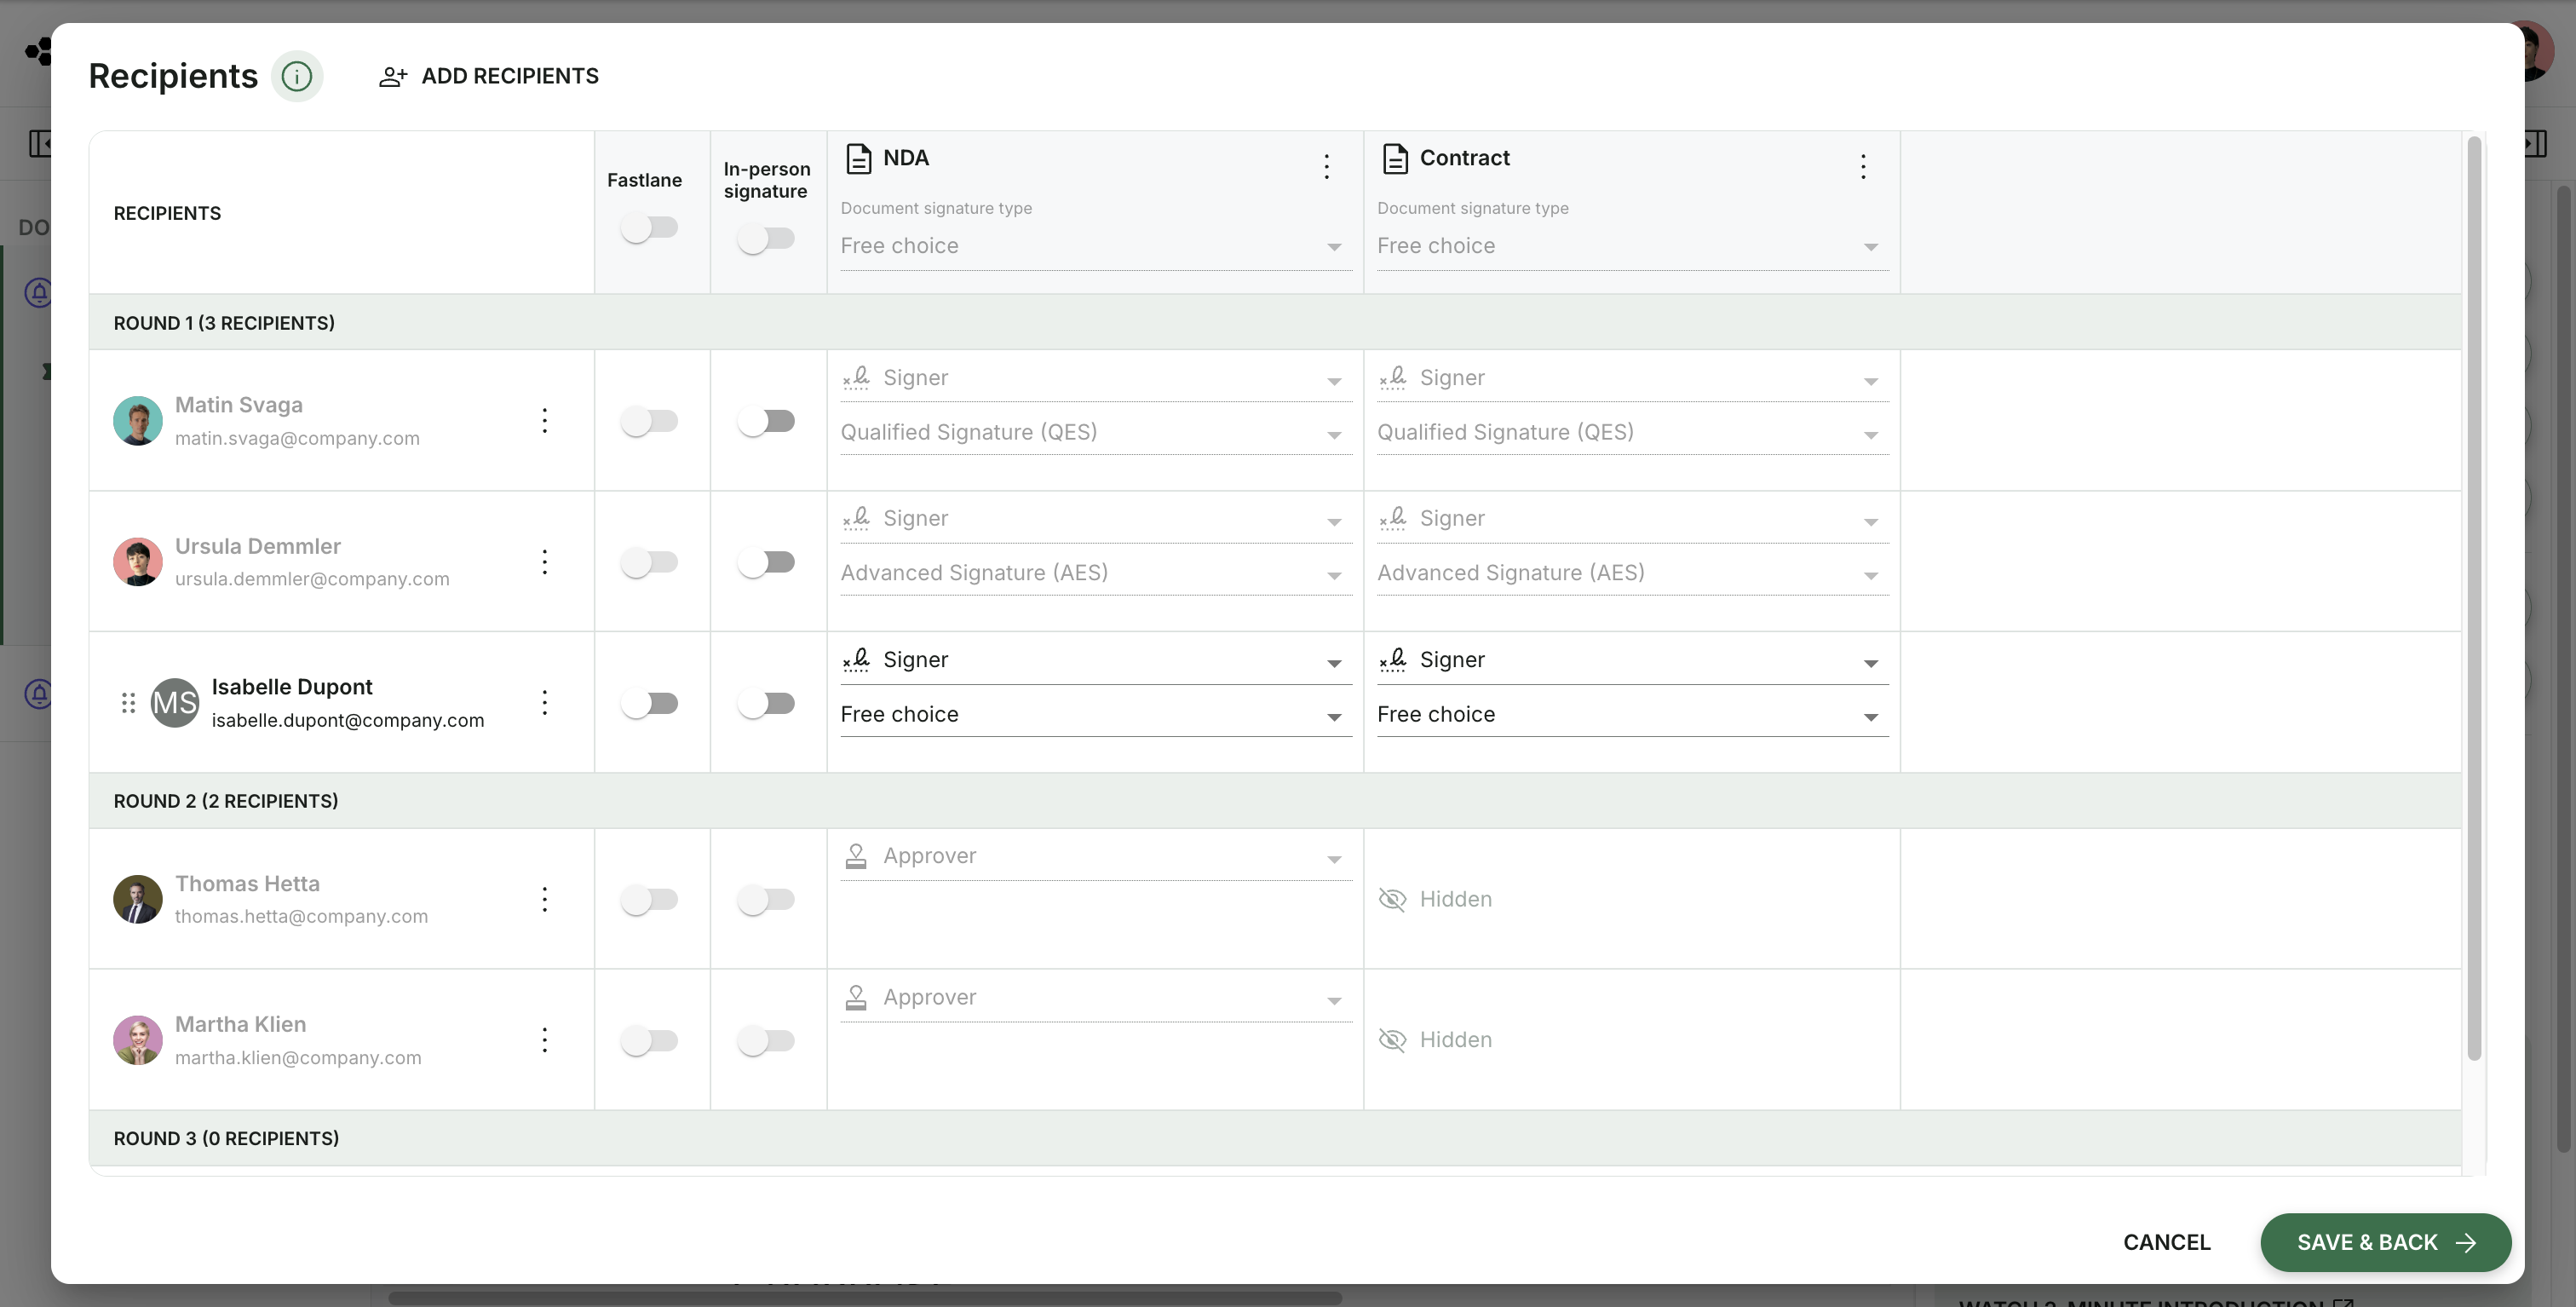
In the matrix you define the appropriate role for each person and – if required – the desired e-signature standard.
-
Signer: The person signs the document.
-
Approver: The person approves the document.
-
Viewer: The person has viewing access without actively signing or approving.
-
Document hidden: The respective document is not visible to this person.
Which e-signature standards are available depends on your subscribed plan and the available counters.
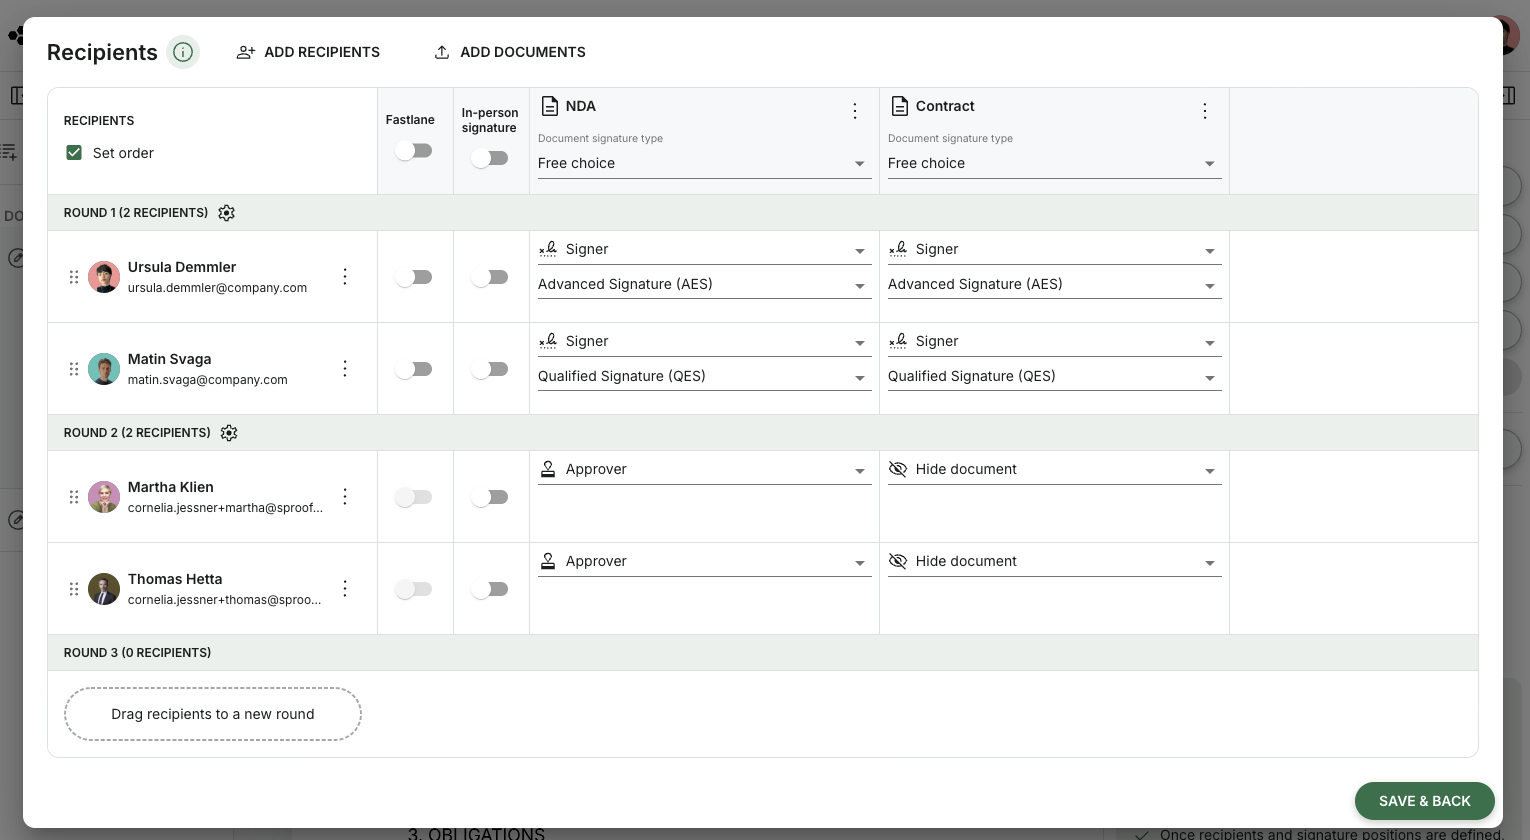
Define order and rounds
If the process should run in a specific order, activate the checkbox Set order in the top left. Then you can assign recipients to the desired rounds via drag & drop.
This defines who is involved first, afterwards or in parallel.
Manage recipients
Use the 3-dot menu next to a person to edit or remove recipients. Changes to the contact itself are only saved to the address book if the person is already stored there as a contact.
Manage documents
Use the Add document button to add more documents to the request at this point.
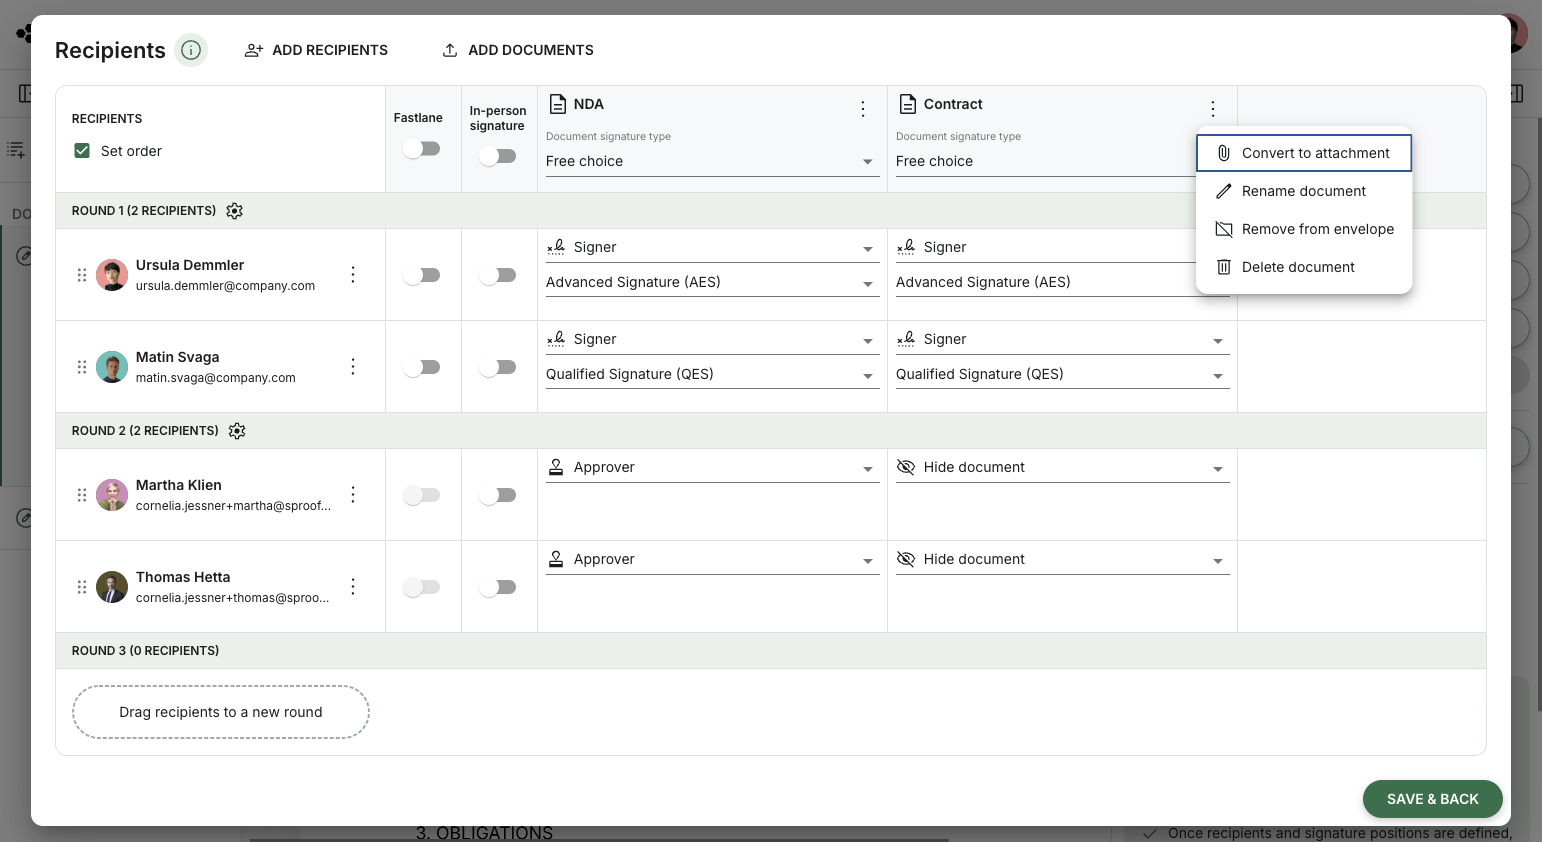
For each document, additional options are available via the 3-dot menu. You can:
-
convert it into an attachment,
-
rename it,
-
remove it from the bundle, or
-
delete it.
For attachments you can specify in the matrix whether they are visible or hidden. By default attachments are visible to everyone.
When you have completed all settings, click Save & Back. The checkmark next to this step will turn green indicating the configuration is complete.
3. Prepare the document
Next, open the Prepare document area. Here you place signature fields, initials and – if required – additional form fields on the document using drag & drop.
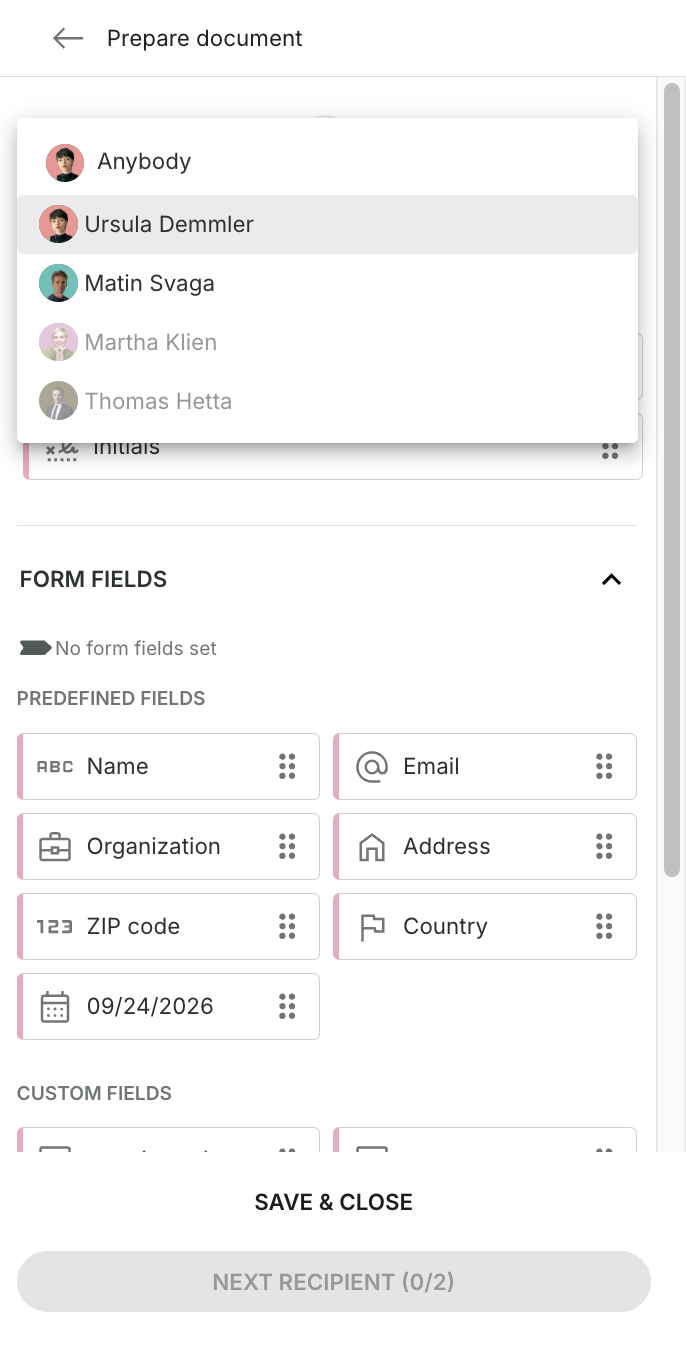
The editor guides you through all recipients and documents one after the other with the green button at the bottom right. This ensures that the required fields are present on all relevant documents for each signing person.
Alternatively, you can switch recipients manually via the selection menu in the upper area.
After completion click Save & Back.
Here too the checkmark will turn green once preparation is complete. After that the Review & Send button becomes active.
Learn more about additional form fields in the Academy module Prepare forms.
4. Set email and general settings
Before you send the invitation, you can adjust the communication and timing of your request.
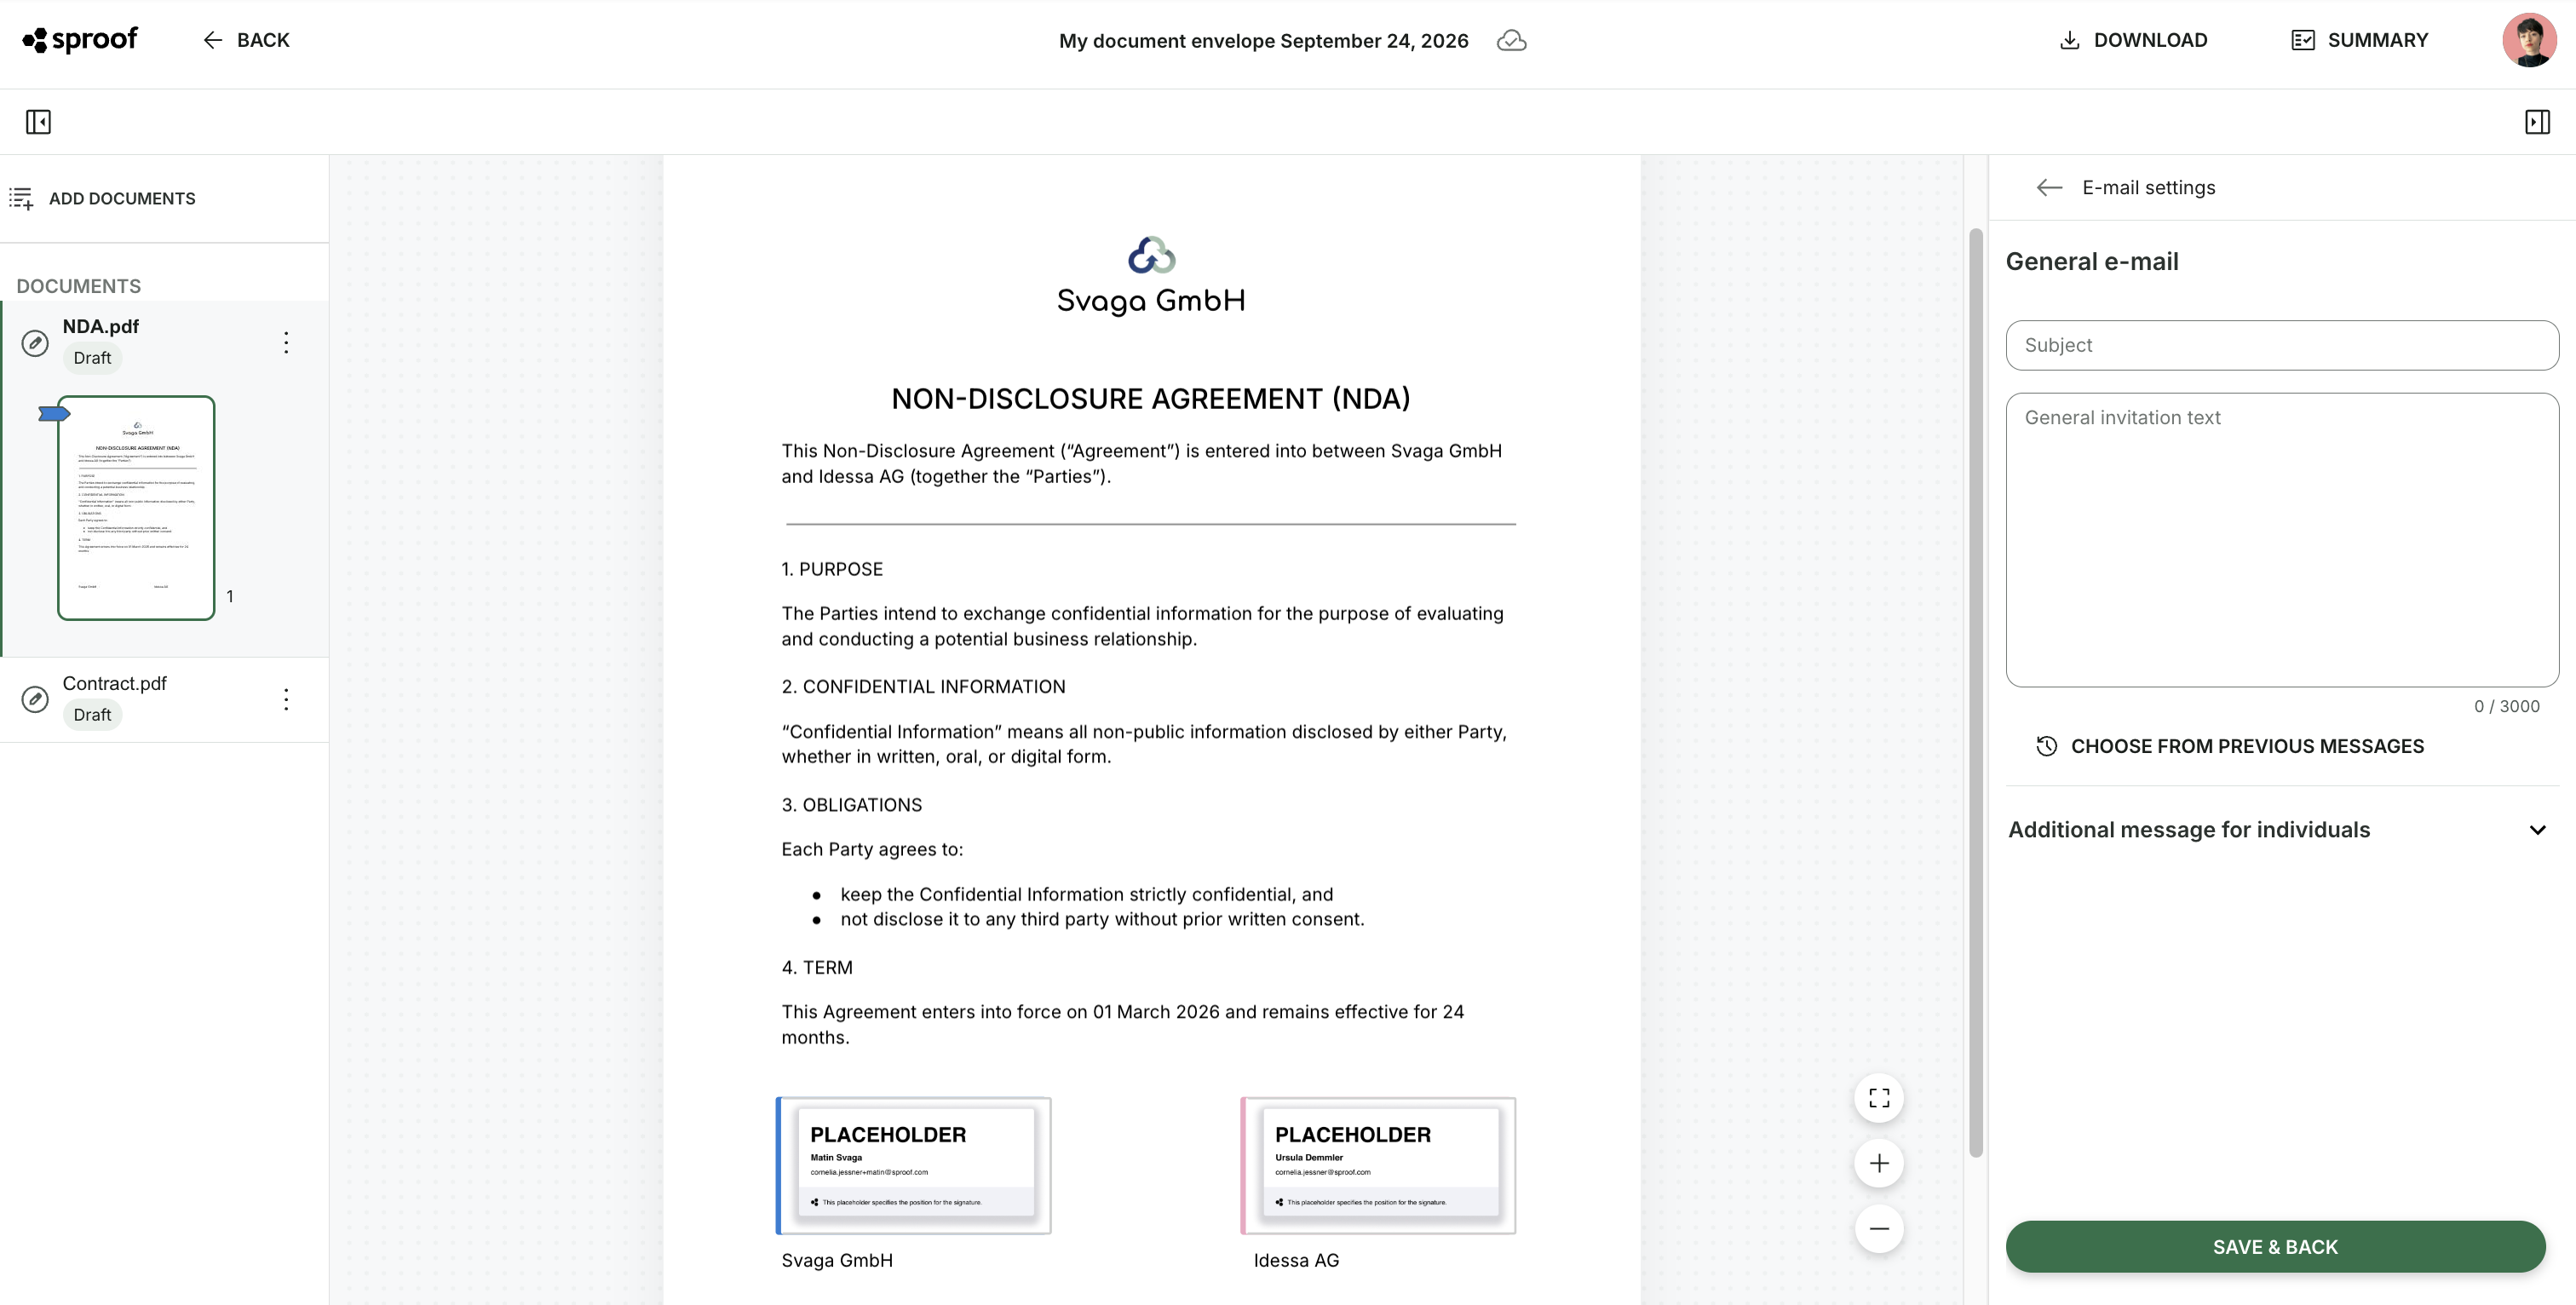
Email settings
Open the Email settings to customize the subject and invitation text. This allows you to address your recipients specifically and provide additional notes about the request.
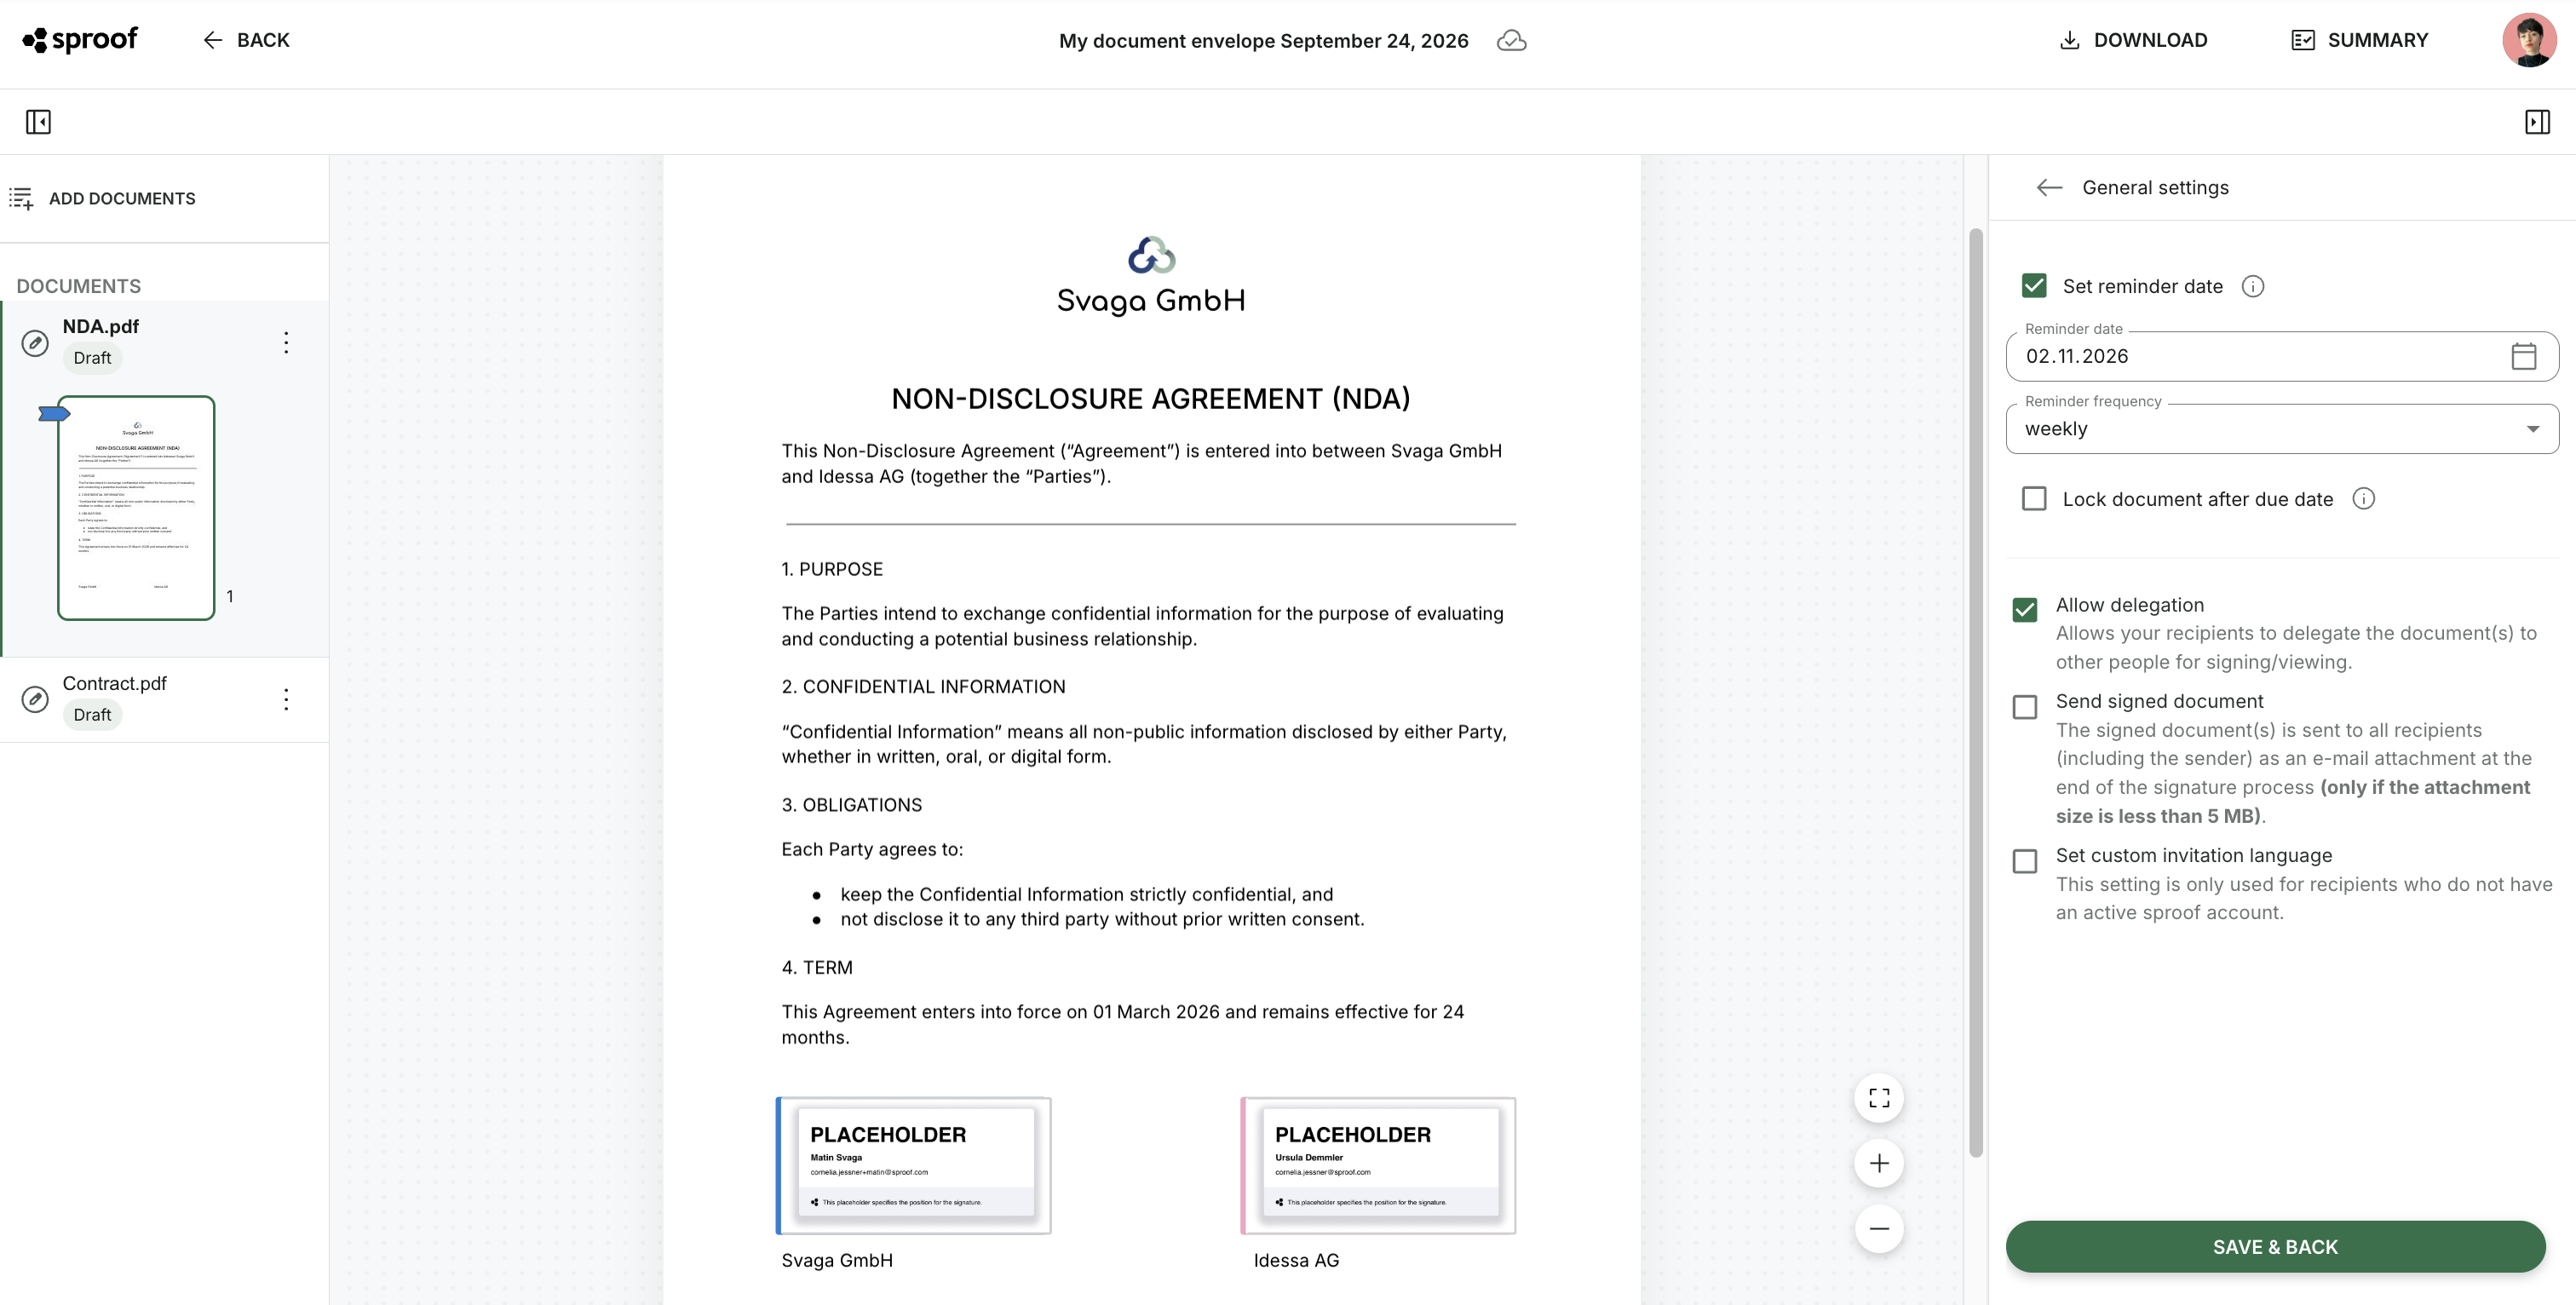
General settings
In the General settings you set further options for the process. These include for example:
-
Reminders,
-
Due dates,
-
Notification intervals.
These settings help you better manage signature processes and specifically track outstanding requests.
Learn more about reminders and deadlines in the Academy module Signature progress & reminder function.
5. Review and send invitations
Once all required steps are completed, you can send the invitation.
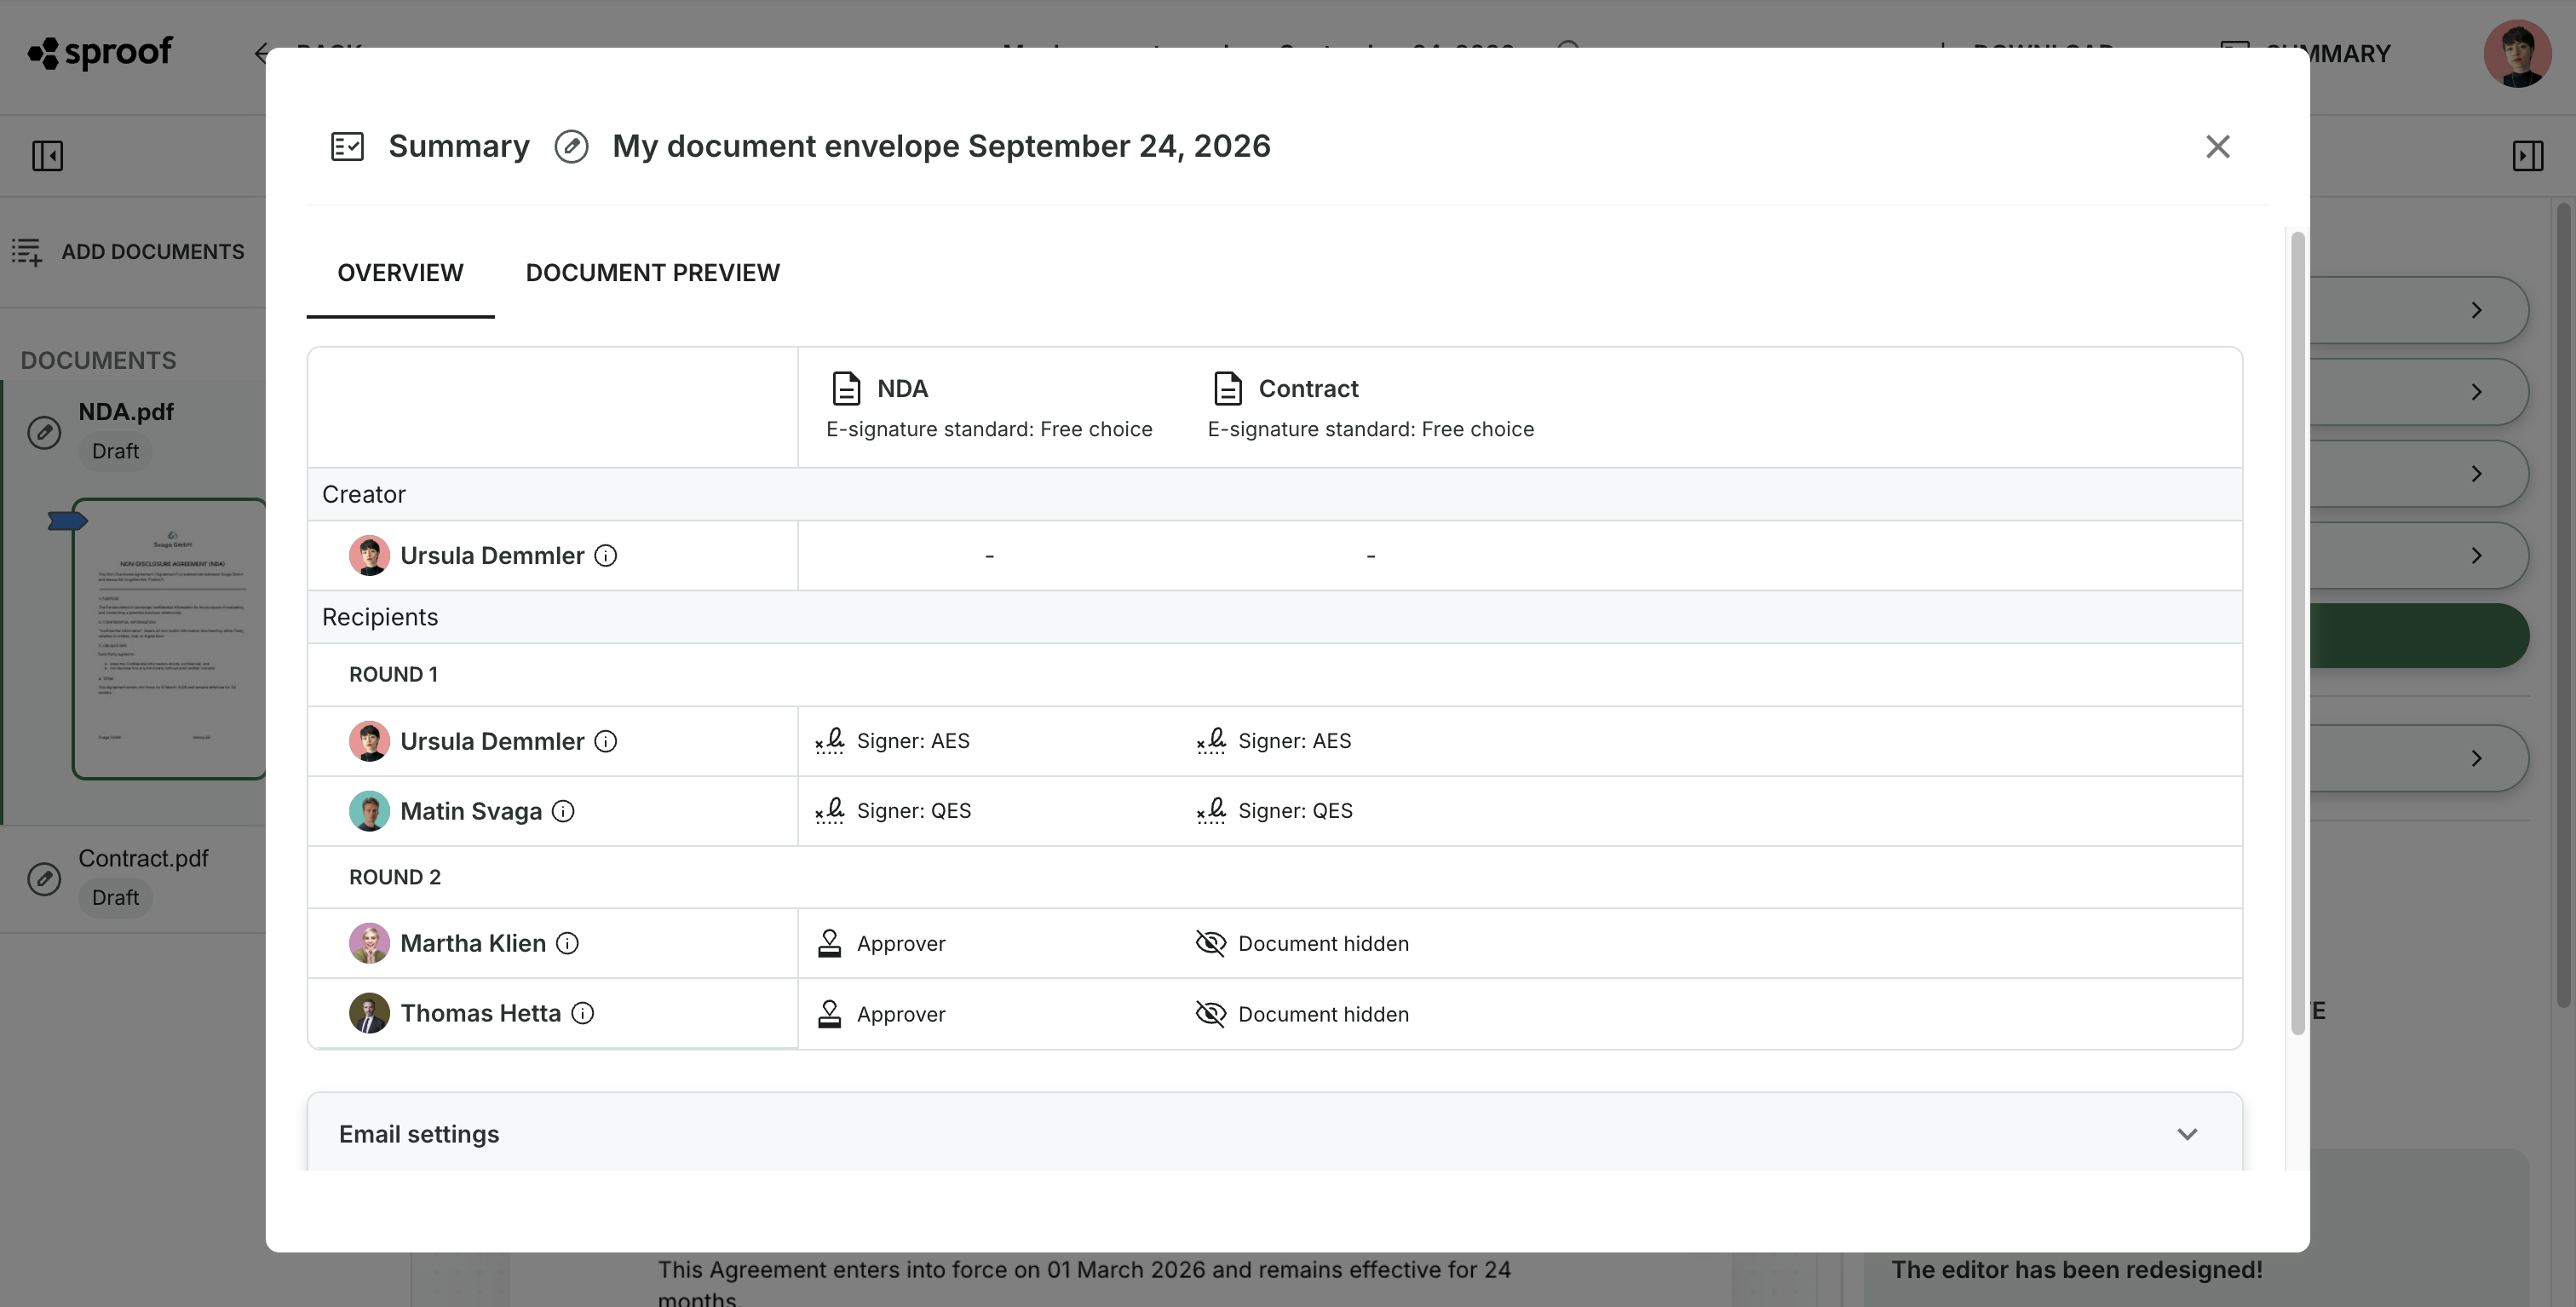
Before final sending, sproof Sign shows you a summary of your settings. There you can see at a glance:
-
which recipients are involved,
-
which roles have been assigned,
-
which documents and visibilities are configured,
-
which email and general settings are active.
Check these details carefully. By clicking Send now, the invitation will be sent to the selected recipients and the signing process will begin.
After sending you can track the status of your request in sproof Sign at any time and trigger additional reminders if needed.
6. Manage sent signature requests
As long as a document or bundle has not yet been signed by all recipients, you can continue to edit and manage the signature request.
Add recipients and configure the matrix
You can add new recipients at any time, even after the document/bundle has been sent. To do so, click as usual on the button “Add recipients”, select a person and then configure the matrix as needed.
If you have activated rounds, the new recipient will be added to the first round. You can drag & drop the person into another desired round. The order of existing recipients cannot be changed. However, you can delete recipients via the 3‑dot icon next to their name and add a new recipient instead.
Signature position and form fields
You will then be taken directly to the next step: defining the signature position. Set the signature position and, if desired, additional form fields for your newly added recipient. If you click “Back” or “Cancel”, you will be asked whether you want to discard the changes.
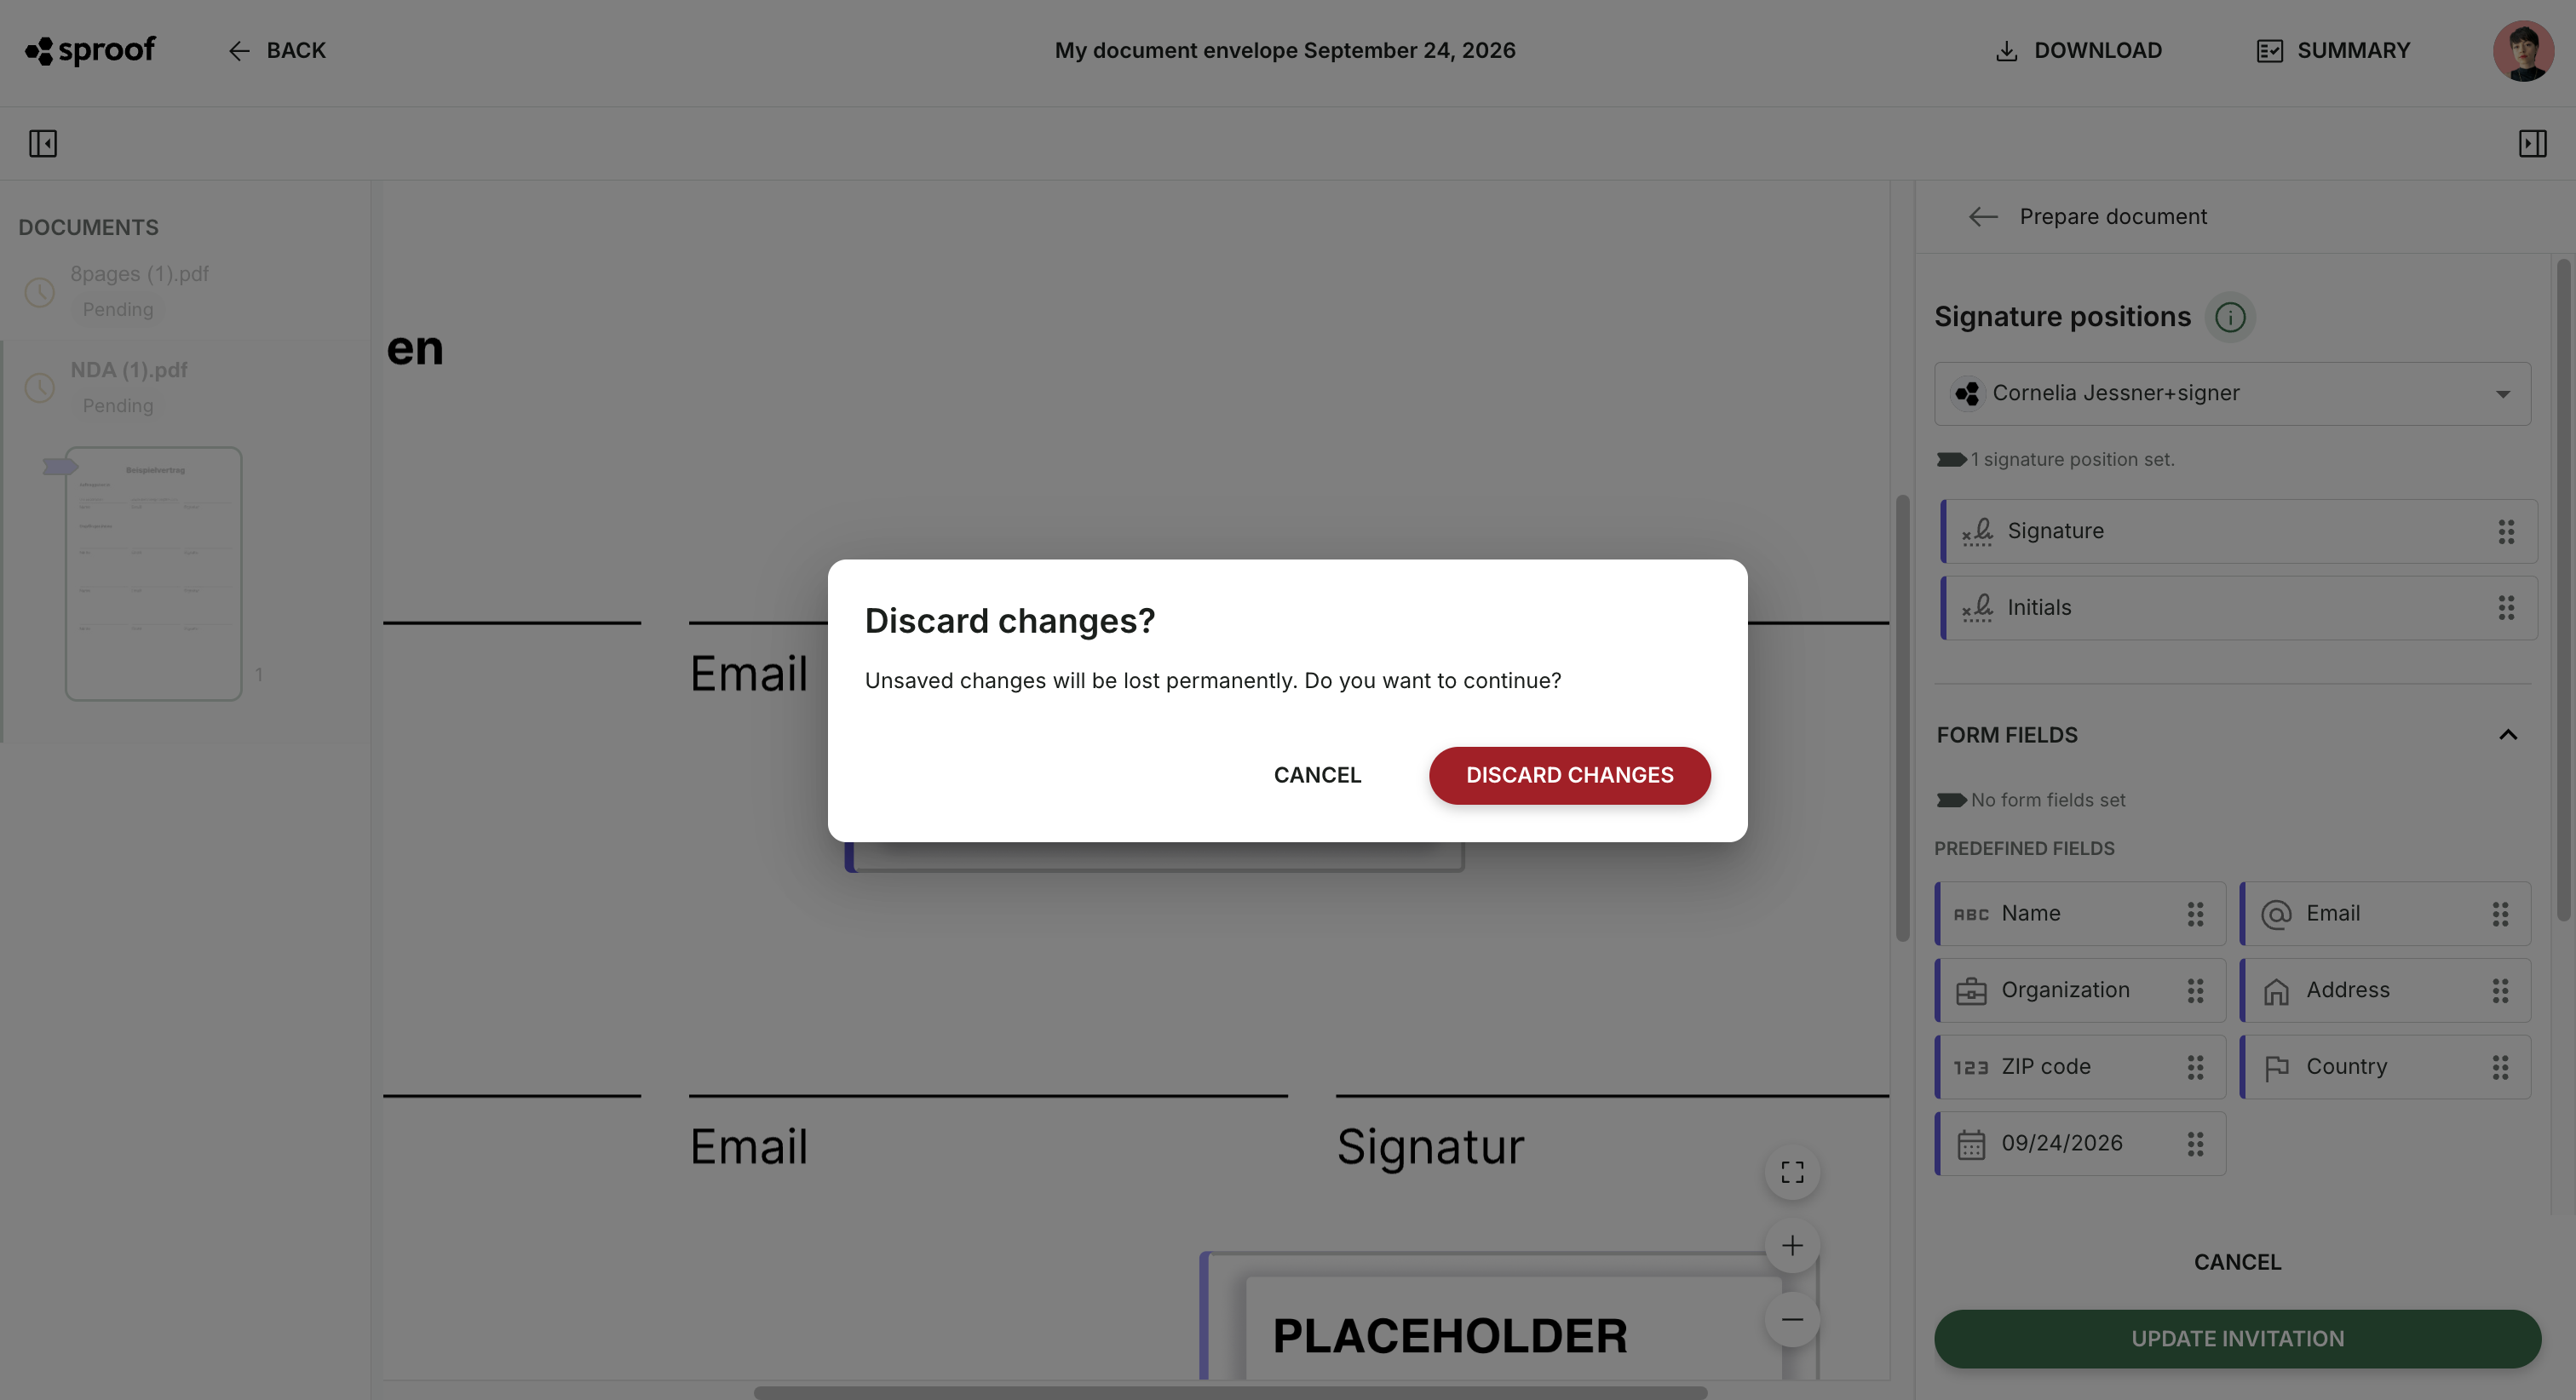
So make sure you complete the process step by step and then click “Update Invitation”.
The following actions are possible as long as not all recipients have signed yet:
|
Action |
|---|
|
Activate or change reminder and due date |
|
Edit fields already placed for recipients |
|
Resend invitation (via the 3‑dot icon) |
|
Delete documents |
|
Sign yourself |
|
Write a message in the chat |
Once the document or bundle is completed, i.e. all recipients have signed, only limited actions are possible:
|
Action |
|---|
|
Add more recipients |
|
View reminder and due date |
|
View settings |
|
Sign yourself |
|
Write a message in the chat |