

Exclusive preview: Discover the features of the new Workflow Editor now – available from October 22, 2026.
💡 At a glance
Workflows help you prepare and reuse recurring signature and approval processes. In this module you will first learn which settings a workflow can save and how to create a workflow. Then you'll learn how to sensibly set up recipients, documents, placeholders and approvals.
📑 Step-by-step guide
Overview: If you want to create a workflow, choose one of the following paths depending on the starting situation:
-
Create a new workflow in the editor: suitable if you want to prepare a process as a template – even without a finished document.
-
Save an existing signature process: suitable if you have already prepared and sent a specific process (only possible with individual documents)
1. What is a workflow in sproof Sign?
With the help of workflows you can save valuable time by storing all settings for obtaining signatures and approvals so you can reuse them later.
You can find the workflows in your dashboard under Workflows & Templates.
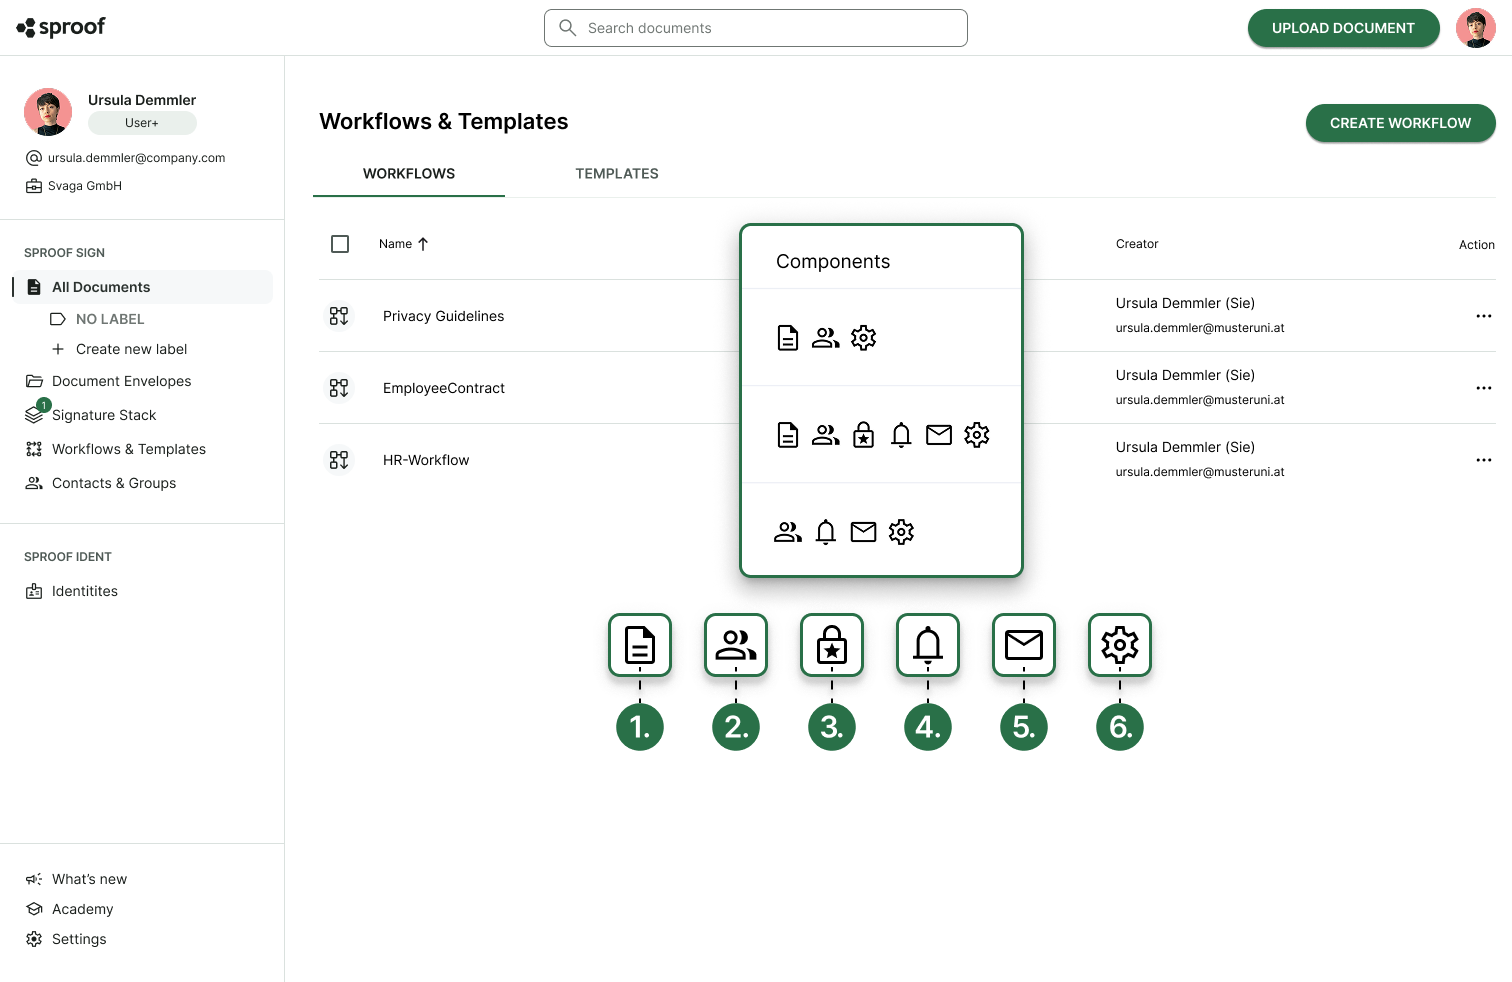
There you will find all workflows listed. In the "Components" column several icons are displayed. These represent the settings you have made for the respective workflow.
You can save the following parameters in a workflow:
-
Document(s), document folders, document placeholders and signature/form fields
-
Recipients (specific people and recipient placeholders)
-
Order of signatures
-
Setting that only a certain number of recipients from a signing round have to sign
-
Roles of the individual recipients (signer, viewer, approver)
-
-
Required signature type (FES, QES)
-
Automatic reminders and due date
-
Invitation message
-
Additional settings (e.g. permission to forward, invitation language, etc.)
All settings and configurations are saved automatically. You do not need to save anything manually – simply exit the workflow editor after you have made your settings.
2. Option A: Create a new workflow in the Workflow Editor
Use the Workflow Editor if you want to create a new process as a template without sending an invitation first. To do this, open the Workflows & Templates area in the dashboard and click "Create workflow".
Then perform the following basic steps:
-
Name the workflow:
Give your workflow a unique name at the top. -
Structure & sidebar:
The editor follows the familiar logic but starts without a document. The menu items in the right sidebar are partially adapted. -
Add document (optional):
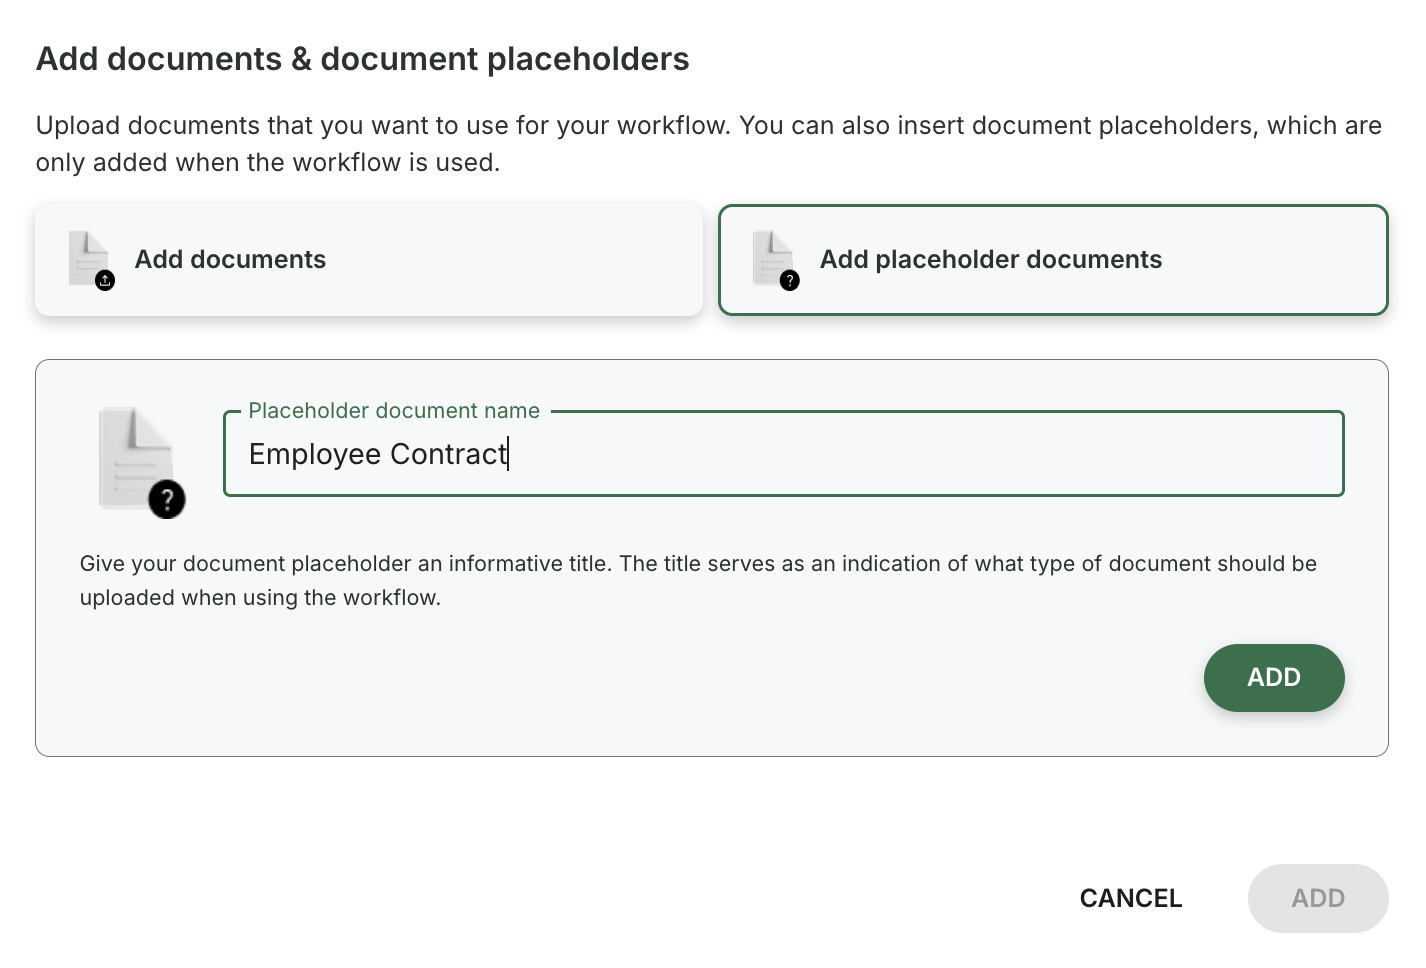
Workflows can also be saved without a specific document – by default a document placeholder is already provided.
-
Keep placeholder: Ideal when the final document should only be uploaded when the workflow is started.
-
Replace placeholder: Click "Replace placeholder" and upload your document if you want to prepare form fields and placements in advance.
-
Add more documents: Use the "Add documents" button to upload additional documents and create further document placeholders. Name your document placeholders clearly so that when the workflow is used later it is immediately clear which document should be uploaded in which position.
-
Add recipients:
Add specific people or recipient placeholders. Set order, roles and e-signature standards.-
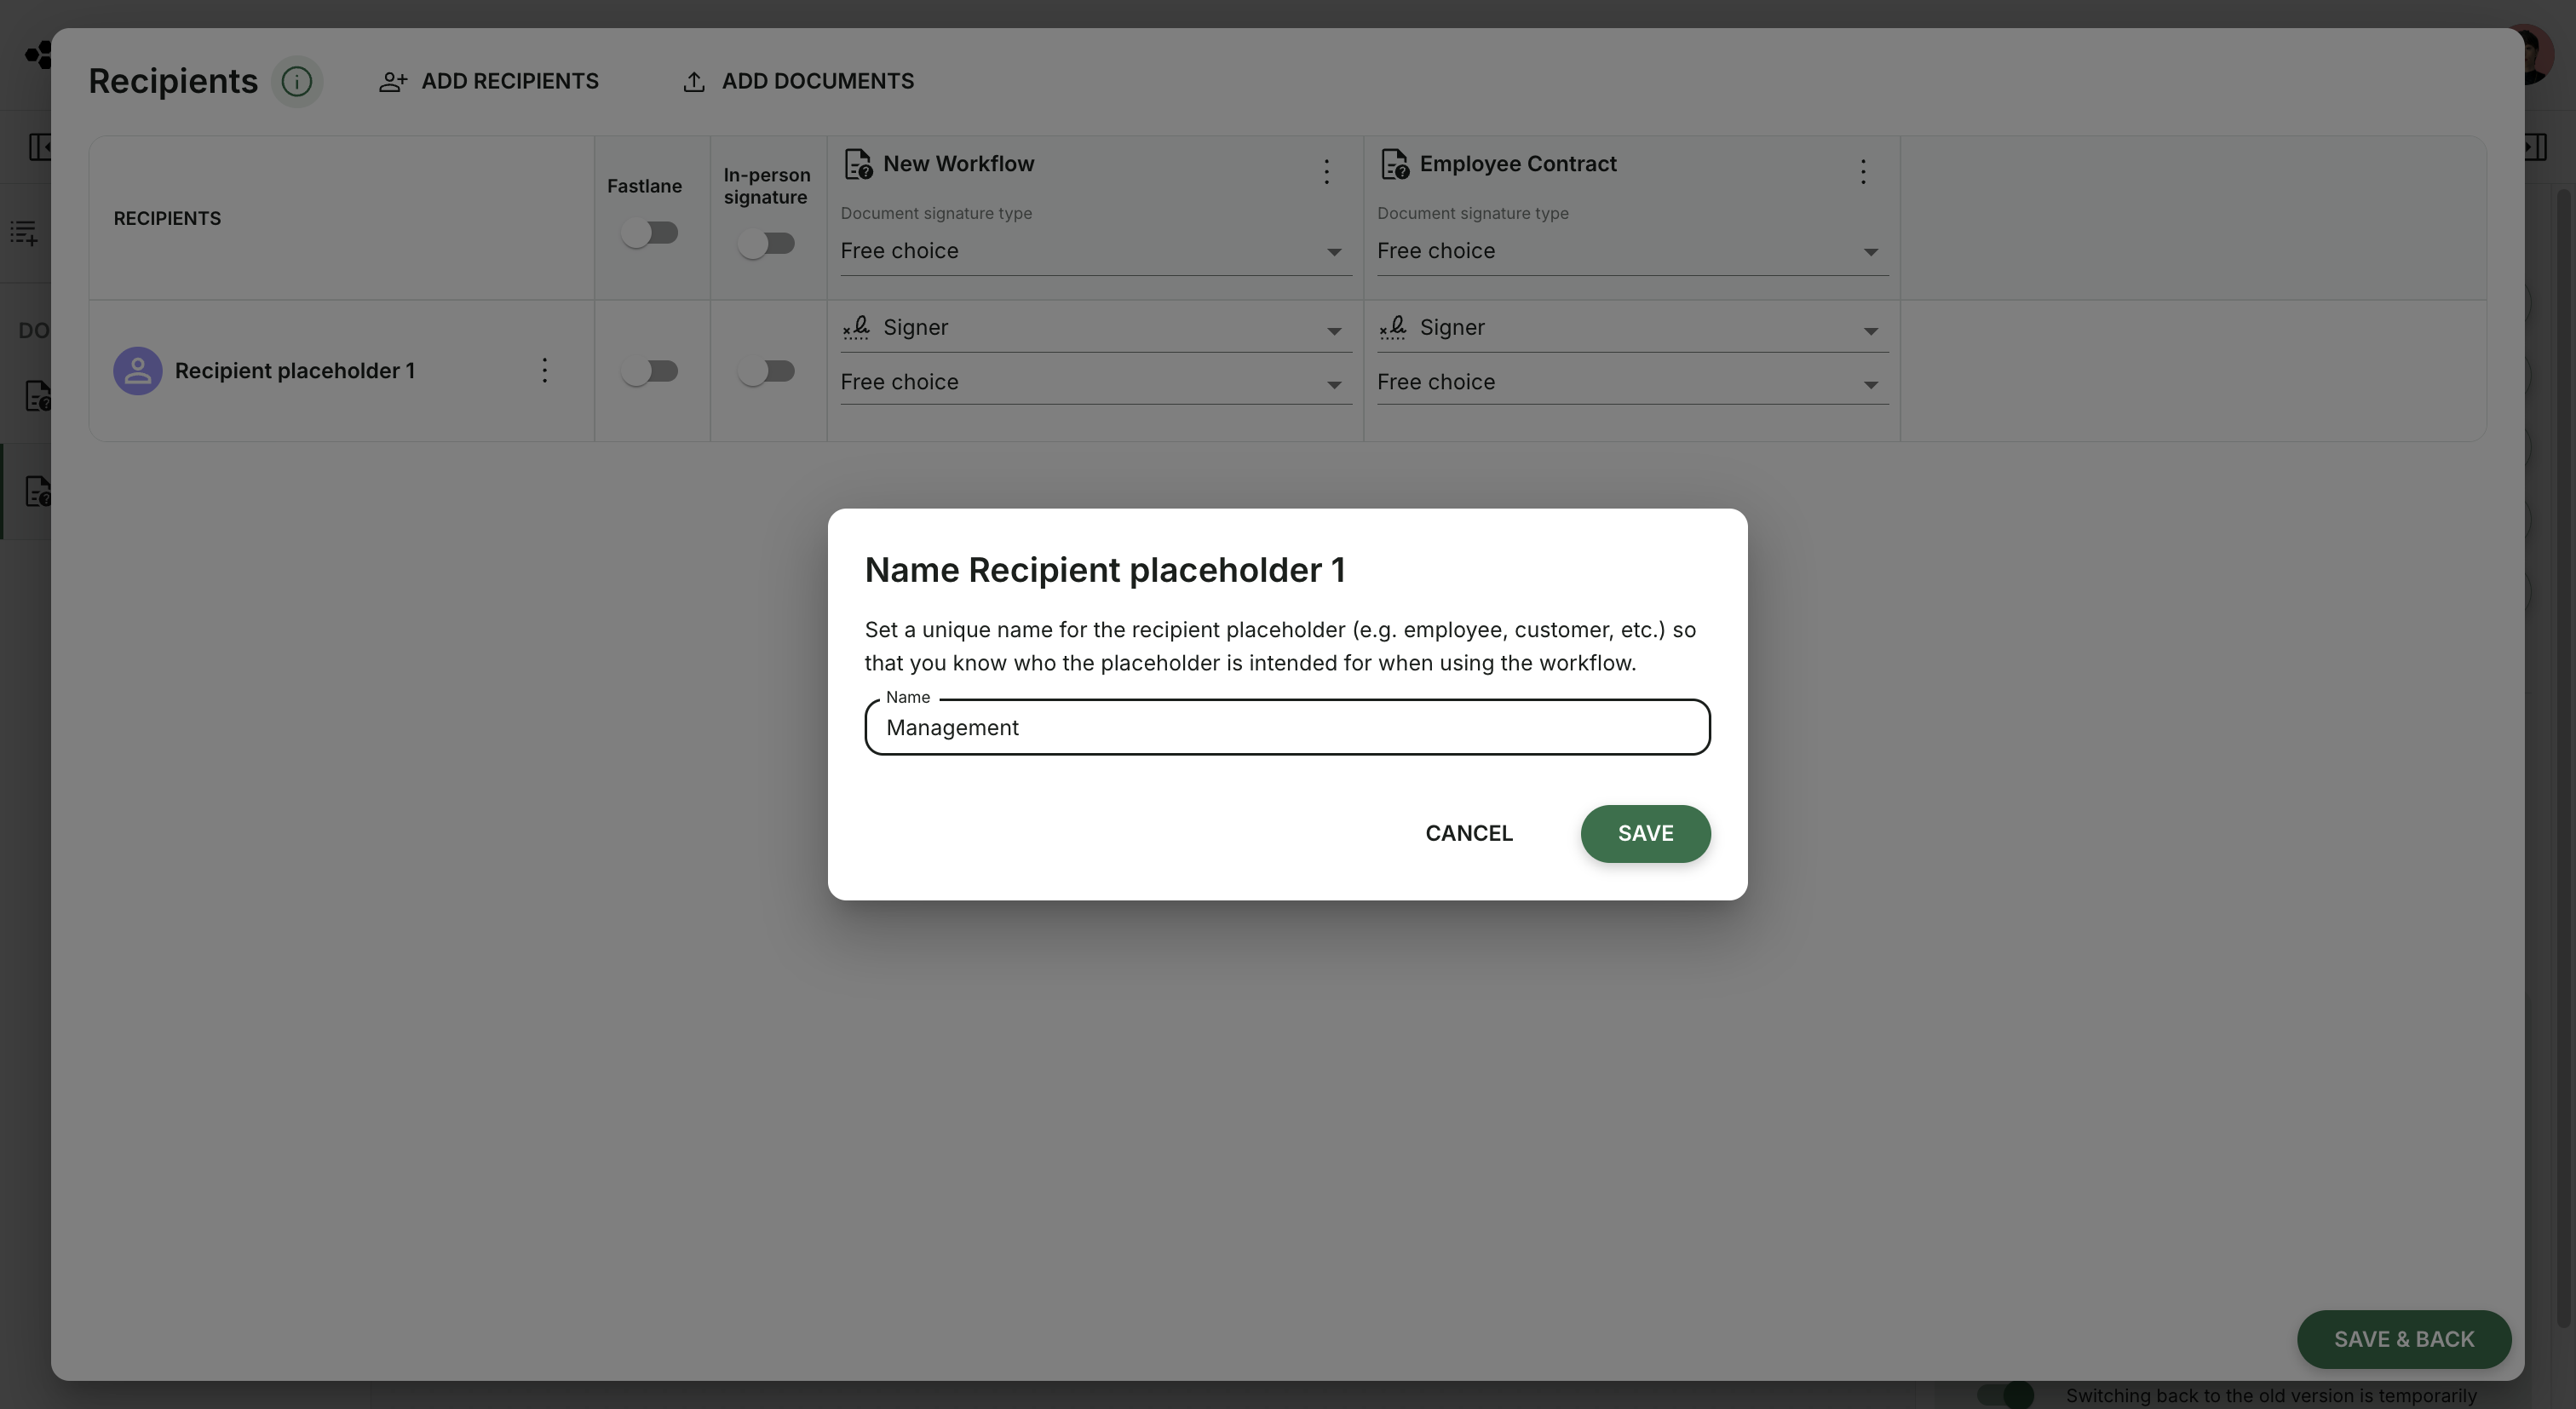
Recipient placeholders: Recipient placeholders allow you to prepare recipient roles, fields and settings when the specific people are not yet known or when different people perform the same function (e.g. employment contract: signature by changing employees and the management).
How it works-
Select: In the tab Recipients > Add recipients placeholders are at the top of the list and behave like regular recipients.
-
Name: Choose 3-dot menu next to the recipient placeholder > Name recipient placeholder. Give it a clear label (e.g. "Management") to make later assignments in the workflow easier.
-
-
Learn in the module “Creating and sending a signature request” which options the flexible matrix table offers you.
-
Place signature placeholders and form fields: For predefined documents you can already define signature positions and form fields (also for recipient placeholders) in advance. This way, when you start the workflow you only need to define the variable components.
-
Optional settings: Configure reminders, due date, invitation language, email text and forwarding options.
-
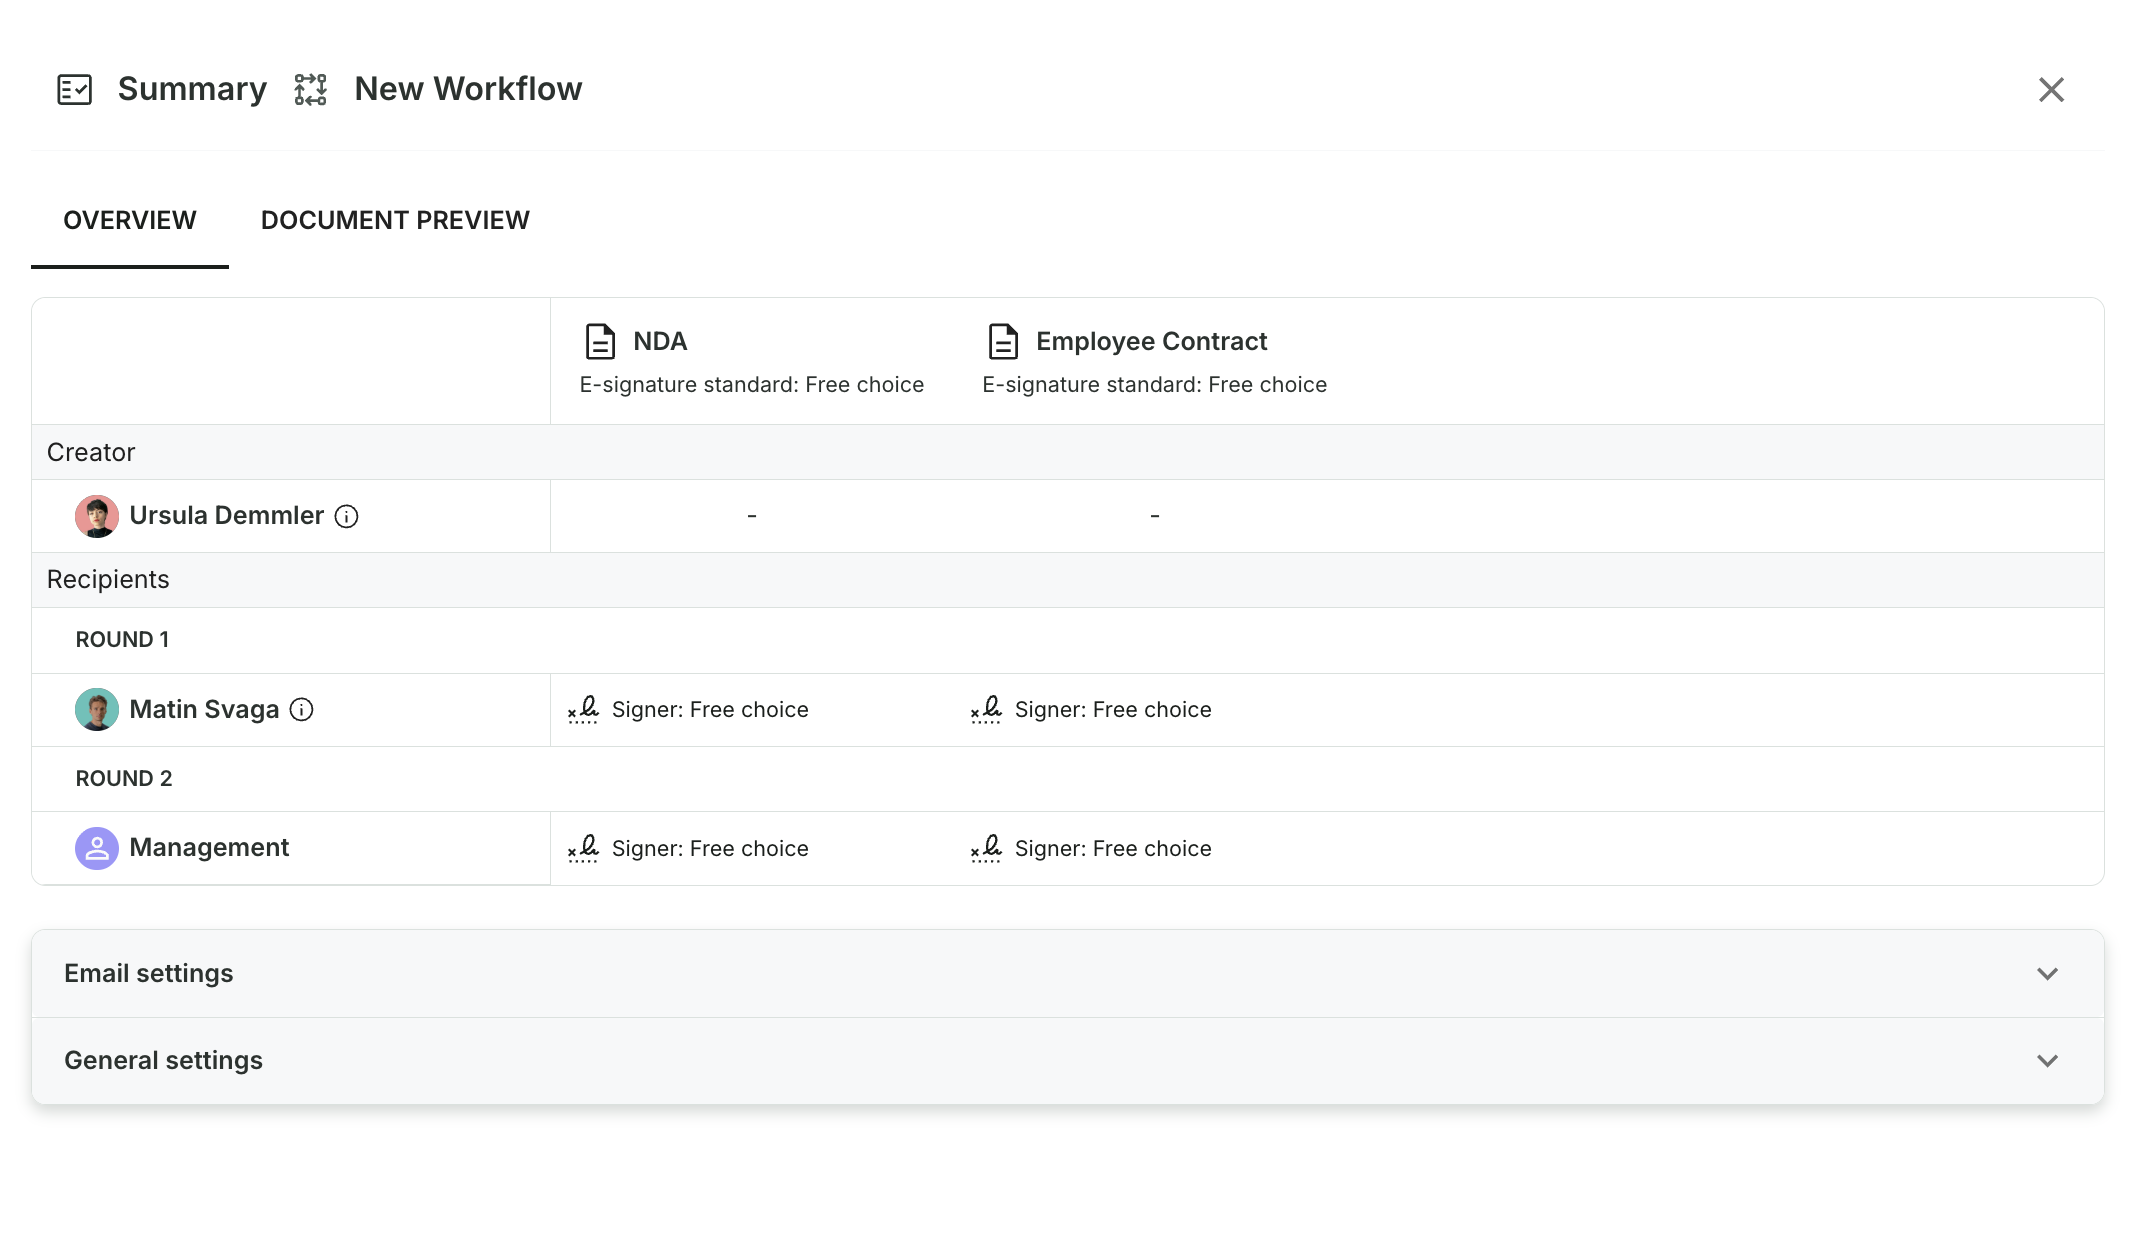
Review summary: Take a quick look at the summary (top right) to check all settings.
-
Save workflow: Click "Save workflow".
Good to know: Your changes are also saved automatically when you leave the editor.
3. Option B: Save signature process as a workflow
This option currently works only with individual documents.
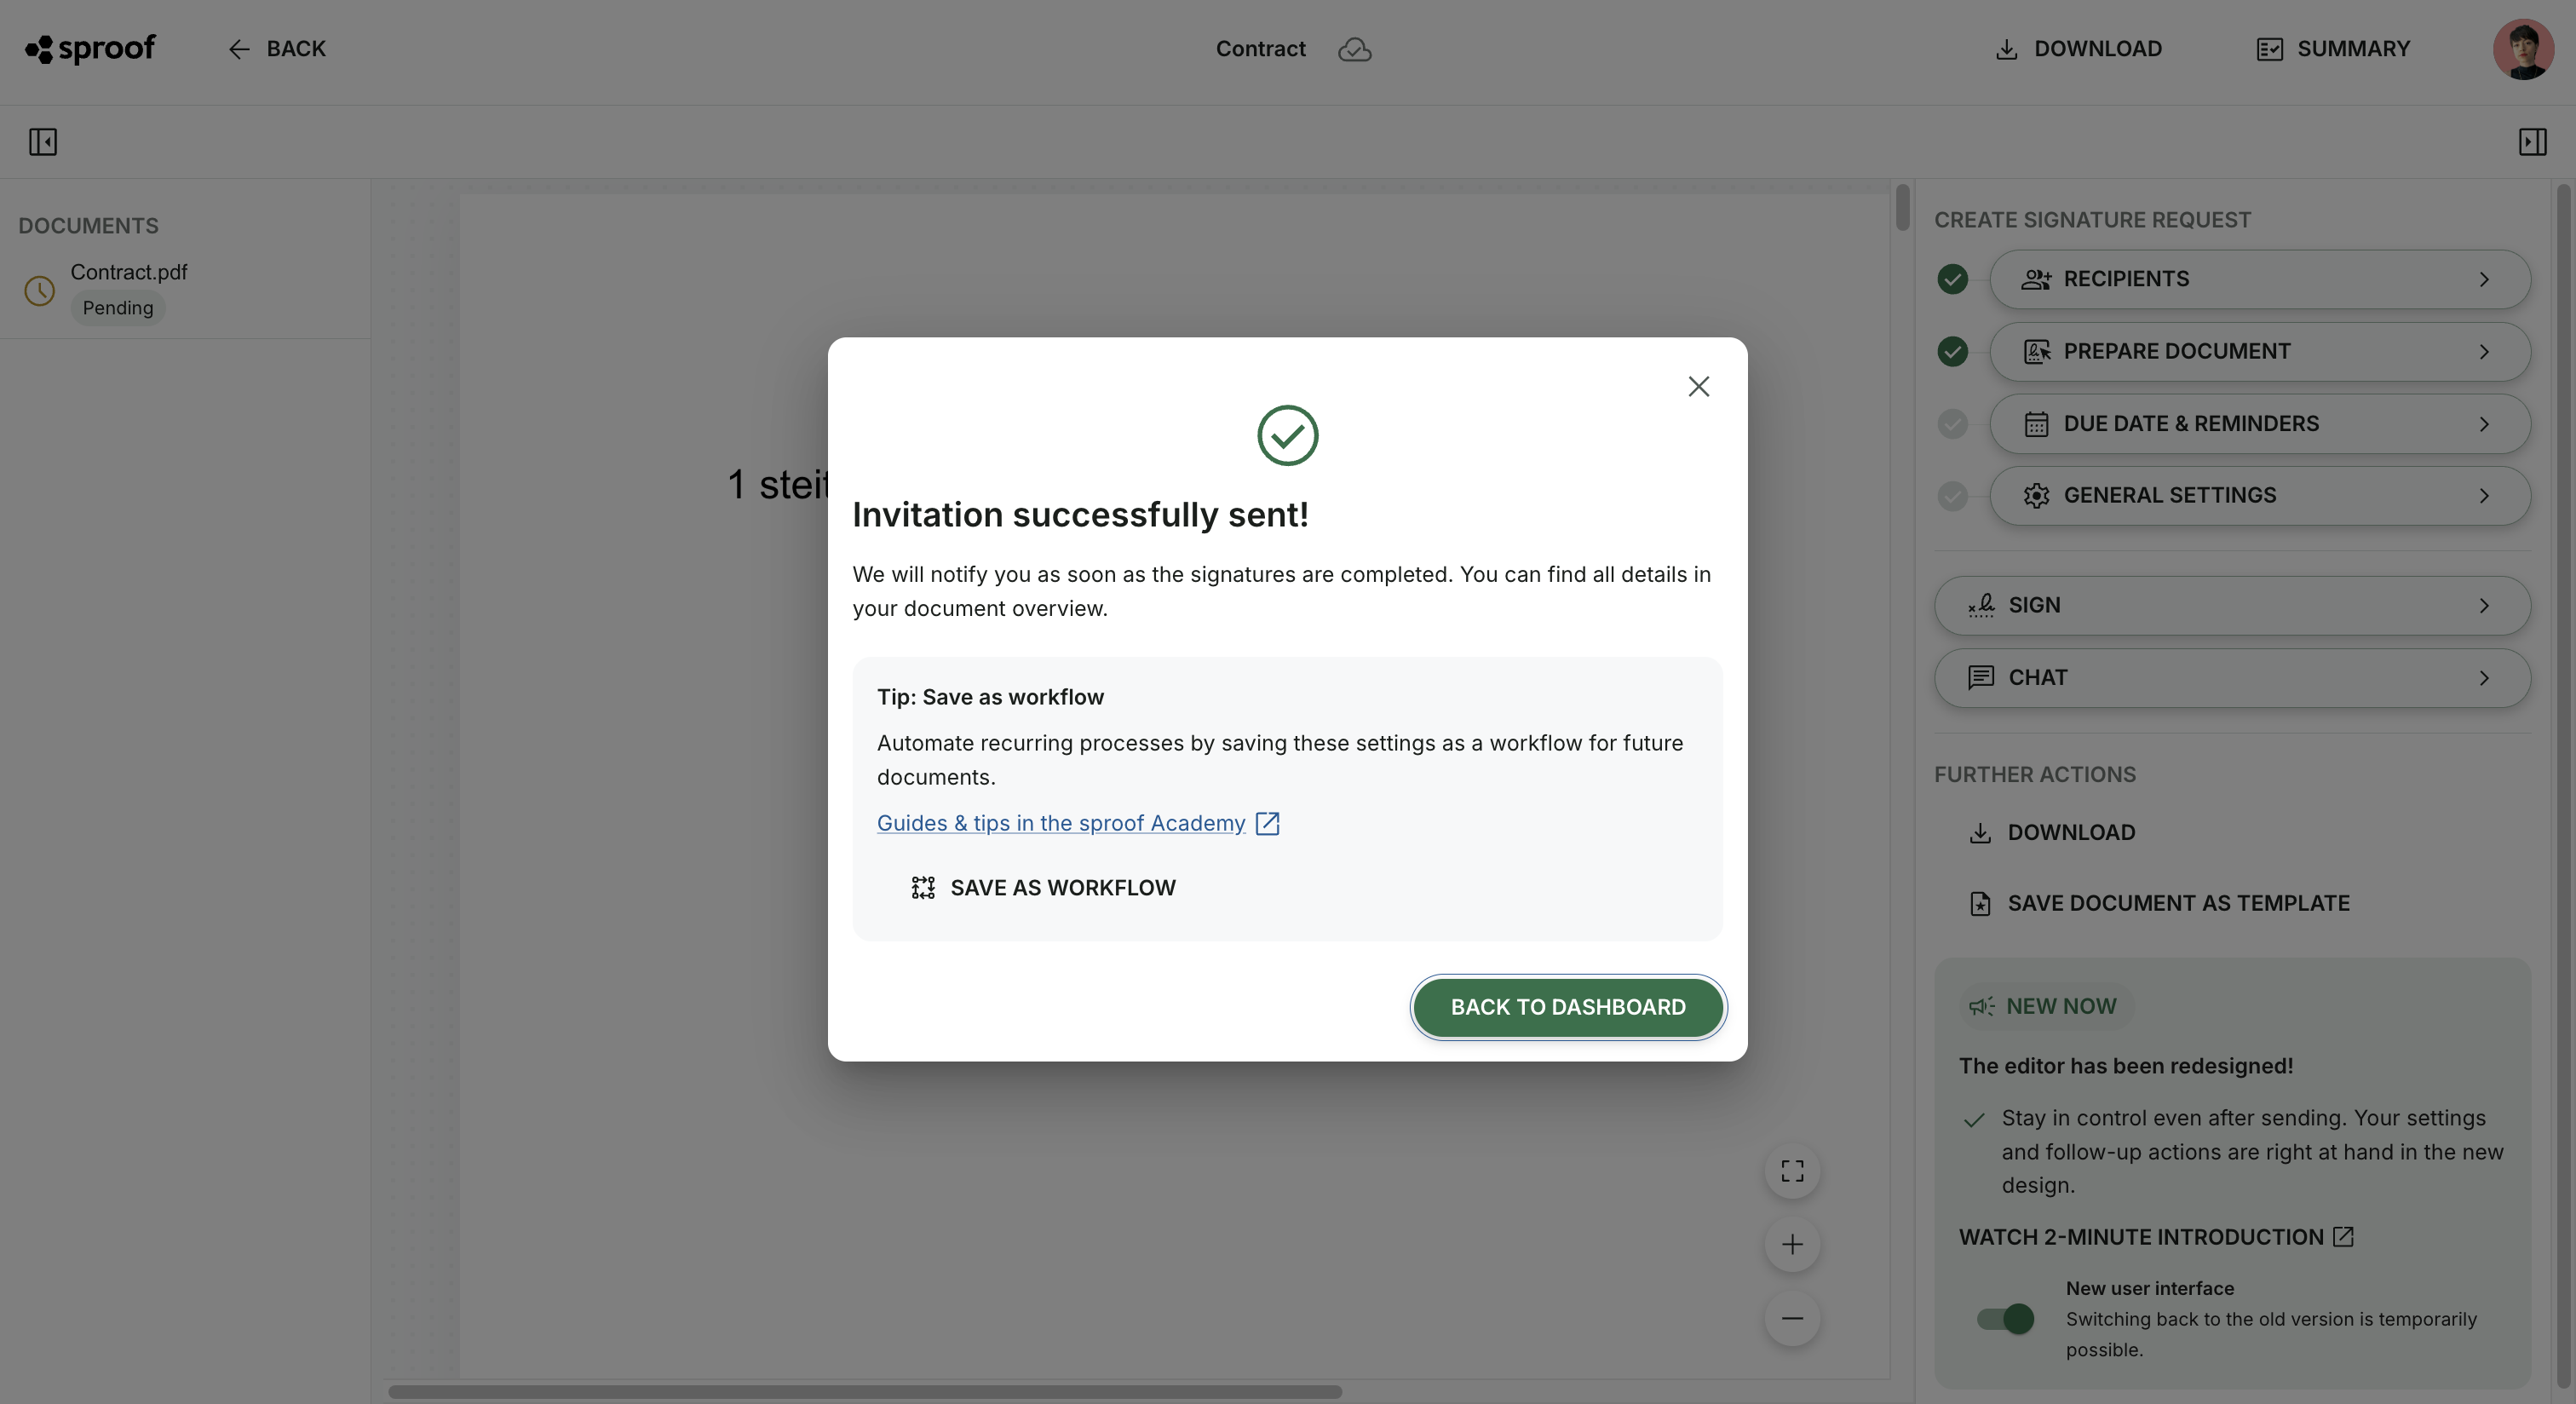
Use this path if you have already prepared a signature process with a document, recipients, fields and settings and want to reuse this configuration as a template. After sending the invitation you can save the process steps as a workflow:
-
Click the "Save as workflow" button.
-
Give your workflow a unique name.
-
Select the parameters you want to save for your workflow.
-
Click "Save as workflow".
4. Collecting signatures with workflows
Learn in the module “Collecting signatures with workflows” how to use a workflow.
5. Update workflows
Go to the dashboard to Workflows & Templates.
-
Option A: Click the row of the workflow > Edit workflow.
-
Option B: Click the 3-dot menu of the workflow > Edit workflow.
The Workflow Editor will open and you can change the desired parameters.
6. Share workflows
You can share workflows specifically with individual people or internal groups.
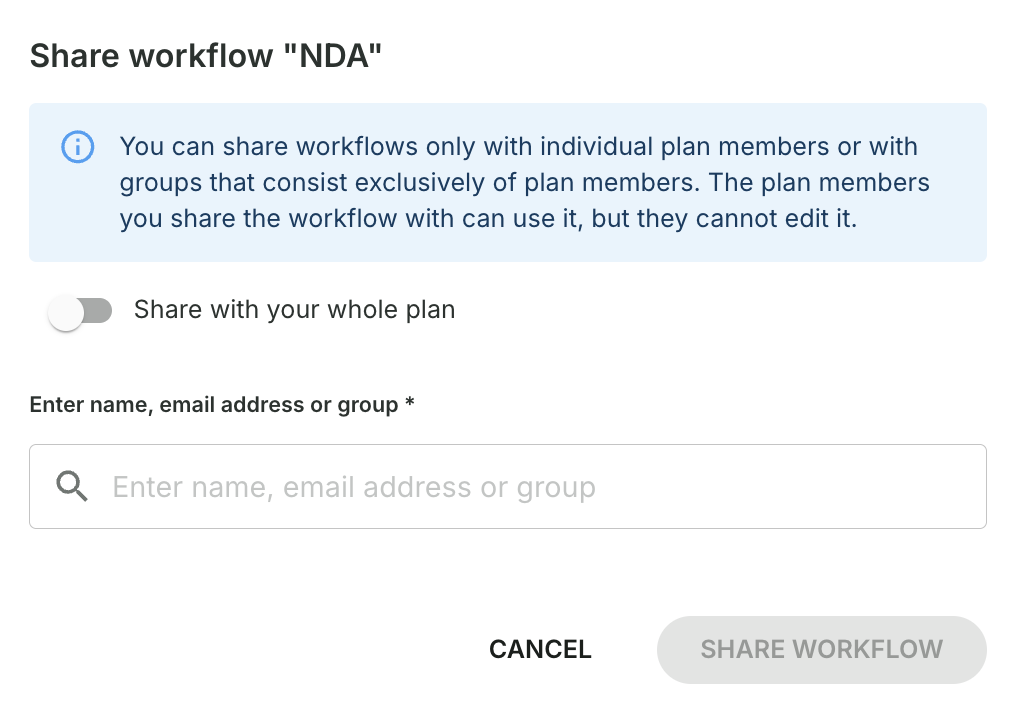
Please note that sharing workflows is only possible within your plan (internal). So if you want to share a workflow with a group, make sure the group is a “Plan members” group and consists exclusively of plan members. Learn more about creating groups in the module “Manage contacts & groups”
How to do it:
-
Click the share icon in the workflow detail view.
-
A window opens: here you can either use the toggle to share the workflow with the entire plan or use the search field to select individual people and groups.
-
Confirm with "Share workflow".
How can I tell which workflows are shared? A green share icon next to the workflow name immediately indicates that this workflow has been shared with others. Want to change the settings? Just click the icon again, either directly next to the name or in the detail view.