

Overview
The sproof Sign Connector for Power Automate exposes part of the sproof Sign API and enables creating flows that generate signature requests, query their status, download signed documents and delete documents — all without code. Prerequisites are an sproof Sign account, a plan that supports the actions and signature types used, and a valid API token.
Available actions
The connector implements the following five endpoints of the sproof Sign API:
|
Connector action |
API endpoint |
What it does |
API reference |
|
Create Signature Request |
POST /documents/signature |
Creates a new signature request from one or more uploaded documents. Supports single documents as well as multipart envelopes, with recipients and signature roles in the request body. |
|
|
Create Signature Request Using Placeholders |
POST /documents/signature |
Creates a signature request from a document that already contains placeholders. Recipients and the positions of signature fields are automatically extracted from the placeholders and do not need to be specified separately. |
|
|
Get Signature Status |
GET /documents/{memberId} |
Returns the current status of a signature request (e.g., pending, signed, declined). The sender's id returned when creating the signature request is used for the query. |
|
|
Delete Document |
DELETE /documents/{memberId} |
Deletes a document or removes a single member's access to it. The exact effect depends on whether the memberId belongs to the sender or to a recipient, whether the document is part of an envelope, and on the optional all flag. |
|
|
Get Document |
GET /documents/download/{memberId} |
Downloads the signed document — either as a binary PDF or as a Base64-encoded string (parameter format). |
Full endpoint details, request/response schemas and error codes: sproof Sign API documentation (interactive reference, based on the OpenAPI specification).
Using the connector
-
Connection: Create a connection with your sproof Sign API token (Settings → API Tokens in the sproof Sign web app).
-
Action: Add the connector to a flow and choose one of the five actions listed above.
-
Chain requests: Create Signature Request and Create Signature Request Using Placeholders return the memberId for each recipient — store these (e.g., in a variable or your data store) so you can use them later with Get Signature Status, Get Document or Delete Document in the same or another flow.
-
Query status (polling): Get Request Status does not send automatic updates. Use a recurring/scheduled flow or a Do until loop with a delay to poll the status until the request is signed, declined or expired.
-
Download results: Once a request is signed (the document status is “completed”), call Get Document with format = pdf to get the binary file (e.g., to save to SharePoint/OneDrive), or with format = base64 if the next step expects a text/JSON value.
-
Placeholders vs. explicit fields: Use Create Signature Request Using Placeholders when recipients and signature positions are already defined in the source document; otherwise use Create Signature Request and specify recipients/positions in the flow.
Known issue: configuring recipientDetails
For “Create Signature Request”, “recipientDetails” (inside “envelopeData”) is not a fixed set of fields but an object whose keys are the recipients' email addresses and whose values are the respective recipient details. Because Power Automate builds its structured input view from a fixed schema, it cannot display or make editable a field whose keys change with each request. In practice this means:
-
recipientDetails cannot be configured via the normal input view in Power Automate — the field appears empty, greyed out or will not accept dynamic content.
-
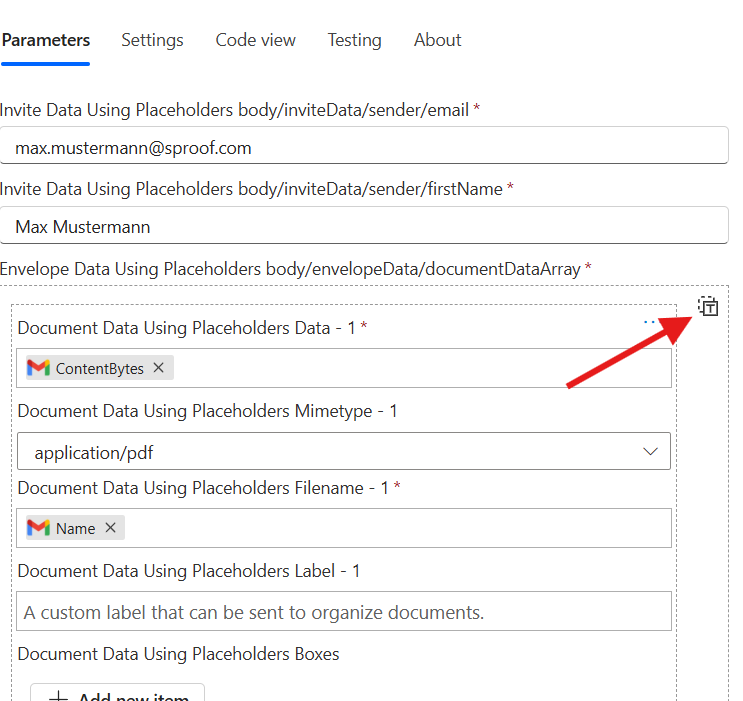
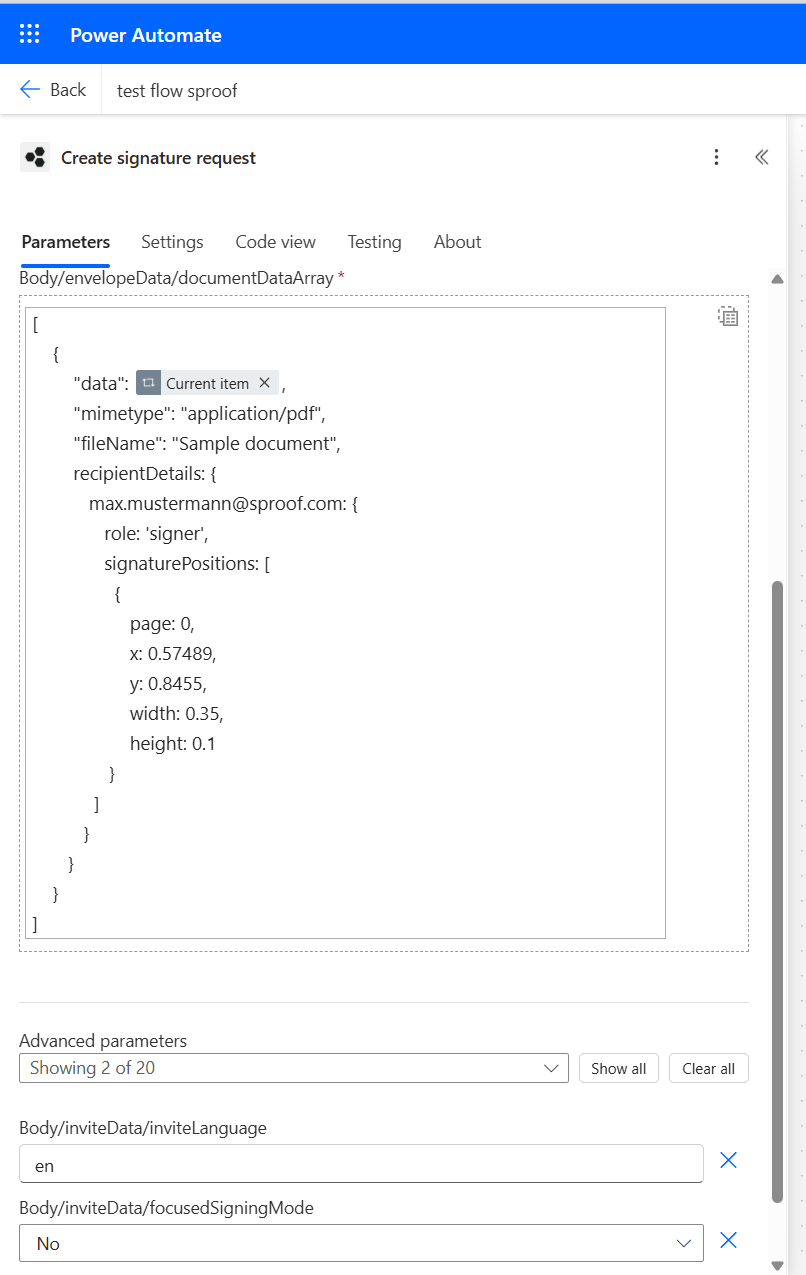
Instead switch this field to free-text (or expression) mode — click the context menu of the input field (the icon at the top right of the field, or “…” on the card) and choose “Enter raw input” / “Switch to input entire array” (the exact label varies by connector version) — and enter recipientDetails as a plain JSON object instead of using the guided fields.
-
The email addresses used as keys in recipientDetails must exactly match the recipient emails in inviteData elsewhere in the same request. If a key does not match the email of an invited recipient (including case sensitivity or typos), sproof Sign cannot associate the details — the request will fail or the details will be ignored.
Here is an excerpt from a “Create Signature Request” payload. In this example two recipients were defined. One signer and one viewer:
...
recipientDetails: {
  max.mustermann@sproof.com: {
    role: 'signer',
    signaturePositions: [
      {
        page: 0,
        x: 0.57489,
        y: 0.8455,
        width: 0.35,
        height: 0.1
        }
      ]
    },
    maria.musterfrau@sproof.com: {
      role: 'viewer'
    }
}
...
Troubleshooting
{
  "message": "The document cannot be processed (Request failed with status code 400)",
  "errorCode": 422002,
  "traceId": "3497be3e4c516fd0fb41bb076e8aa1b3"
}
Error: “The document cannot be processed” (400 / errorCode 422002)
This error is usually caused by the value passed in the data field not being a valid Base64 string. How to fix it:
-
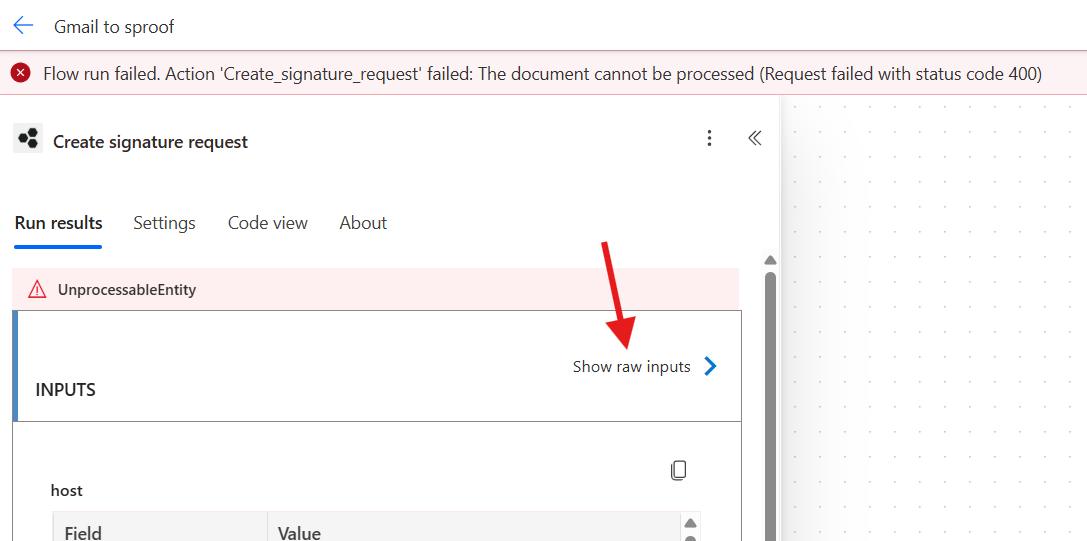
Check the input first: Open the run history of the Create Signature Request action and inspect the input value of data to confirm that it is actually Base64-encoded.
-
Wrap in string(...): Even if the value looks correctly formatted, wrap it in the expression string() to ensure it is treated as a plain Base64 string. This is especially important if data is a dynamic value from a previous action, since Power Automate might otherwise pass it along in a type that is not a clean string.
Further resources
-
An example of a simple signature process using “Create Signature Requests”: sproof Sign: Einholen von Signaturen (API)
-
Complete API reference (all endpoints, schemas, error codes)